MCX-2000
We Want You Listening For a Lifetime
Important Safety Instructions
Compliance Information Statement
Special Instructions for U.K. Model
FCC Warning
Achtung
Welcome to MusicCAST
Preparing Items
Connecting with Peripheral Devices
Powering Up
Remote Control Features and Operations
Setting Batteries
Creating a MusicCAST Network
Enter the following settings
Push Select Play
Streaming Music
STAMDBY/ONPOWER
When All Songs is selected
MCX-2000 Setup Guide
All rights reserved
MCX-2000
Table of Contents
Preface
Audio Playback Functions
Feature Overview
What’s Included
CD Recording Functions
Audio Recording Functions
Music Archiving Functions
Music Streaming Functions
Timer Function
Front Panel
Panel Descriptions MCX-2000
@ Broadcast indicator
$ # @
Back Panel
@ 10/100 indicator # LINK/DATA indicator $ LAN Ethernet port
IR transmitter
Panel Descriptions Remote Control
Playback control buttons
Connecting to the AC Power
Connecting External Devices
Operation Modes on the MCX-2000
STANDBY/ON button red
Operating on the Remote Control
AOC
Using as a Universal Remote Control
Saba
Registering Your TV Monitor to the MCX-2000
Returning to the previous screen
For quick access to Top Menu
Menu Operation Basics
Selecting a menu item
TV monitor Built-in display
Move the highlight Previous screen
MCX-2000 Menu Tree
All different places
Network Basics
Configuration of a MusicCAST-only network
Configuring a MusicCAST-only Network
1200
Using Easy Setup
Network Connection stand-alone, without clients
Easy Setup Overview
Date and Time
MusicCAST System Configuration
Network Configuration
Network Connection with clients
For automatic configuration of a MusicCAST network
Configuration examples
Automatic Configuration of a MusicCAST Network
Preparation on the MCX-2000
Preparation on Each Client
Automatic Registration of Clients
Wired network icon indicates radio signal strength
Configuration example
Checking Out Parameter Values
MCX-2000 Client System Unique Server/Client ID Information
Settings on the MCX-2000
DNS Server P, DNS Server S
Setting Method
IP Address, Subnet Mask, Default Gateway
IP Address
Channel
Wireless LAN
Wireless LAN
ESS ID, WEP Key
Settings on Each Client
Server ID
Mode
Subnet Mask
IP Address
WEP Key
ESS ID
Manual Registration of Clients
Confirming Network Status
Updating Client Firmware
Playing Archived Music
Playing Audio Sources
Songs
Scroll Buttons
Using the List View
Alphabetical index search Buttons
Identifying an List Item
Play Information and Controls
Adding a Bookmark to a Song
Random
Playing a CD
Page
What are ID3 Tags?
What is Gracenote CDDB?
What is CD-TEXT?
XM US model only
Presets
Listening to a Radio Broadcast
Listening to FM Radio
Information from XM Satellite Radio, Inc
Connecting an XM Connect-and-Play Antenna
Listening to XM Radio US model only
Receiving XM Radio Broadcasts
Activating Your XM Satellite Radio Account
Search category
Search all channels
Screen Messages for XM Radio
Message Description Action/Solution
Listening to Internet Radio
Using the Presets List
Registering a Radio Station to the Presets List
Playing a Radio Station from the Presets List
Getting the most out of the Presets List
Registering FM Stations Automatically to the Presets List
Analog Input
Playing External Audio Signals
Digital Input
Playing Audio Content on the Computer
You cannot view digital photo and movie files
Recording Songs from a Music CD
Recording Audio Sources
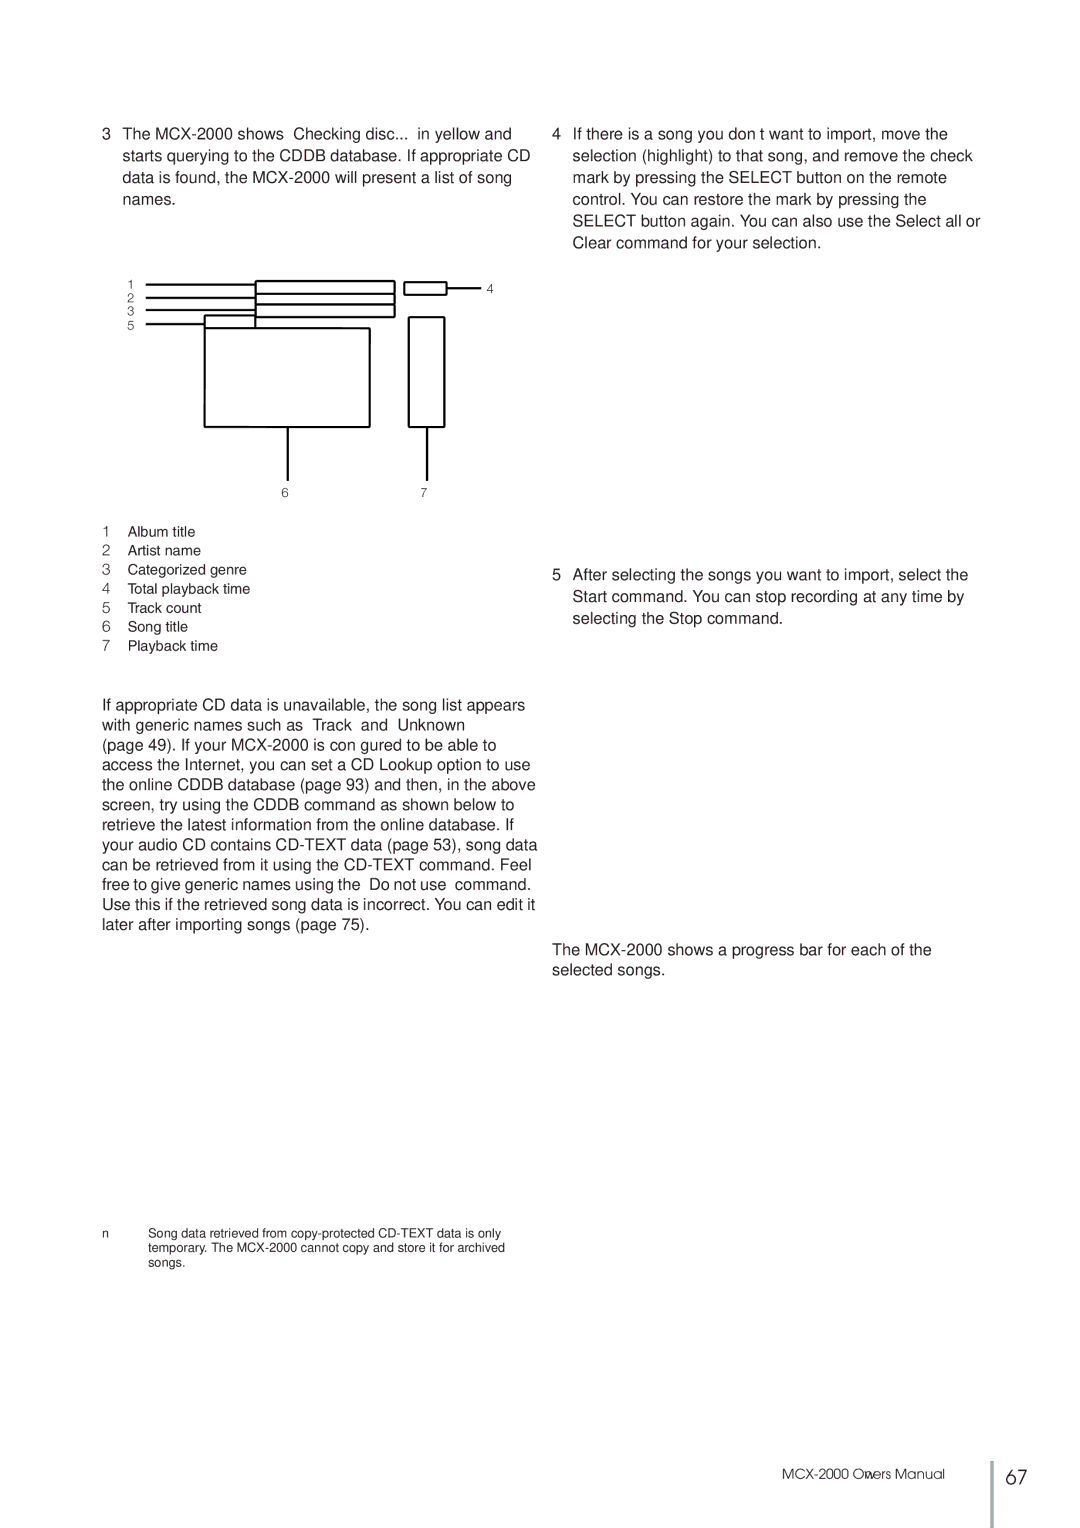
MCX-2000 shows a progress bar for each of the selected songs
Importing a Music CD Automatically
Track Marking
Recording from FM Radio or External Audio Signals
SYNCHRO. Type
Open the Submenu to start CD duplication
Duplicating a Music CD
Initialize Disc and proceed with recording
Recording Archived Songs to a CD
Archived songs are analog recorded onto a CD-R/RW disc
Character Palette
Editing the Library
Typing Text Characters
PS/2 Keyboard
Edit Title
Web Browser
Changing Song Attributes
Editing Song Data
Editing Titles
Example How to Organize the Music Archive
Change Genre dialog box
Open a song list view screen
Deleting the PCM Data
Other Song Delete Options
Creating a Playlist
Using a Playlist
Editing a Playlist
Repeat steps 2 to 3 as required
Registering an Internet Radio Station
Renaming Items from the Radio Presets List
Click Select for a station list view
Operating a Client Remotely
Selecting the Client Audio Source
MusicCAST as an Integrated Music Delivery System
Setting the Timer Playback
Recall Play
Setting Date and Time
Other Features
Selecting the Time Display
Setting Date and Time Manually
Defining User Interface
Using the Online Cddb Database
Use Screen Saver
Delay before activation
Backlight
Contrast
From the User Interface menu, select Language
Adjust the volume level automatically
Selecting Playback Options
MP3 Encode Quality
Selecting Recording Options
Type of data stored in Music Archive
Activate when?, Date
Using the Timer Playback
Content, Playback
OK, Cancel, Clear
Using a Yamaha AV Receiver
Receiver input to which the MCX-2000 is connected
Synchronize receiver power ON/OFF with the MCX-2000
Server IP Address
Initializing Network Settings
Managing an Existing MusicCAST Network
Checking the Network Status
System Utilities menu
Managing the MCX-2000 System
Hard Drive Capacity
Viewing System Information
Version MP3 Encode Schedule
Controllable Yamaha AV Receivers
103
Limiting Local Operations on the MCX-2000
Minute CD-R disc
Discs that can be used for recording on this unit
Discs that can be used for recording
Discs that cannot be used for recording on this unit
To prevent a malfunction of this unit
Handling of discs
Number of recordable discs and tracks and their length
Recording of non-audio signals
SCMS-Serial Copy Management System
Source sampling rate conversion
Symptom Cause Remedy
Troubleshooting
109
110
MP3 format
Album
Artist
Bookmark list
Client
Wired LAN
Remote control
Subnet mask
Storage
Audio Performance
Laser Diode Properties
Outputs
Index
115
All rights reserved

