3. SETUP AND CONNECTIONS
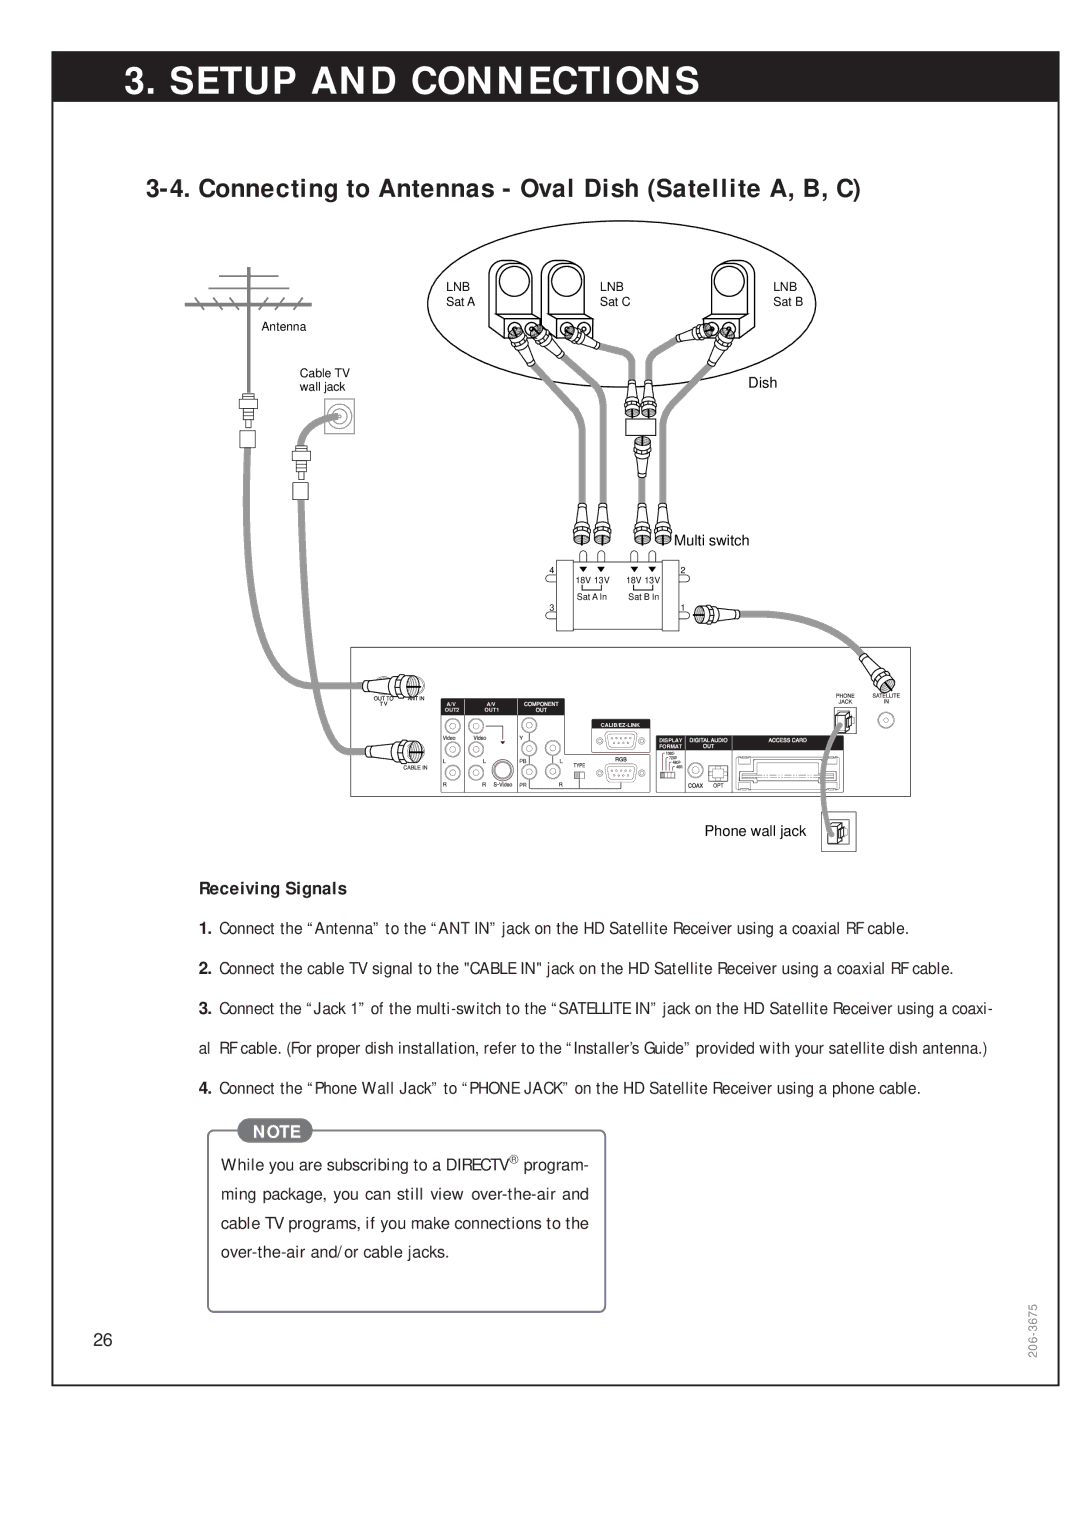
3-4. Connecting to Antennas - Oval Dish (Satellite A, B, C)
LNB
Sat A
Antenna
Cable TV wall jack
4
3
LNB | LNB |
Sat C | Sat B |
Dish
![]()
![]() Multi switch
Multi switch
|
|
|
|
| 2 | |
18V 13V | 18V | 13V | ||||
|
|
|
|
|
|
|
Sat A ln | Sat | B ln | ||||
1
A/V
OUT2
A/V
OUT1
DISPLAY
FORMAT
PB
PR
Phone wall jack
Receiving Signals
1.Connect the “Antenna” to the “ANT IN” jack on the HD Satellite Receiver using a coaxial RF cable.
2.Connect the cable TV signal to the "CABLE IN" jack on the HD Satellite Receiver using a coaxial RF cable.
3.Connect the “Jack 1” of the
4.Connect the “Phone Wall Jack” to “PHONE JACK” on the HD Satellite Receiver using a phone cable.
NOTE
While you are subscribing to a DIRECTV program- ming package, you can still view
26