Installing printer memory or flash memory
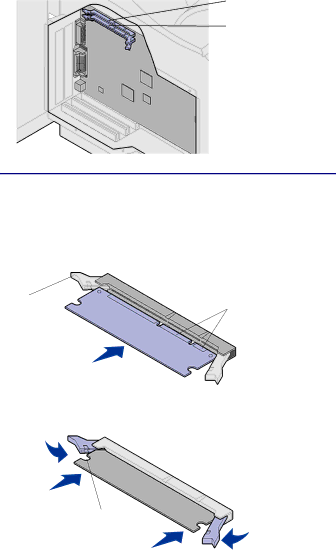
Memory connector 1
Memory connector 2 |
Warning! Electronic components can be damaged by static electricity. Touch something metal on the printer before you touch the mem- ory option.
Latch
![]() Connection points
Connection points
![]() Latch
Latch
Notch
Note: Some memory and firmware options for other Lex- mark printers cannot be used with your printer. Refer to the Lexmark T522 Publications CD for specifications.
1 Follow the steps in “Accessing the printer system board” on page 10.
2 Unpack the memory option. Avoid touching the connection points along its edge. Save the packaging materials.
3 Open both latches on the connector completely. Insert the memory option straight into the connector with the connection points pointing toward the system board.
4 Push the memory card firmly into the connector until it snaps into place. Make sure each latch fits over the notch located on either side of the option card.
5 Follow the steps in “Reattaching the shield and closing the doors” on page 16.
12