Programmer’ser’sGuide,Guidecont’d
Serial Ports
The switcher has two serial ports that can be connected to a host device such as a computer running the HyperTerminal utility, an
•The rear panel Remote
•The front panel Configuration
• | 9600 baud | • | no parity | • 8 data bits |
• | 1 stop bit | • | no flow control |
|
The ports can be configured to operate at the 9600, 19200, 38400, or 115200 baud rate.
These two ports are independent of one another. A front panel Configuration port connection and a rear panel Remote port connection can both be active at the same time.
The switcher can operate at 9600, 19200, 38400, or 115200 baud rates, but
Extron recommends leaving these ports at 9600 baud only.
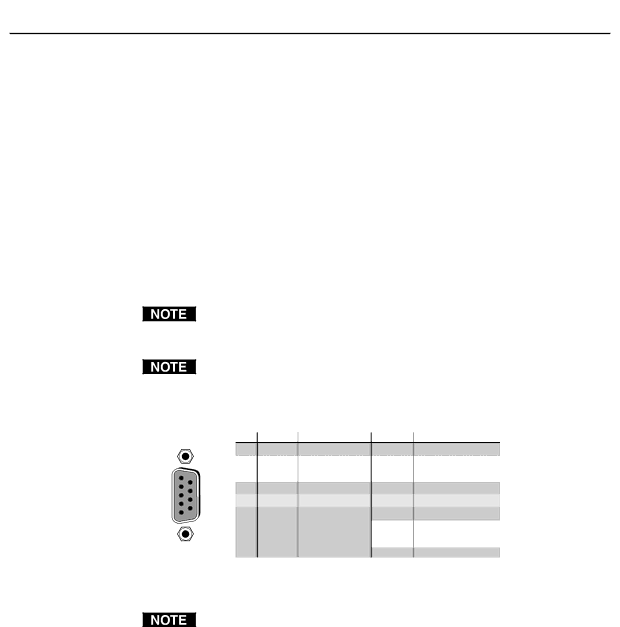
Rear panel Remote port
REMOTE
|
|
| Pin | ||||
|
|
| 1 | — | Not used | — | Not used |
|
| RS232/RS422 | 2 | TX | Transmit data | TX– | Transmit data |
1 |
| 7 | — | Not used | RX+ | Receive data (+) | |
| 6 |
| 4 | — | Not used | — | Not used |
5 | 9 |
| 5 | Gnd | Signal ground | Gnd | Signal ground |
| 6 | — | Not used | — | Not used | ||
|
| ||||||
|
|
| 8 | — | Not used | TX+ | Transmit data (+) |
|
|
| 9 | — | Not used | — | Not used |
Figure 4-1 — Remote connector pin assignments
The rear panel Remote port can support either