Model 2616RC | 2 • Hardware installation |
|
|
Table 5. WAN cable’s 68 non-terminated twisted-pairs (Continued)
Port/Directio | Pairs | 68 Pin | Wire Color |
n |
| Positions | Code |
| — | 33 | NOT USED |
| 67 | ||
|
|
| |
|
|
|
|
Port/Directio | Pairs | 68 Pin | Wire Color |
n |
| Positions | Code |
| — | 34 | NOT USED |
| 68 | ||
|
|
| |
|
|
|
|
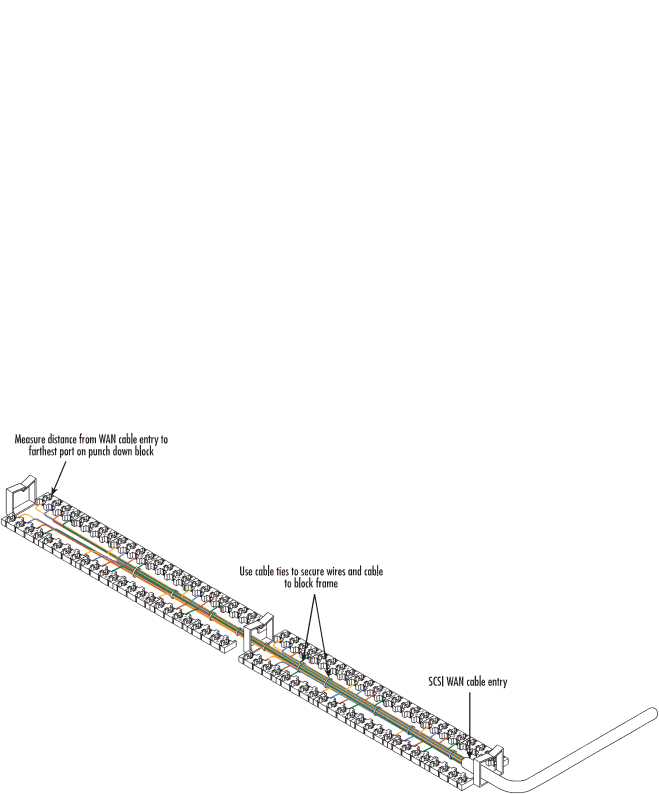
Installing the WAN cable to a punch-down block
Materials required:
•
•Plastic tie wraps
•WAN cable
1.Measure the distance between SCSI cable entry point on the
Figure 14. Punch-down block wiring
2.Strip SCSI cable insulation and shielding based on the measurement made in step 1.
Cable installation | 28 |