Seiko FB 390 user manual

Page 17

Figure 3-11 Adjusting the paper guide pulley position

7Open the tractor covers and place the paper on the sprocket pins. If you are using preprinted paper or labels, install them with the printed or labeled side facing upwards.

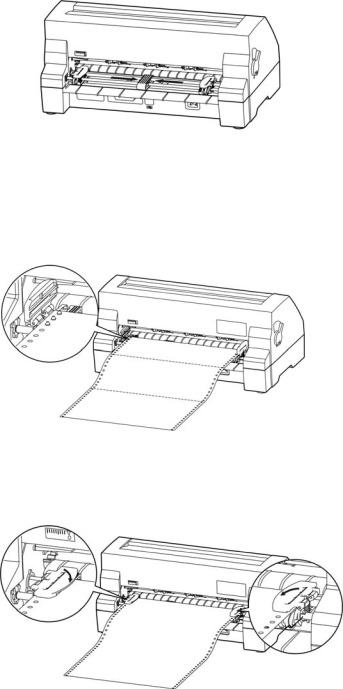
Figure 3-12 Setting paper on the sprocket pins

8 Close the tractor covers.

Figure 3-13 Close the tractor covers.

9Slide the right tractor to the left to take up any slack in the paper, and then fasten the lock lever to fix the tractor in position. Ensure the tractor paper is in line with the print start position. If the paper is not aligned with the print start position, align the paper, and then fasten the lock lever to lock the tractors.

12

Image 17
Contents Seiko Precision Important Safety Instructions Table of Contents To enter the Setup Menu System and change the settings Epson Emulation Select Code Pages Overview FeaturesHigh Resolution Graphics Automatic Interface SwitchingUser- Friendly Control Panel EmulationUnpacking PreparationMain parts of printer rear view Paper feed knob Parts IdentificationInstalling and Replacing the Ribbon Cassette InstallationInstalling the Front Table Extension Tray Make sure of the following Connecting the Interface CableConnecting to the Power Source Using the Parallel Interface and the USB InterfaceConnecting the Power Cord Turning the Power on and offAdjusting the gap adjust lever Paper Thickness AdjustmentLoading paper Position Copies ThicknessLoading Cut Sheet Paper Loading Tractor Paper Using Tractor PaperPage Page 15 Tractor paper tear-off Tearing off Tractor PaperPrinting from Your Software Setting Up Your Printer To Work With SoftwareControl Panel Keys and LEDs Indicator LED OffControl Panel Basic Control Panel Operations Top of Form Adjustment ModeUsing the Setup Menu System Tear-off Adjustment ModeTo exit without saving, just turn the printer OFF To exit without saving, just turn off the printerTo exit the Setup Menu System To enter the Setup Menu System and change the settingsTo print the current settings Printing the Current Setting ReportSeiko Precision FB-390 Setup Menu System Options of the Setup Menu SystemFont Options DescriptionUsing the Self Test Functions Restoring Factory Printer SettingsMaintenance Printing Test H pattern Slide Pattern Printing TestPrint Mode Hex Dump ModeAppendix a Maintenance and Fault FindingCleaning the Cabinet Intervals and Materials for Cleaning Problems And SolutionsError Cause Remedy Error LED on the Control PanelAppendix B SpecificationsGeneral Print HeadPaper Mechanism×H inches Print mode specificationsMultipart Dot Spacing Max No Character Printing Print mode Parallel Interface Graphic Print SpecificationsEpson Emulation Command Code SummaryUSB Interface Character Set Name Code SymbolDownload Character Graphics ModeBit-Image Input Data ControlCode No D2 d3 HEX Name Select Code PagesFormat