ACCESS SHOWVIEW |
| ||
PROGRAM SCREEN |
| ||
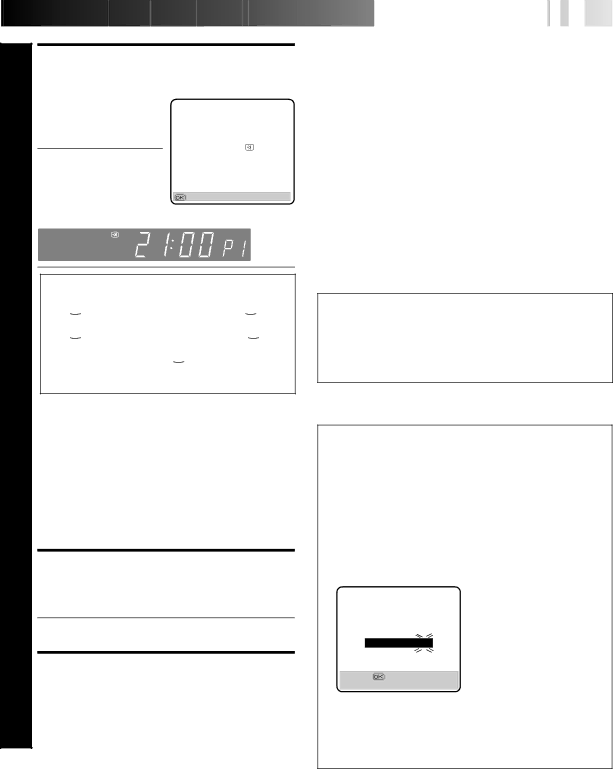
Press OK, and the | – P1 – |
| |
SHOWVIEW Program screen |
| ||
SHOWVIEW 123456789 | |||
3 appears (if you’re just | START | STOP | |
21:00 = | 22:00 | ||
starting out, “P1” appears). |
| ON | |
The display panel shows |
| ||
DATE | TV PROG | ||
the programme start time. | |||
25.12 | 1 | ||
Pressing PROG. CHECK |
| ARD | |
changes the display to the | : OK |
| |
programme stop time, then |
|
| |
the date and channel position. |
| ||
IMPORTANT
Be sure to confirm the setting of PDC/VPS recording.
●If " ![]()
![]()
![]()
![]() ON" is displayed on the screen or "
ON" is displayed on the screen or " ![]()
![]()
![]()
![]() " is lit on the display panel, PDC/VPS is set to ON.
" is lit on the display panel, PDC/VPS is set to ON.
●If " ![]()
![]()
![]()
![]() OFF" is displayed on the screen or "
OFF" is displayed on the screen or " ![]()
![]()
![]()
![]() " is not lit on the display panel, PDC/VPS is set to OFF.
" is not lit on the display panel, PDC/VPS is set to OFF.
To change the setting, press ![]()
![]()
![]()
![]() : PDC/VPS (NUMBER key "7").
: PDC/VPS (NUMBER key "7").
☞ "PDC/VPS Recording" on page 29.
●Make sure the channel position number you wish to record is displayed; if not, see "SHOWVIEW Setup" on page 10 and set the Guide Program number for that SHOWVIEW number correctly.
●If the number you entered is invalid, "ERROR" appears on the screen and "Err" appears on the display panel. Press CANCEL to backspace and input a valid SHOWVIEW number.
●If "ERROR=GUIDE PROG" appears on the screen, see "ATTENTION – Regarding Guide Program Number Set" in the right column.
●If you are using the
RETURN TO NORMAL
SCREEN
![]()
![]()
![]()
![]()
![]()
![]()
![]()
![]()
![]()
![]()
![]()
![]()
![]()
![]()
![]()
![]()
![]()
![]()
![]()
![]()
![]()
![]()
![]()
![]()
![]()
![]()
![]()
![]()
![]()
![]()
![]()
![]() E
E![]() N
N![]()
![]() 25
25![]()
NOTE:
To Delay The Stop Time . . .
. . . press ADD TIME (NUMBER Key "5") after pressing OK in step 3. Each time you press, the Stop time is delayed by 5 minutes (meaning that 5 minutes of recording time is added). You can easily compensate for anticipated programme schedule delays this way.
To Timer-Record Weekly Or Daily Serials . . .
. . . after pressing OK in step 3, press WEEKLY (NUMBER key “9”) for weekly serials or DAILY (NUMBER key “8”) for daily serials
You can programme this recorder to
Satellite Tuner Users
To
ATTENTION
Regarding Guide Program Number Set
"ERROR=GUIDE PROG" appears after performing step 3 on the previous page if the Guide Program number for the SHOWVIEW number you entered has not been set.
● If the recorder is in the stop or rewind or
• Press the NUMBER keys or PUSH JOG %Þto input the channel position number you recorder receives that station on, then press OK.
GUIDE PROG SET
4 Press OK.
●Repeat steps 1–4 for each additional programme.
ENGAGE RECORDER’S TIMER MODE
GUIDE PROG | TV PROG |
2 | – – |
[5°] = |
|
[MENU] : EXIT |
|
(Ex.) To
*If your recorder receives ZDF on the channel position 2, press OK after entering "2".
5 Press TIMER. The recorder turns off automatically.
• Press MENU, then try again from step 1.
●If the recorder is in a mode other than the above mentioned modes, press MENU first and input the correct Guide Program number for that SHOWVIEW number (☞ pg. 10, "SHOWVIEW Setup"), then try again from step 1.