Kodak DX3500 manual Previewing Your Picture on the LCD, Taking Close-up Pictures

Page 24

Chapter 2

Previewing Your Picture on the LCD

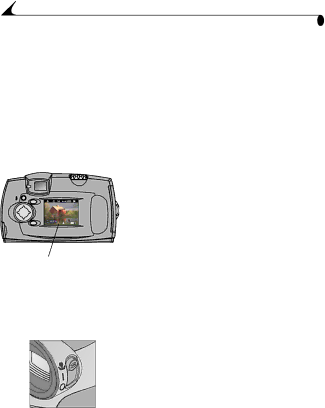
When the Preview feature is on, a live image is displayed on the LCD. Use the LCD instead of the viewfinder to frame your subject.

NOTE: Preview is required when you are using the Digital Zoom (page 17) feature.

To turn on Preview:

1Turn the Mode dial to Still , then press Select. The LCD displays a live image and the status bar.

MENU

SELECT

2To take a picture in Preview, center your subject on the LCD and press the Shutter button completely down.

3To display the last picture taken in this session, press .

4To turn off Preview, press Select again.

Live image

Taking Close-up Pictures

Use the Close-up setting to gain sharpness and detail in pictures at close range, from 9 to 12 inches (22 to 30cm) from your subject.

1 Set the power switch to Close-up .

The camera automatically enters Preview and a live image is displayed on the LCD.

2 Frame your subject in the LCD and press the Shutter button completely down to take a picture.

16

Image 24
Contents Kodak DX3500 Digital Camera User’s Guide Eastman Kodak Company 343 State Street Rochester, New York Front View Back View Table of Contents Installing the Software Troubleshooting Problems Viii Getting Started What Can I Do With My Camera?Camera Package Contents Important Battery Information Loading the BatteriesInserting a Picture Card To insert a Picture Card Turn off the cameraTurning the Camera On and Off Built-in Lens CoverAutomatic Powerdown Saves Batteries Setting the ClockPowerdown Camera Behavior To reactivate Feature AfterChecking the Battery Level Mode Dial-Settings and Menus Menu Self Timer Date Stamp Quality QuickViewStill Menus Review Menus Setup Menus Menu Display BrightnessDate/Time set About Video Out Format Language Navigating Through The Menus Checking Current Camera Status Status Bar IconsChanging Your Storage Location Setting Choosing Internal Memory or Picture CardChecking Your Storage Setting Checking Your Picture’s LocationTaking Pictures Taking a PicturePreviewing Your Picture on the LCD Taking Close-up PicturesUsing the Digital Zoom Using the Flash Putting Yourself in the Picture Setting Picture Quality Placing the Date on Pictures Displaying the Picture Just Taken Picture is briefly displayed in the LCD With the iconReviewing Your Pictures Viewing Pictures on the LCDNavigating Through the Pictures Magnifying PicturesDeleting Pictures Creating a Print OrderPrinting Your Order Protecting Pictures From Deletion Running a Slide ShowStarting the Slide Show Changing the Display IntervalCopying Pictures Before You CopyCopying Pictures Viewing Picture Information Customizing Your Camera Settings Adjusting LCD Screen BrightnessSetting Video Out Selecting a Language Viewing Camera InformationCancel FORMAT-exits without making a change Formatting Memory or Picture CardInstalling the Software Install the SoftwareSoftware Included With Your Camera Kodak Picture Transfer SoftwareKodak Picture Software Kodak Camera Connection SoftwareComputer System Requirements WINDOWS-Based System RequirementsMacintosh System Requirements Page Using Pictures on Your Computer Connecting to Your ComputerConnecting With the USB Cable Before You Transfer Your PicturesConnecting With the Kodak Camera Dock Transferring Your PicturesTransferring on a WINDOWS-based Computer Working With Your Pictures Transferring on a Macintosh ComputerKodak Picture Transfer Software Online Help Transferring Your Pictures Manually On a WINDOWS-based ComputerOn a Macintosh Computer Kodak Camera Connection Software Online HelpPrinting Your Pictures From Kodak Picture SoftwareFrom a Picture Card Page Using the Kodak Camera Dock Camera Dock Package ContentsInstalling the Dock Insert Connecting the Camera DockInstalling the Battery Pack in the Camera Docking the CameraCharging the Battery Pack Using a Tripod Transferring PicturesPage Troubleshooting Problems Troubleshooting-CameraPicture Card Problem Cause Solution Camera Communications Problem Cause Solution Camera Problem Cause Solution Review mode Change to Auto flash Lens is dirty Clean the lens Batteries are low Replace or recharge Red LCD Messages Cause Solution SeeCardsee Troubleshooting-Camera Dock Camera Dock Problem Cause SolutionCamera Dock indicator light Light Status Cause Solution Page Kodak Online Services Getting HelpSoftware Help Kodak Fax SupportTelephone Customer Support Before You CallTelephone Numbers Austria/Osterreich 0179 567 Belgium/Belgique 02 713 14 China Page DX3500 Camera Specifications Camera SpecificationsAppendix Jpeg Camera Dock Specifications Camera Dock SpecificationsOriginal Factory Settings-Camera Using Your BatteriesFeature Factory Setting Tips, Safety, Maintenance Camera Accessories Picture Storage Capacities Locating Pictures on a Picture CardStore this many pictures Best Quality Good QualityPicture File Naming Conventions File Naming Conventions on a Picture CardFile Naming Conventions in Internal Memory Regulatory Information File Naming Conventions After a CopyFCC Compliance and Advisory Before Copy After CopyCanadian DOC Statement Index Using pictures on 39 connect camera Dock Image storage menu Fax numbers, support LCD Navigating 39, 40 Macintosh Windows Zoom, digital