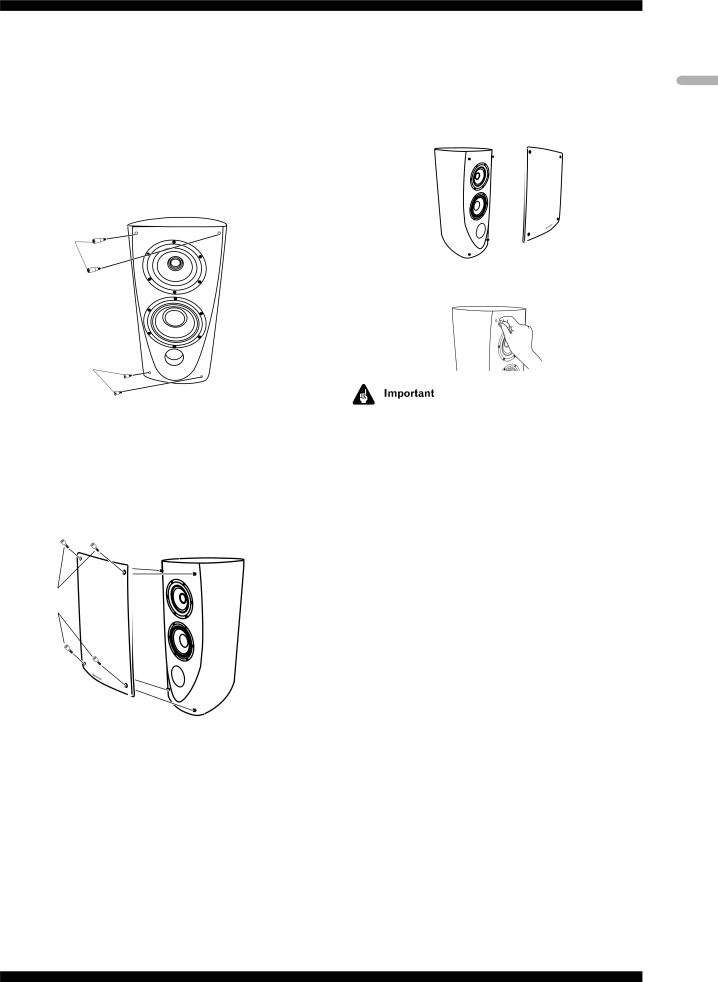
Attaching and removing the front grille
The front grille of this speaker system is removable. Follow the instructions below to attach/remove the grilles.
Attaching the grille
1Insert the supplied fastening screws into the four holes provided on the front of the speaker.
Use your fingers (not a screwdriver) to secure the screws to the front of the speaker.
Long fastening screws
Short fastening screws
Removing the grille
1Loosen, then remove the finishing screws from the four corners on the front of the grille.
2After detaching the grille, remove the fastening
screws from the four holes on the front of the speaker.
Optionally, you can insert the supplied caps into the holes.
English
2Line up the holes on the grille with the protruding ends of the screws on the front of the speaker and press firmly.
3Insert the supplied finishing screws into the four holes on the front of the grille and tighten to secure. Use your fingers to tighten the finishing screws.
Finishing screws
•Do not use a screwdriver (or hex wrench) to tighten the screws. Overtightening could damage the speaker.
•When not in use, store the screws with these operating instructions for safekeeping.
Magnetic shielding
This speaker system is magnetically shielded. However, depending on the installation location, color distortion may occur if the speaker system is installed extremely close to the screen of a television set.
If this happens, turn off the television, then turn it on again after 15 min to 30 min. If the problem persists, place the speaker system away from the television set.
Cleaning the speaker cabinet
With normal use, wiping with a dry cloth should be sufficient to keep the cabinet clean. If necessary, clean with a cloth dipped in a neutral cleanser diluted five or six times with water, and wrung out well. Do not use furniture wax or cleansers.
Never use thinners, benzine, insecticide sprays or other chemicals on or near this unit since these will corrode the surfaces.
5
En