JVC DR-MV5S manual Monitor Set, Pan&Scan/Letter Box

Page 23

INITIAL SETTINGS EN 23
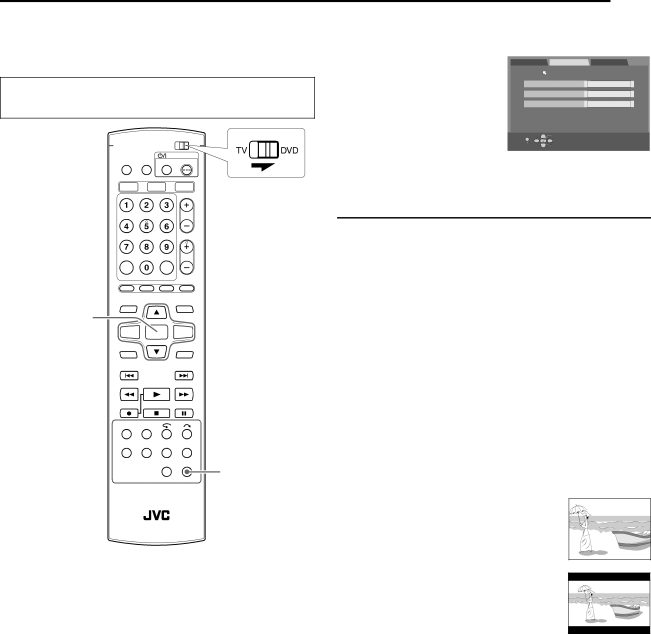
 

Monitor Set

1 Press SET UP to access the Main Menu screen.


You cannot set the monitor type during recording or playback.


2 Press w e to select “FUNCTION SET UP”, then press t.

You can select the monitor type depending on the TV used when

3 Press w e to select “VIDEO


you play back DVD VIDEO discs recorded for wide-screen TVs.

DVD SET UP

FUNCTION SET UP INITIAL SET UP


IN/OUT”, then press t.

VIDEO IN/OUT

RECORDING SET

DISPLAY SET

OTHERS


Turn on the unit.

Turn on the TV and select the AV mode.

Slide the TV/DVD switch to DVD.

4 Press rt to select “MONITOR TYPE”, then press

ENTER.

5Press rt to select the desired option, then press ENTER.

6Press SET UP to complete the setting.

MONITOR TYPE

4:3LB

FRONT AUX F-1

VIDEO

REAR AUX L-1

VIDEO

SET UP

OK

SELECT WITH [CURSORS]

EXIT

SELECT

THEN PRESS [ENTER]


ENTER

rtwe

SET UP

*The boldface settings below indicate the settings at your purchase.

8MONITOR TYPE 4:3LB / 4:3PS / 16:9 AUTO / 16:9 FIX

4:3LB (Letter Box conversion): Select this when the aspect ratio of

your TV is 4:3 (conventional TV). While viewing a wide screen picture, the black bars appear on the top and the bottom of the screen.

4:3PS (Pan&Scan): Select this when the aspect ratio of your TV is 4:3 (conventional TV). While viewing a wide screen picture, the black bars do not appear; however, the left and right edges of the pictures will not be shown on the screen.

16:9 AUTO (Wide television conversion): Select this when the aspect ratio of your TV is 16:9 (wide TV).

16:9 FIX (Wide television conversion): Select this when the aspect ratio of your TV is fixed to 16:9 (wide TV). The unit automatically adjusts the screen width of the output signal correctly when playing back a picture whose aspect ratio is 4:3.

Pan&Scan/Letter Box

In general, DVD VIDEO disc are produced for a wide-screen TV with 16:9 aspect ratio.

Material with this ratio will not fit to a TV with 4:3 aspect ratio. There are two styles to display the image, “Pan&Scan” (PS) and “Letter Box” (LB).

Pan&Scan

The right and left side of the image are cut off.

The image fills the screen.

The picture will be shown in the “4:3LB” mode depending on the disc even if the “4:3PS” mode is selected.

Letter Box

Black bands appear at the top and bottom of the image. The image itself appears in 16:9 aspect ratio.

Image 23
Contents For Customer Use DR-MV5SThis unit should be used with AC 120Vd, 60Hz only Dear CustomerOutdoor Antenna Grounding Power LinesPower Sources Power Cord ProtectionReplacement Parts AccessoriesCleaning Damage Requiring ServiceTo mobile phone users Declaration of ConformityDo not place the unit Do not block the unit’s ventilation openings or holesEnjoy the vivid picture quality DVD recording/playback Enjoying your life withRecorder DVD-RAM Discs About DiscsRecordable/Playable Discs Discs For Playback OnlyRegion Number Recording Medium And FormatUnplayable Discs File Structure Of DiscsFile structure of a disc before starting the MP3/JPEG DVD Video MarksAudio CD/Video CD Marks related to videoCare And Handling Of Discs Placing a DiscRear View Front ViewFront Display Panel When a disc is loaded, the type of the disc is indicatedLights when a DVD-RW disc is formatted in VR mode Left 3 digits of Multi Display S indicate the audio mode pg How To UseOn-Screen Display DVD deck only It’s essential that your unit be properly connected ConnectionsComposite Connection Without Cable Box Or DBS Receiver Back of unit Composite Connection With Cable Box Or DBS ReceiverComponent Video Connection Auto Clock Set/Auto Tuner Set What to do if Plug & Play setting failedPlug & Play Set Enter SET UPLanguage DVDAuto Daylight Saving Time Clock SetSemiauto Clock Set Manual Clock SetAuto Channel Set Tuner SetManual Channel Set Letter Box Monitor SetPan&Scan/Letter Box Pan&ScanPlayback About recording modeWant to do? Load a disc Basic Playback DVDCompact VHS camcorder recordings can be played on this Clean the video heads using a dry cleaning cassette whenBasic Playback VHS Usable cassettesPress 8 to stop recording Basic Recording DVDRecording Recording amount Recording ModeMode Approx Time approx Recording Resume FunctionUse Basic Recording VHSMaximum VHS Timer ProgramingCancel TimerVHS DVD Manual Timer ProgramingTimer-record the program Cable Box and DBS Receiver Users To Make The Disc For On-Disc Timer ProgramingTo Timer-record The Program With The Programed Disc OnlyHow Discs Are Overwritten Program’s information on the front display panel Check, Cancel And Change ProgramsWhen Programs Overlap Each Other REC LinkDVD REC Link REC ModeDVD Deck Only Auto Blank-Cut Dubbing Auto Recording Mode OptimizerStop and pause mode on the DVD deck Auto Title Creation DubbingVHS/DVD VHS Dubbing Dubbing a Part Of a CassetteVHS/DVD Dubbing REC Mode Progressive ScanDubbing An Entire Disc VHS/DVD Dubbing DVD Dubbing a Part Of a DiscDV Dubbing DVD Deck Only Performing dubbing without using the DV Dubbing controllerEdit From a Camcorder If the camcorder has no S-VIDEO output connectorEdit From Another Recorder Slide the TV/DVD switch to DVDWhen recording on DVD deck When recording on VHS deckExample Dubbing to an MD Digital Audio DubbingMenu Advanced Playback DVDHigh-Speed Search DVD TOP Menu EnterSkip Search Resume FunctionStill Picture/Frame-By-Frame Playback Slow MotionSubtitle Selection Checking The Time Information Angle SelectionPressing Next 6 advances to the next Audio Channel SelectionOn-Screen Display PBC appears on the front display panelDisplay Recording/playback Status DisplayRecording screen Live Memory Playback screen Overview Of Live Memory PlaybackDisplay During Live Memory Playback Buttons To Be Used During Live Memory Playback Available only when pausedTo Watch a Program Previously Recorded While Recording Rtwe Using The On-screen BarHow To Access The On-screen Bar Basic Operation On The On-screen BarReturn On Screen Repeat PlaybackTo select track 5, press the number button Adjusting The Picture QualitySetting The Progressive Mode Time SearchProgram Playback Cancel EnterSelect The Switching Interval Of The Slide Show Random PlaybackCH + Advanced Playback VHSQuick Rewind a Little Index SearchSoundtrack Selection Next Function MemoryManual Tracking VHS Progressive ScanSecond Audio Recording Instant Timer Recording ITRAdvanced Recording DVD Elapsed Recording Time And Disc Remaining Time IndicationDisc space VHS TV Input ResetAdvanced Recording VHS Free Rate FunctionPlayback Elapsed Recording Time IndicationTape Remaining Time Active Video CalibrationIcons and their meanings Library Database DVD NaviDisplay for original Display for play list Recording Memo Modify Original InformationScan For Beginning Of Title Modify IndexProtect Title Modify Title NameDelete Unwanted Part Of The Title Modify CategoryMove Scenes Modify Play List InformationAdd Scenes To a Play List Create Play ListModify Play List Name Play Back Play ListDelete Unwanted Part From Play List Delete Play ListDelete Information Modify Library InformationScan For Title From Library Register DiscPress Clear Locating The Desired Group And TracksOn completion of the playback of all the items For better sound Remote control settingTips for your trouble Specifications Warranty Only in U.S.AEnter SET UP Remote Control FunctionsRemote Control 1/2/3/4 Code Switching TV Multi-Brand Remote ControlDigital Decoder or an amplifier with built-in DTS With built-in DTS using an optional coaxial cablePress rt to select 2ND Mode Set DVD DeckUtility  pg Others  pgRecorded When this function is set to onWhen this function is set to OFF, the SAP audio cannot be OFF You cannot use the resume function Scan Mode SetFor Example Mode Set VHS DeckVHS Enter To unlock tray Tray Lock DVD Deck OnlyTo lock tray SET, then press Enter Changing VCR Plus+ SettingGuide Channel Number Set Press rt to select Guide CHThen press t Format a DVD-RW DiscFinalize a DVD-R/RW Disc After finalizing For DVD-R/RW Video mode discsGeneral Playback DVD DeckInitializing DVD Deck Only Recording VHS Deck Timer Recording DVD DeckPlayback VHS Deck Recording DVD DeckFor composite connection Timer Recording VHS DeckOther Problems Power failure occurred Set date and time correctly.  pgAn invalid PlusCode number has been input.  pg Timer recording has finished during Live Memory playbackDimensions WxHxD Power requirementPower consumption TemperatureLanguage Code List Elapsed Recording Time Indication Select The Switching Interval Of The Slide ShowWhen Program Overlap Each Other Audio Language/Sound SelectionWarranty Only in U.S.A DR-MV5S