Maytag HVP41240PCGA, HVN41250VCGA Vent Connections To Blower Assembly, Venting And Installation

Page 17
VENT CONNECTIONS TO BLOWER ASSEMBLY

VENT CONNECTIONS TO BLOWER ASSEMBLY

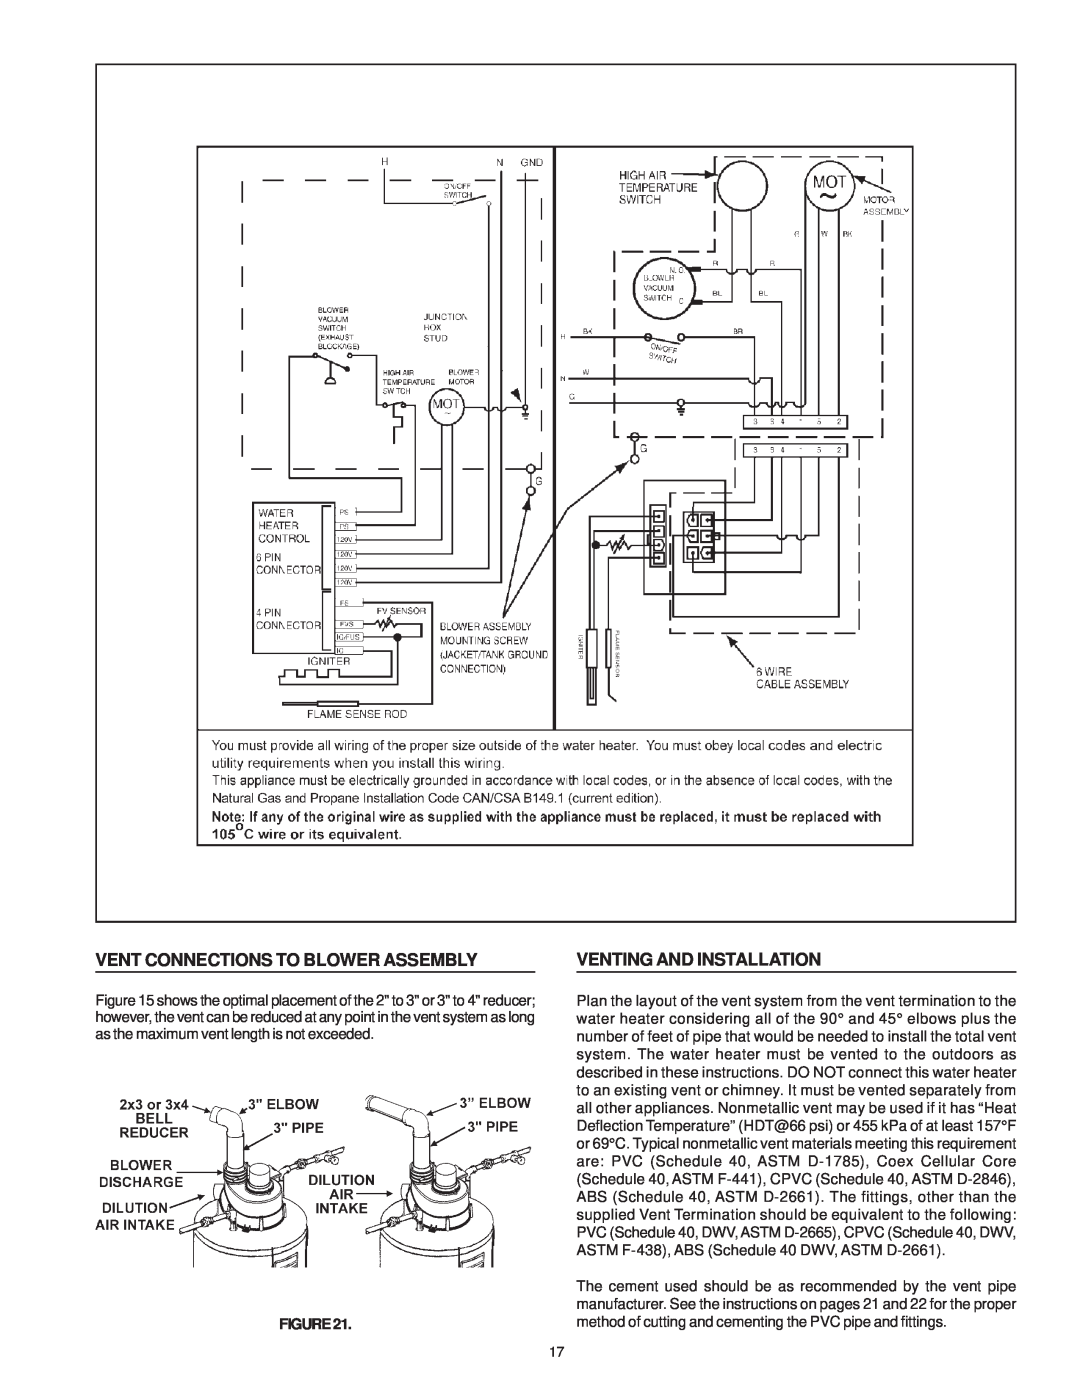
Figure 15 shows the optimal placement of the 2" to 3" or 3" to 4" reducer; however, the vent can be reduced at any point in the vent system as long as the maximum vent length is not exceeded.

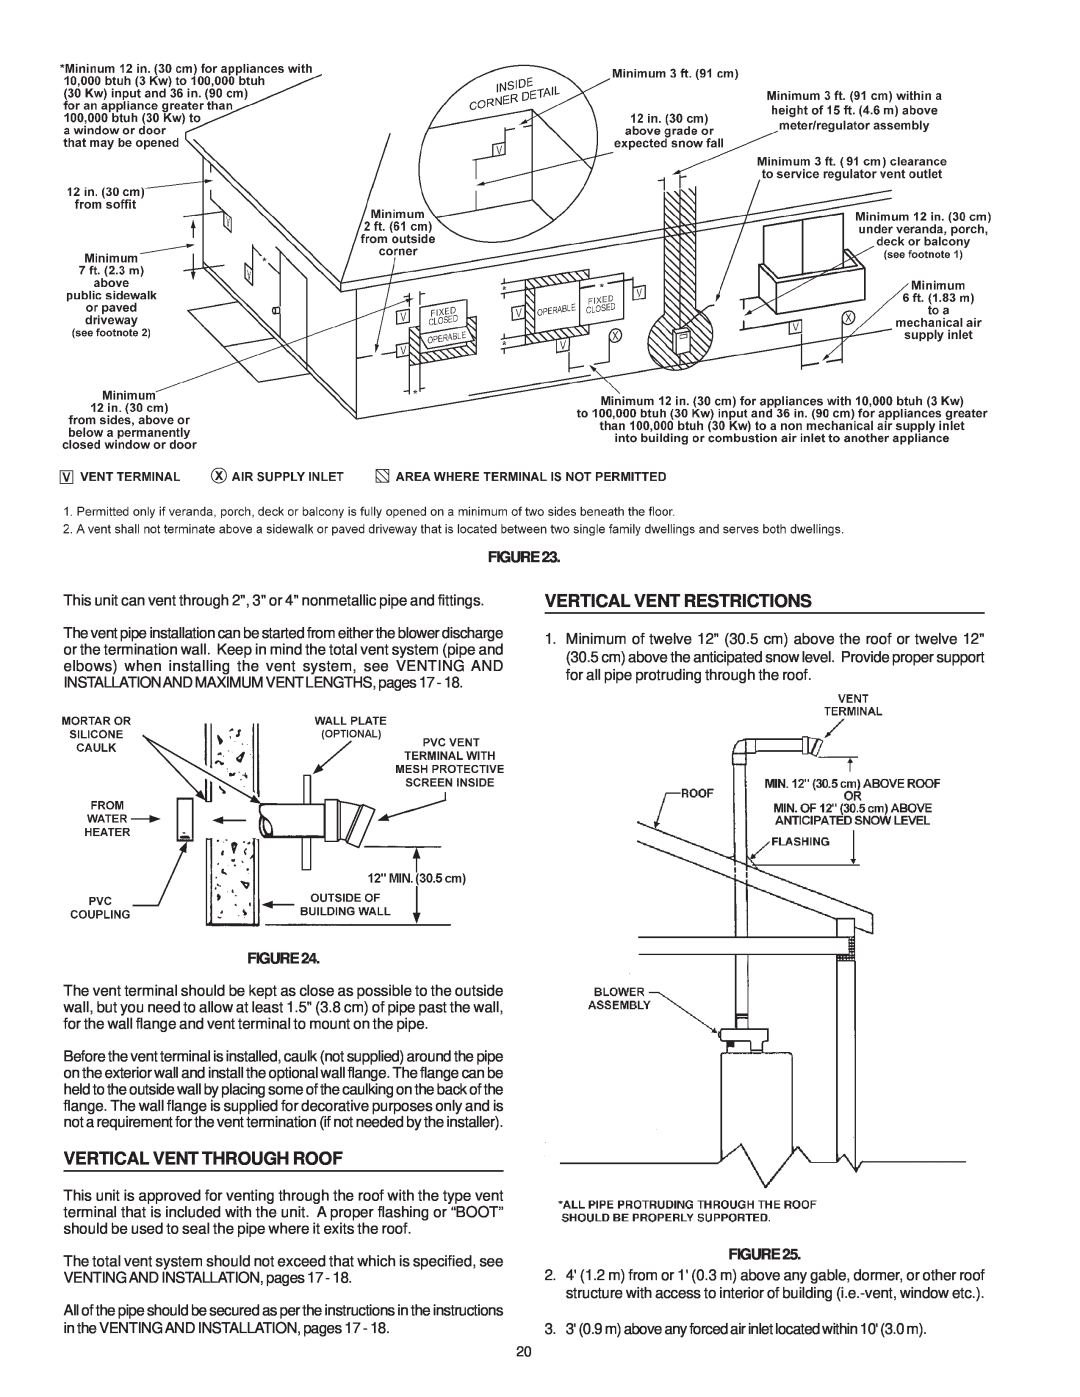
FIGURE21.

VENTING AND INSTALLATION

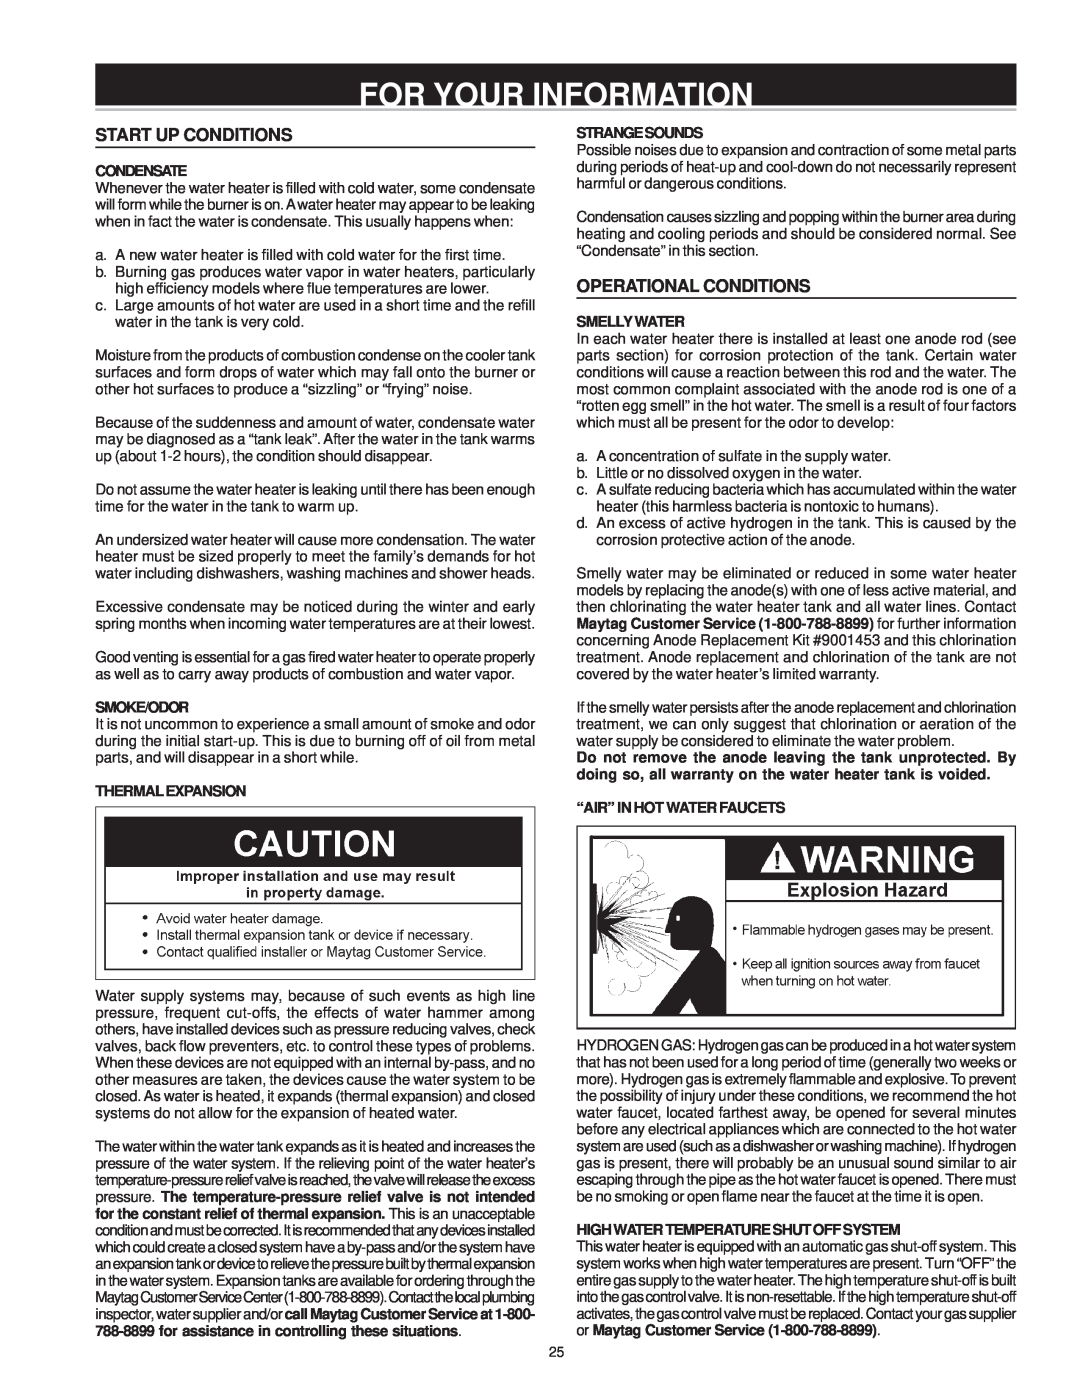
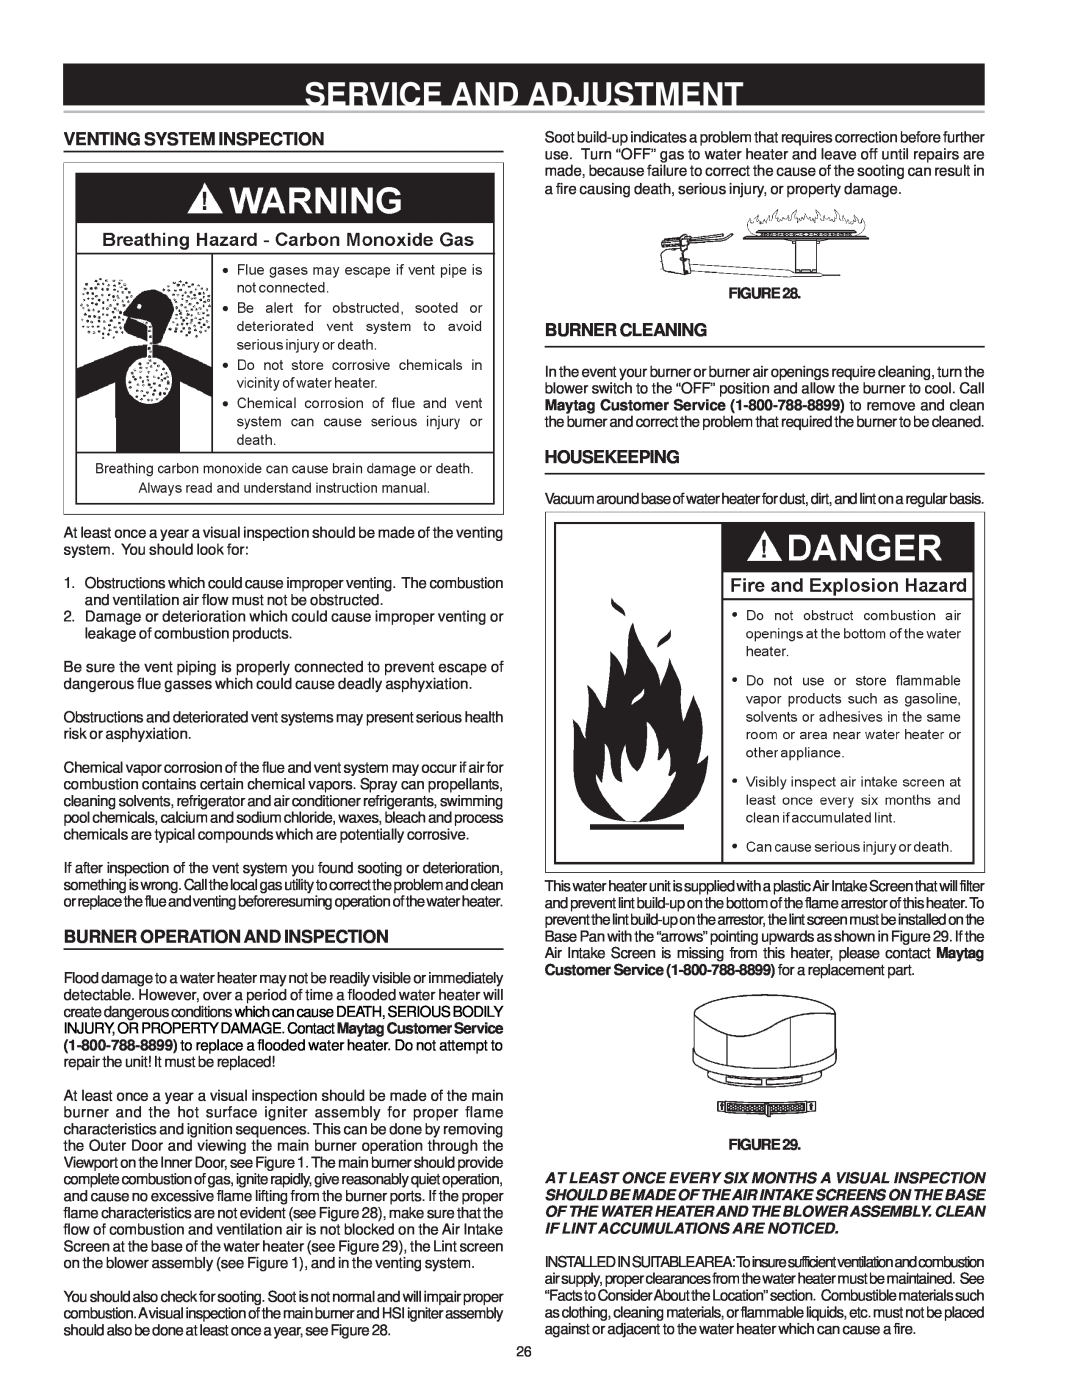
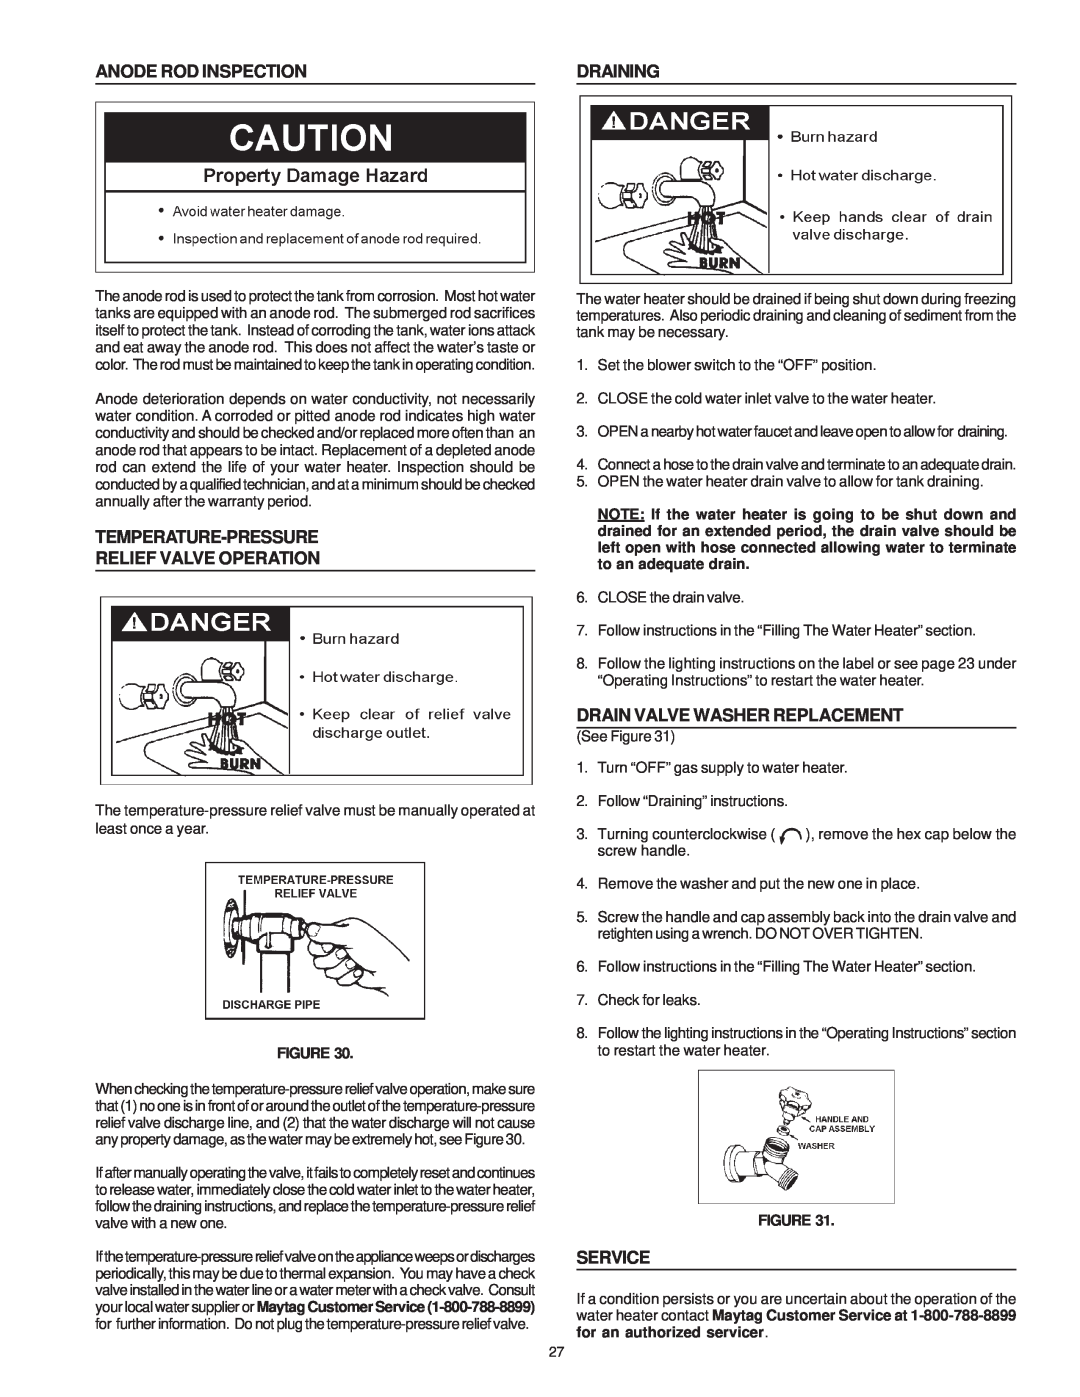
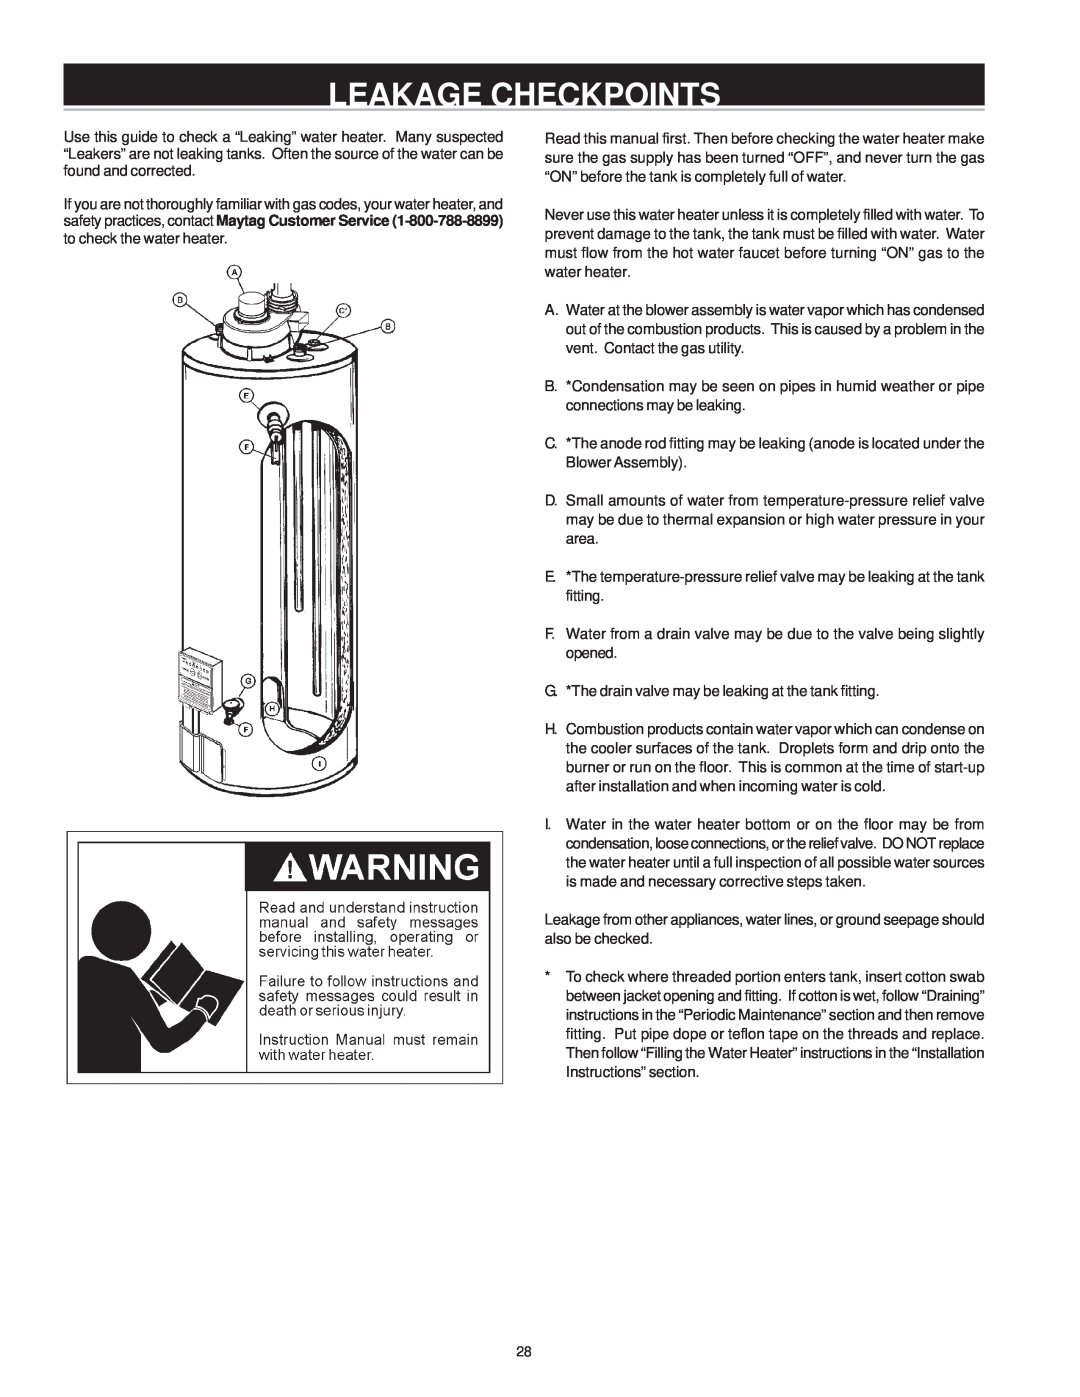
Plan the layout of the vent system from the vent termination to the water heater considering all of the 90° and 45° elbows plus the number of feet of pipe that would be needed to install the total vent system. The water heater must be vented to the outdoors as described in these instructions. DO NOT connect this water heater to an existing vent or chimney. It must be vented separately from all other appliances. Nonmetallic vent may be used if it has “Heat Deflection Temperature” (HDT@66 psi) or 455 kPa of at least 157°F or 69°C. Typical nonmetallic vent materials meeting this requirement are: PVC (Schedule 40, ASTM D-1785), Coex Cellular Core (Schedule 40, ASTM F-441), CPVC (Schedule 40, ASTM D-2846), ABS (Schedule 40, ASTM D-2661). The fittings, other than the supplied Vent Termination should be equivalent to the following: PVC (Schedule 40, DWV, ASTM D-2665), CPVC (Schedule 40, DWV, ASTM F-438), ABS (Schedule 40 DWV, ASTM D-2661).

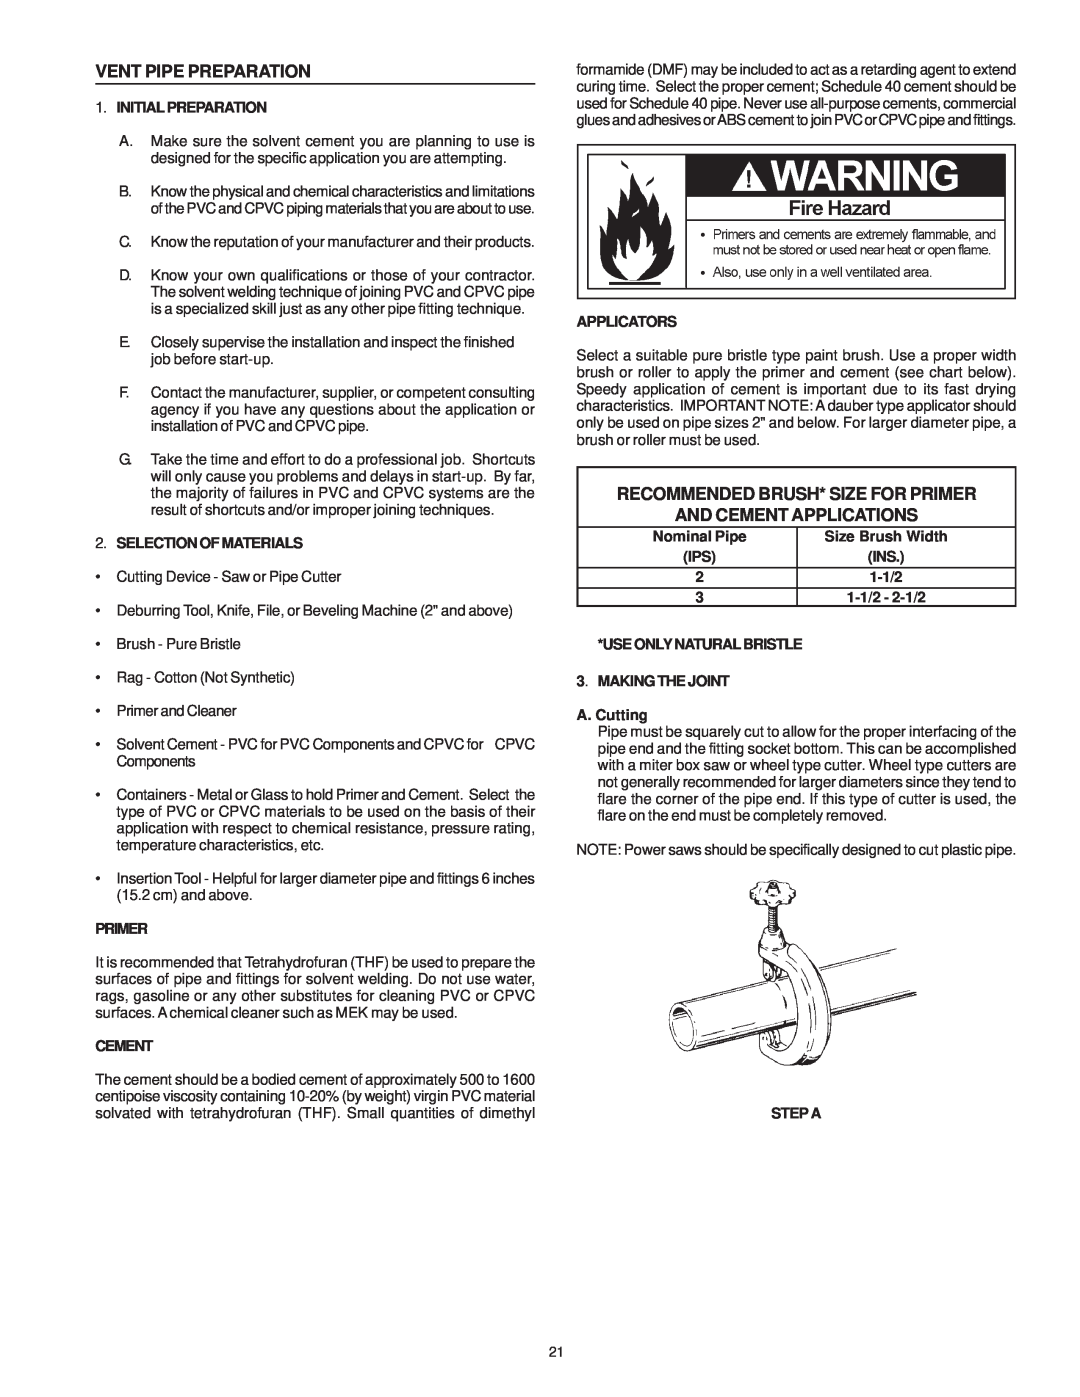
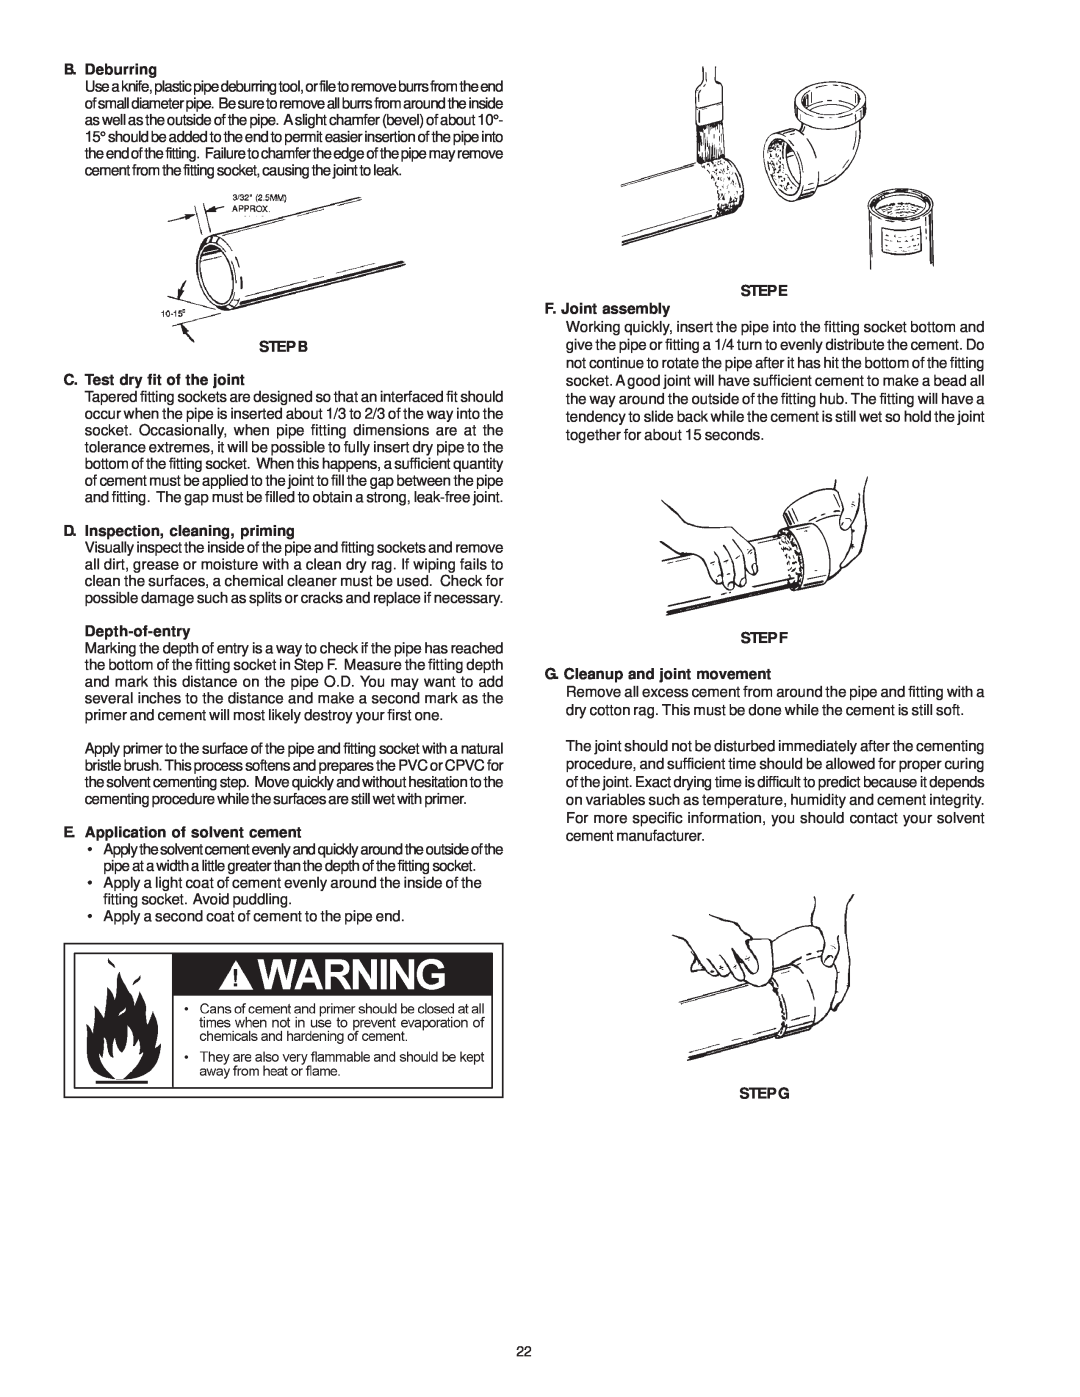
The cement used should be as recommended by the vent pipe manufacturer. See the instructions on pages 21 and 22 for the proper method of cutting and cementing the PVC pipe and fittings.

17
Image 17
Contents Series Twelve POWER VENT GAS WATER HEATER USER’S GUIDEIMPORTANT DEFINITIONS SAFE INSTALLATION, USE AND SERVICESAFETY PRECAUTIONS TABLE OF CONTENTS PREPARING FOR THE INSTALLATION PRODUCT SPECIFICATIONSCUSTOMER RESPONSIBILITIES Accessories MATERIALS AND BASIC TOOLS NEEDEDAdditional Tools Needed When Sweat Soldering ToolsGET TO KNOW YOUR WATER HEATER - GAS MODELS TYPICAL INSTALLATIONGAS MODELS WITH HOT SURFACE IGNITION 2, 3 OR 4 PVC VENT CAPABILITYFIGURE2 TYPICAL INSTALLATIONMIXING VALVE USAGE Removing the Old Water Heater INSTALLATION INSTRUCTIONSFIGURE9 FACTS TO CONSIDER ABOUT THE LOCATIONINSULATION BLANKETS FIGURE13 FIGURE12FIGURE14 FIGURE15WATER PIPING FIGURE17 TEMPERATURE-PRESSURERELIEF VALVET & P Valve and Pipe Insulation if supplied GAS PIPING FIGURE 18. GAS PIPING WITH FLEXIBLECONNECTORSEQUENCEOFINSTALLATION BLOWER ASSEMBLY INSTALLATIONSEDIMENT TRAPS FILLING THE WATER HEATERFIGURE21 VENT CONNECTIONS TO BLOWER ASSEMBLYVENTING AND INSTALLATION MAXIMUM VENT LENGTHS CONDENSATION40,000 BTU Units 50,000 BTU UnitsFIGURE22 VENT TERMINAL INSTALLATIONVENTING VERTICAL VENT RESTRICTIONS VERTICAL VENT THROUGH ROOFFIGURE23 FIGURE24AND CEMENT APPLICATIONS VENT PIPE PREPARATIONRECOMMENDED BRUSH* SIZE FOR PRIMER STEPE F. Joint assembly D.Inspection, cleaning, primingSTEPF G. Cleanup and joint movement B.DeburringFOR YOUR SAFETY READ BEFORE OPERATING OPERATING INSTRUCTIONSOPERATING INSTRUCTIONS TO TURN OFF GAS TO APPLIANCEFIGURE26 TEMPERATURE REGULATIONOPERATIONAL CONDITIONS FOR YOUR INFORMATIONSTART UP CONDITIONS BURNER CLEANING SERVICE AND ADJUSTMENTVENTING SYSTEM INSPECTION BURNER OPERATION AND INSPECTIONSERVICE DRAIN VALVE WASHER REPLACEMENTANODE ROD INSPECTION DRAININGLEAKAGE CHECKPOINTS PROBLEM TROUBLESHOOTING GUIDELINESSOLUTION WATER HEATER CONTROLThese guidelines should be used by a qualified Maytag Customer Service Center Agent. Call the Maytag Customer Service Center at TROUBLESHOOTING GUIDELINESTHIS IS A REPAIR PARTS LIST, NOT A PACKING LIST REPAIR PARTS LISTFULL ONE YEAR WARRANTY WARRANTYLIMITED PARTS WARRANTY LIMITED TANK WARRANTY AGAINST LEAKS