Frymaster 35 Series manual Replacing the High-Limit Thermostat in G Series Fryers

Page 10

5.Use a slotted socket to unscrew the thermostat from the frypot.

6.Apply a small amount of Loctite™ PST56765 compound to the threads of the new thermostat and screw it into the frypot, torquing to 150 foot-pounds.

7.Recalibrate the thermostat (see Section 1.7).

CAUTION

The operating thermostat must be calibrated after installation is complete. Refer to

Section 1.7 for calibration instructions.

1.8.3 Replacing the High-Limit Thermostat in Standard MJ35 Fryers

1.Drain the fryer and turn the gas off.

2.Disconnect the wires at the gas valve.

3.Use a slotted socket to unscrew the high-limit thermostat from the frypot.

4.Apply a small amount of Loctite™ PST56765 compound to the threads of the new thermostat.

The high-limit thermostat on the standard MJ35 is located below the thermostat dial.

5. Screw the replacement thermostat into the frypot, torquing to 180 inch-pounds.

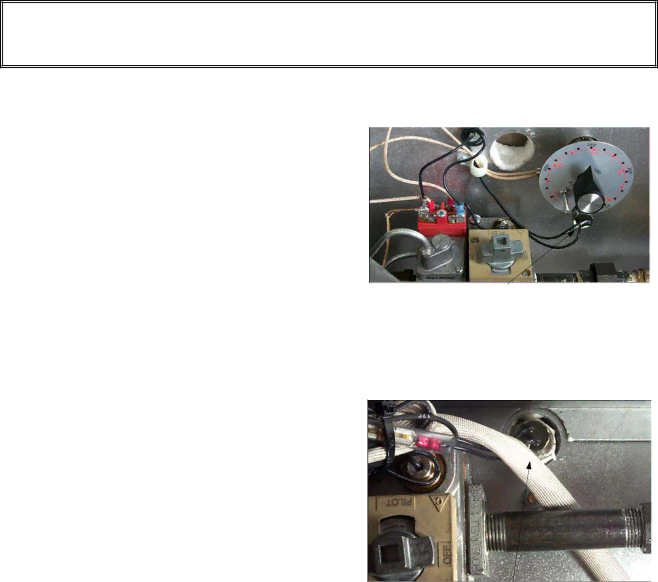
1.8.4 Replacing the High-Limit Thermostat in G Series Fryers

1.Drain the fryer and turn the gas off.

2.Disconnect basket lift- or filter-equipped fryers

from the electrical power supply.

3.Disconnect the thermostat wires from the gas valve.

4.Use a slotted socket to unscrew the thermostat from the frypot.

On G-Model fryers, the high-limit thermostat is accessed through the cabinet dooor.

5.Apply a small amount of Loctite™ PST56765 compound to the threads of the new thermostat.

6.Screw the replacement thermostat into the frypot, torquing to 180 inch-pounds.

1-6

Image 10
Contents Hour Service Hotline Gas FryersCanada Page Series GAS Fryers Table of Contents Control Options Functional DescriptionPilot Ignition System ThermostatsInch CE Gas Valves Adjusting the Pilot Flame Non-CE Gas ValvesCalibrating the Thermostat Control On Standard MJ35 Fryers On G-Model Fryers Page Replacing the High-Limit Thermostat in G Series Fryers Page Page Ferrule on thermopile unscrews from bottom of pilot Replacing the Frypot Three screws, on each side of the fluecap, must be removed No pilot flame Problems Related to the Gas and/or Electrical CurrentPilot Failures Unreliable flameProblems Related to the Electrical Circuits Problems Related to the Gas ValveImproper Burner Functioning Millivolt Operator Terminal PanelFiltration Problems Improper Temperature ControlFailure to Control at Setpoint Filter Magic Simplified Wiring Diagram Leakage Basket Lift MalfunctionsElectrical Problems Binding/Jamming ProblemsMotor Problems Bell Crank Basket Lift Wiring DiagramProbe Resistance Chart Probe Resistance ChartAccessories ComponentBasket Lift Arm, MJ35 Left use 823-06931 for FM35 units Cabinetry System Component Filter Boxes WIR0146SPOne-Piece Filter Pan Assembly Items 7, 8, 10, 11, MJ35V FrypotsFM35 MJ35 FrypotThis page Intentionally Left Blank Components Natural Gas G20/G25 for thermocouple only, use OIL Component Power Shower and OIL Return Handle Components THERMOSTATS, TIMER, and Related Components This page Intentionally Left Blank Service Hotline