Patient interface
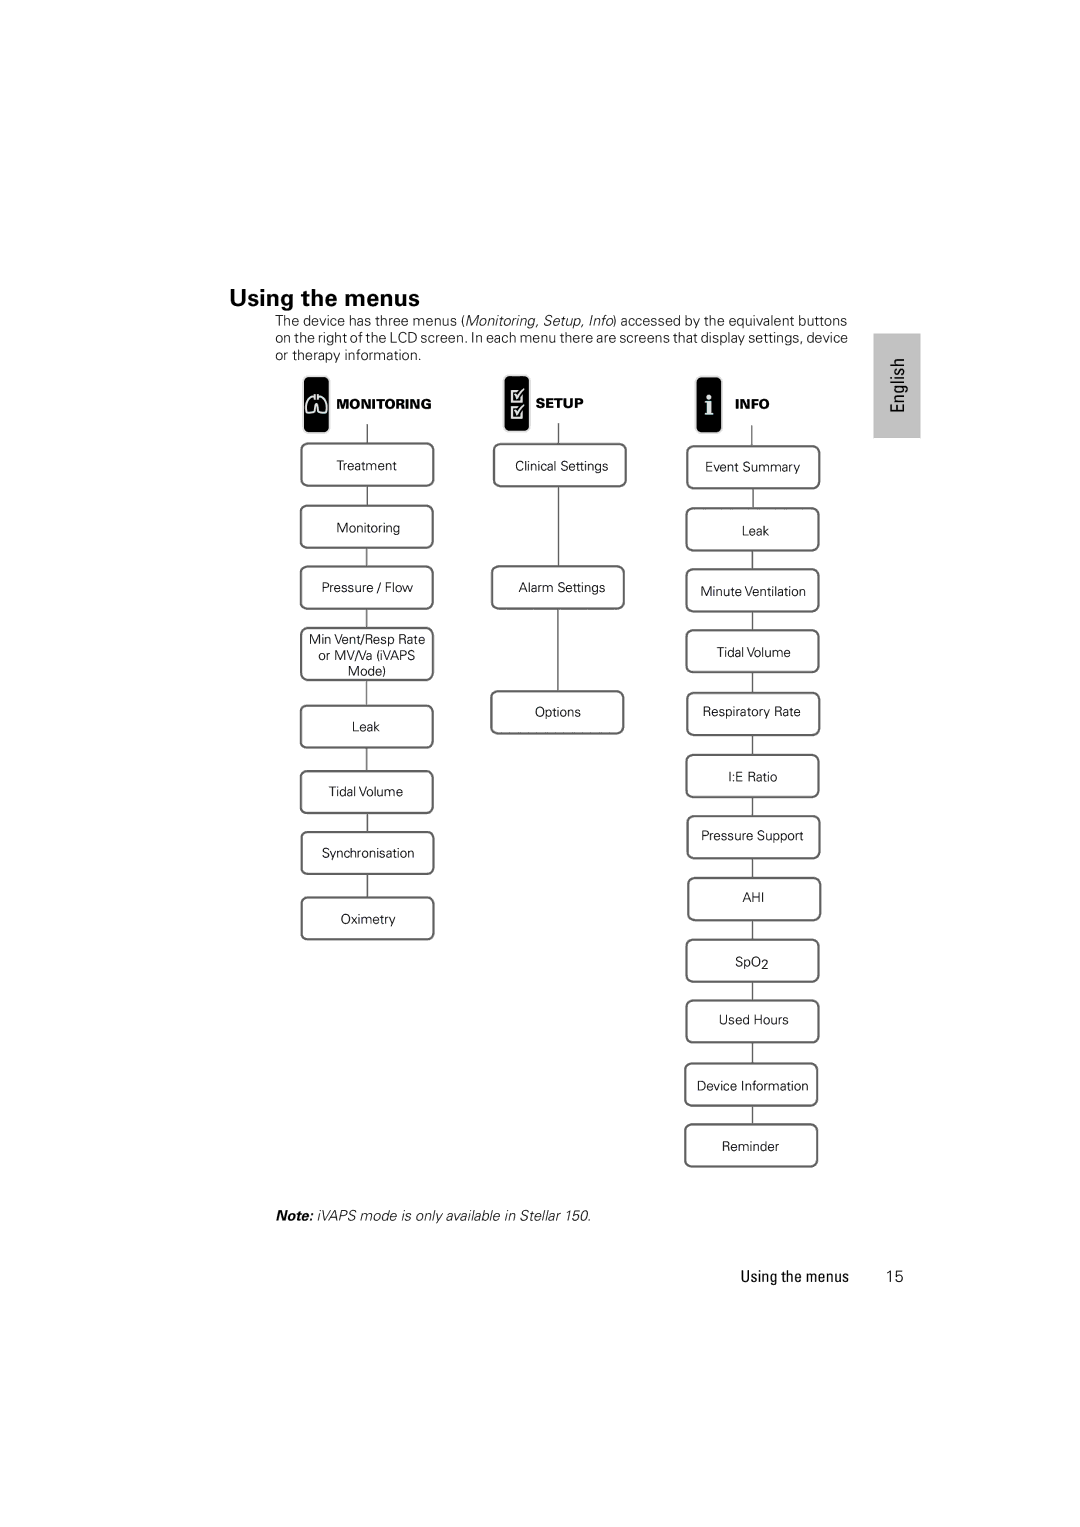
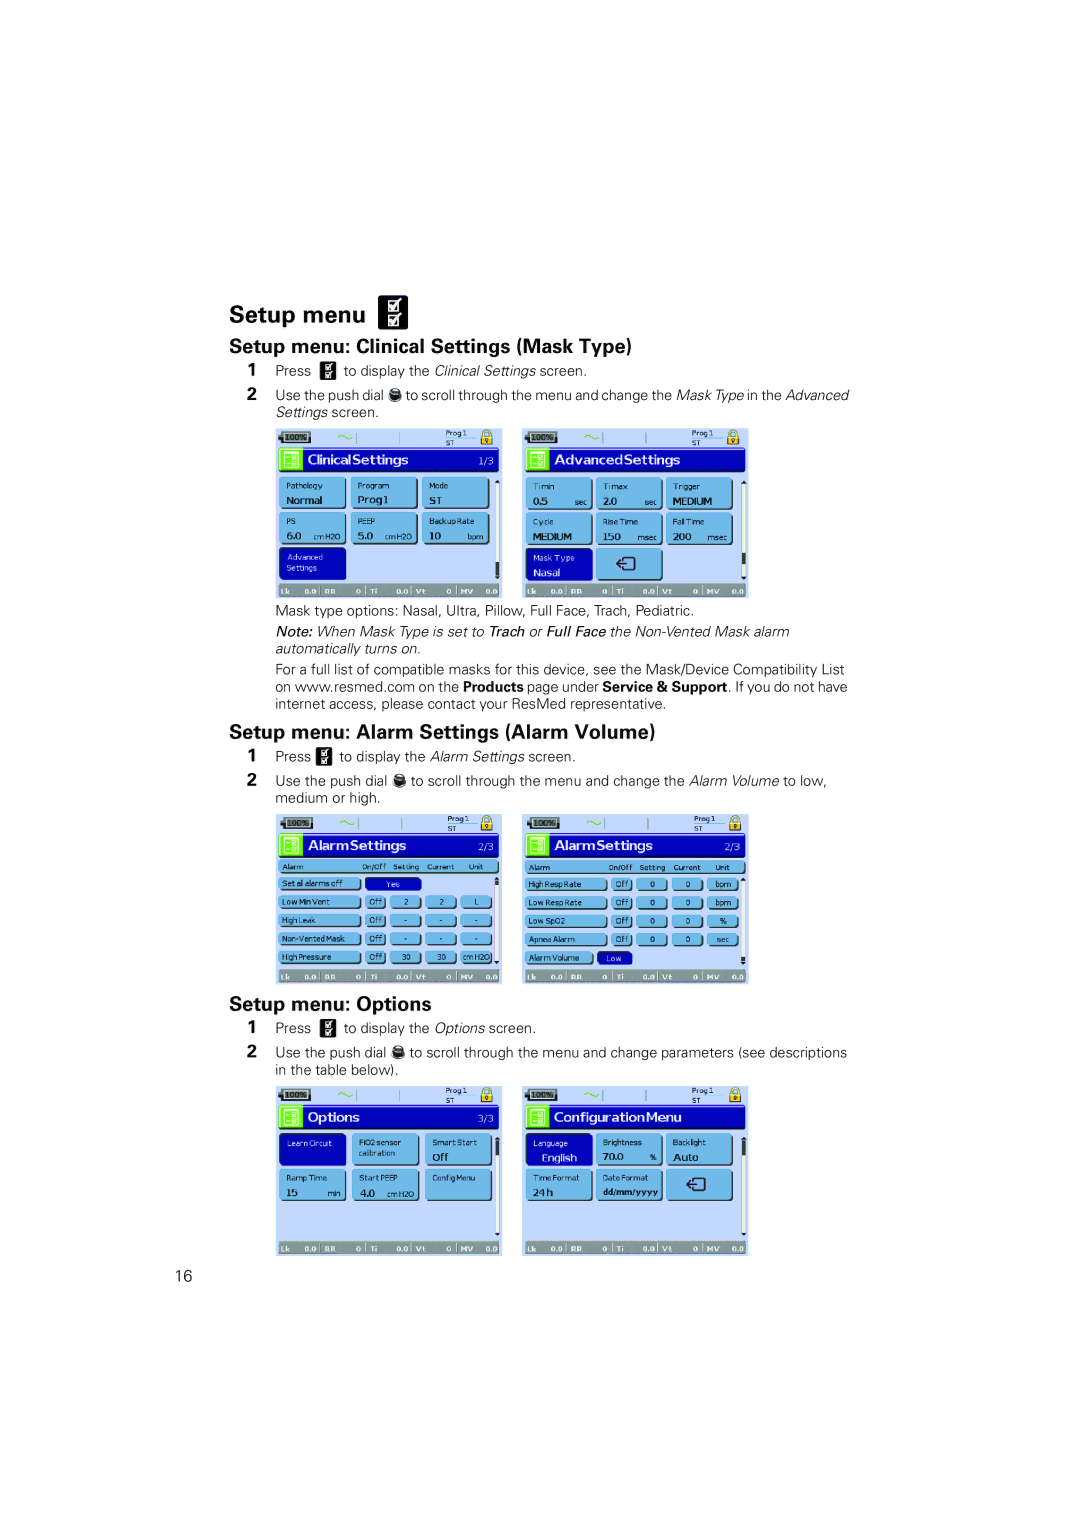
Both masks and tracheostomy tubes can be used with Stellar. To set the patient interface type go to the Setup menu, select Clinical Settings, then Advanced Settings.
For information on using masks, see the mask manual. For a full list of compatible masks for this device, see the Mask/Device Compatibility List on www.resmed.com on the Products page under Service & Support. If you do not have internet access, please contact your ResMed representative.
Humidification
A humidifier is recommended especially for patients experiencing dryness of the nose, throat or mouth. For information on using a humidifier as part of:
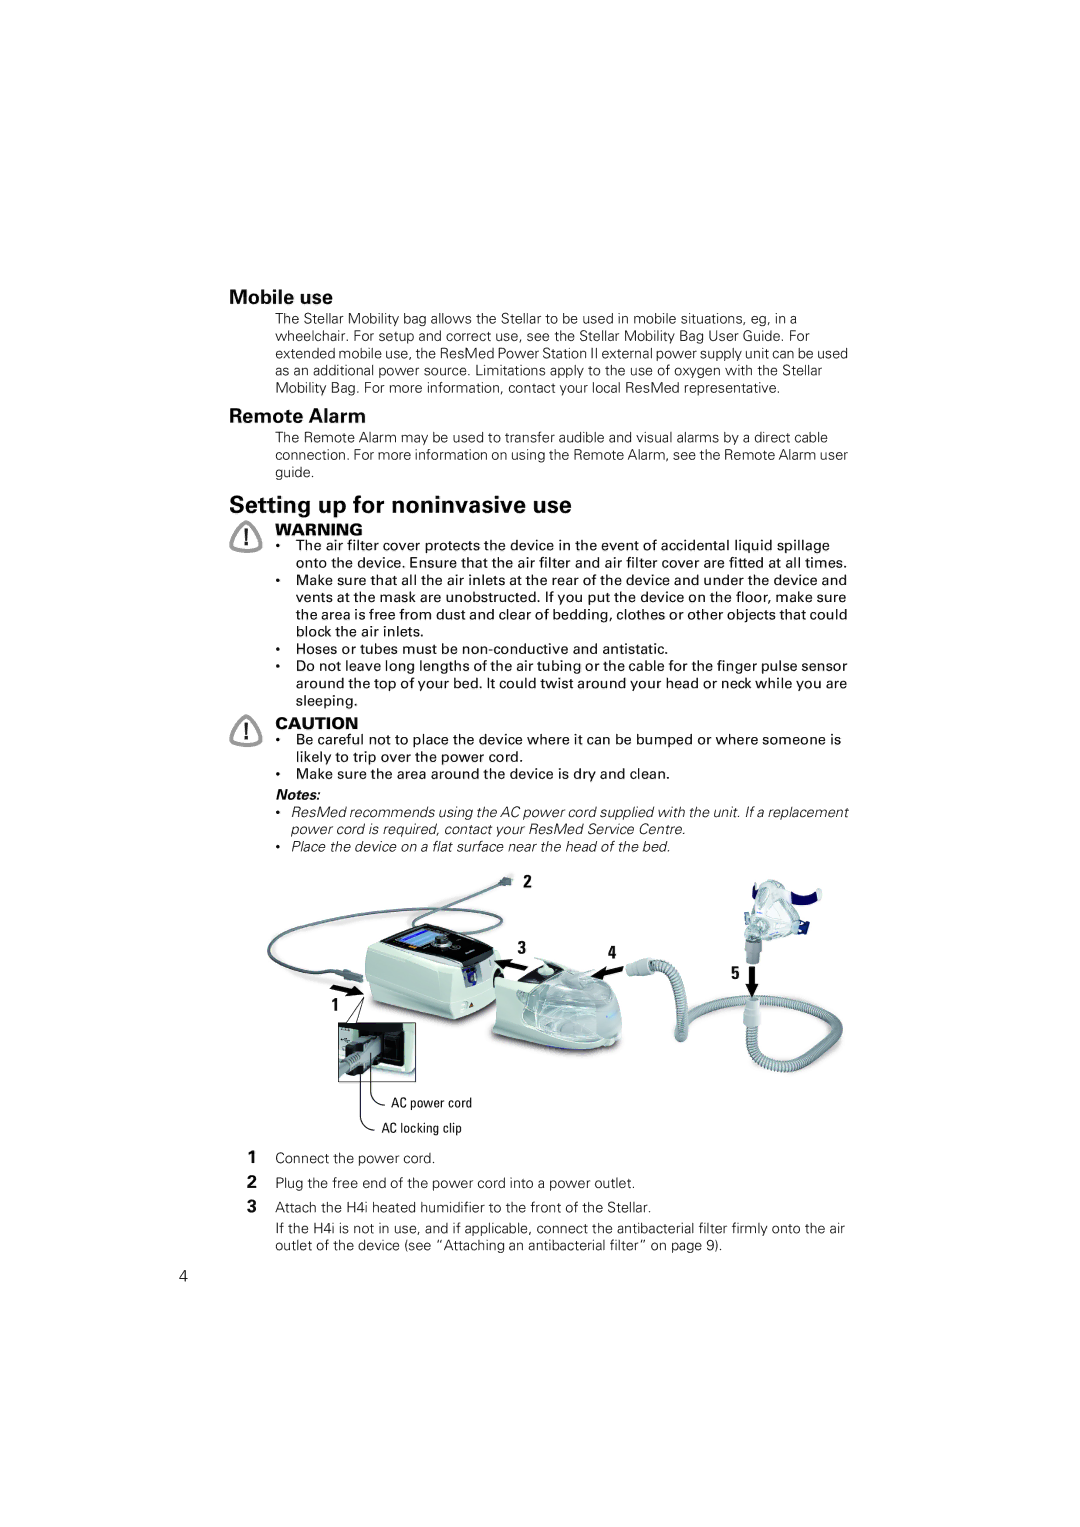
•noninvasive ventilation, see “Setting up for noninvasive use” on page 4.
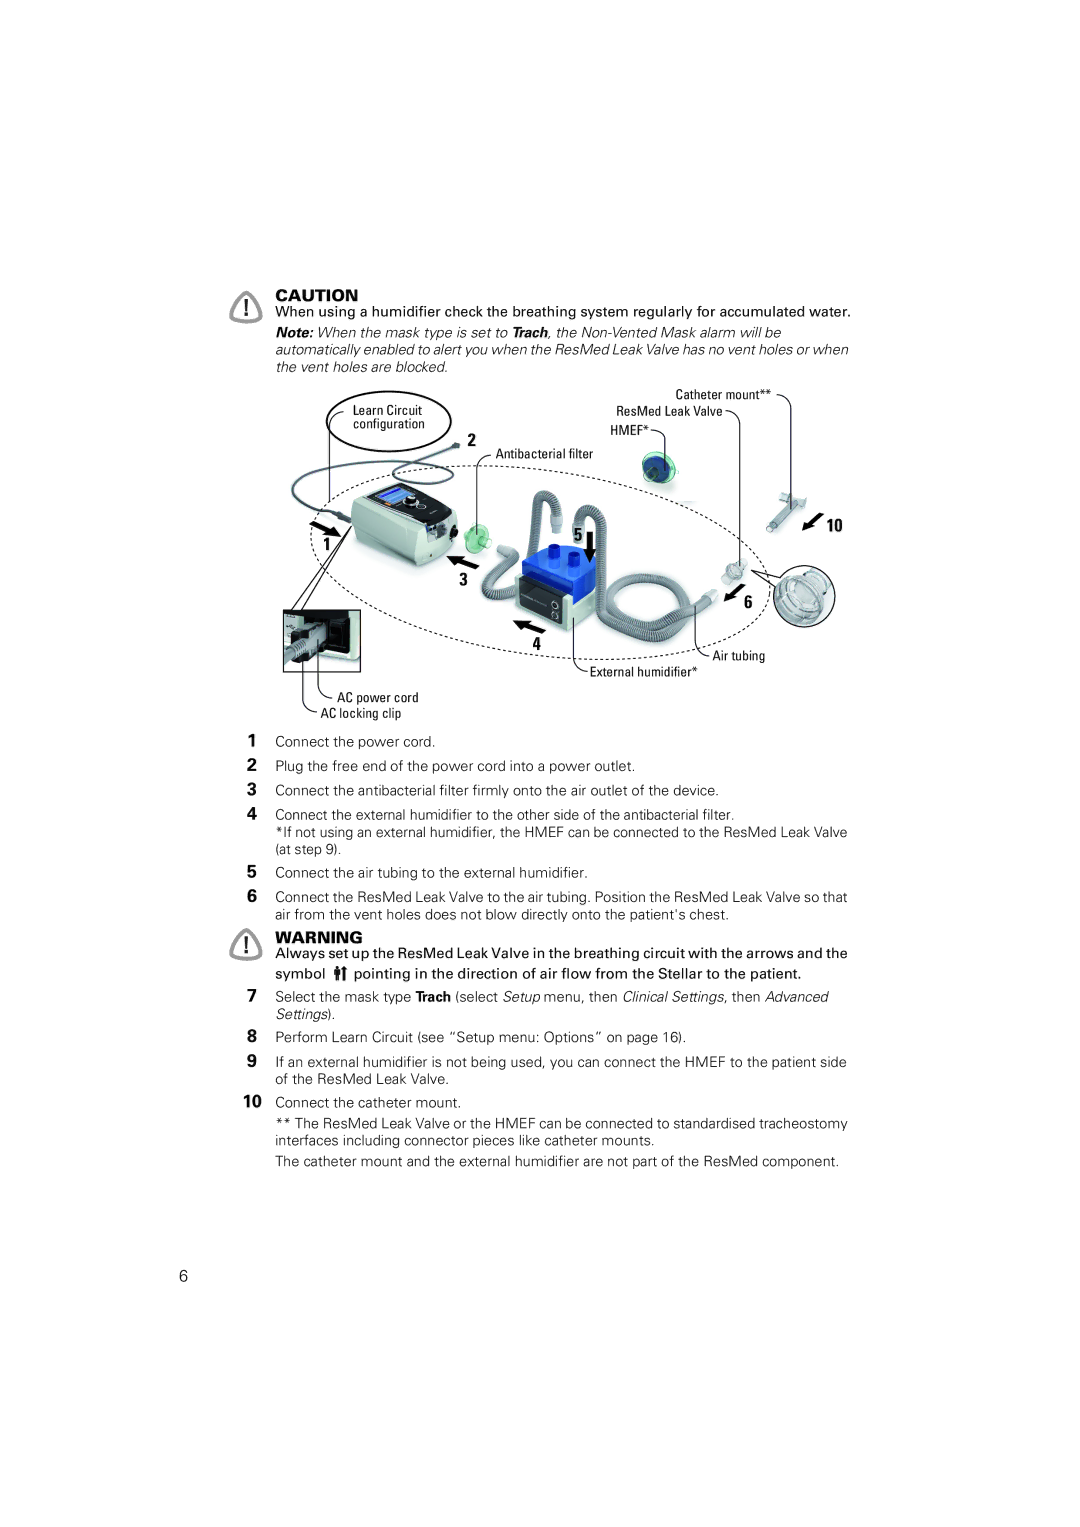
•invasive ventilation, see “Setting up for invasive use” on page 5.
Internal battery
CAUTION
Over time, the capacity of the internal battery will decrease. This depends on individual use and ambient conditions. As the battery degrades, it could lead to battery related alarms and or system errors. ResMed recommends the battery be tested after two years to assess the remaining battery life. Testing and replacement of the internal battery should only be performed by an authorised service agent.
Note: The battery duration depends on the state of charge, the environmental conditions, the condition and age of battery, the device settings and the patient circuit configuration.
In case of a mains power disruption, the device will operate using the internal battery if there is no external battery connected to the device. The internal battery will operate for approximately two hours under normal conditions (see “Technical specifications” on page 27). The power status of the battery is displayed on top of the LCD screen. Check the battery status regularly while operating the device with the internal battery and connect the device in time to mains power or alternatively to the external battery.
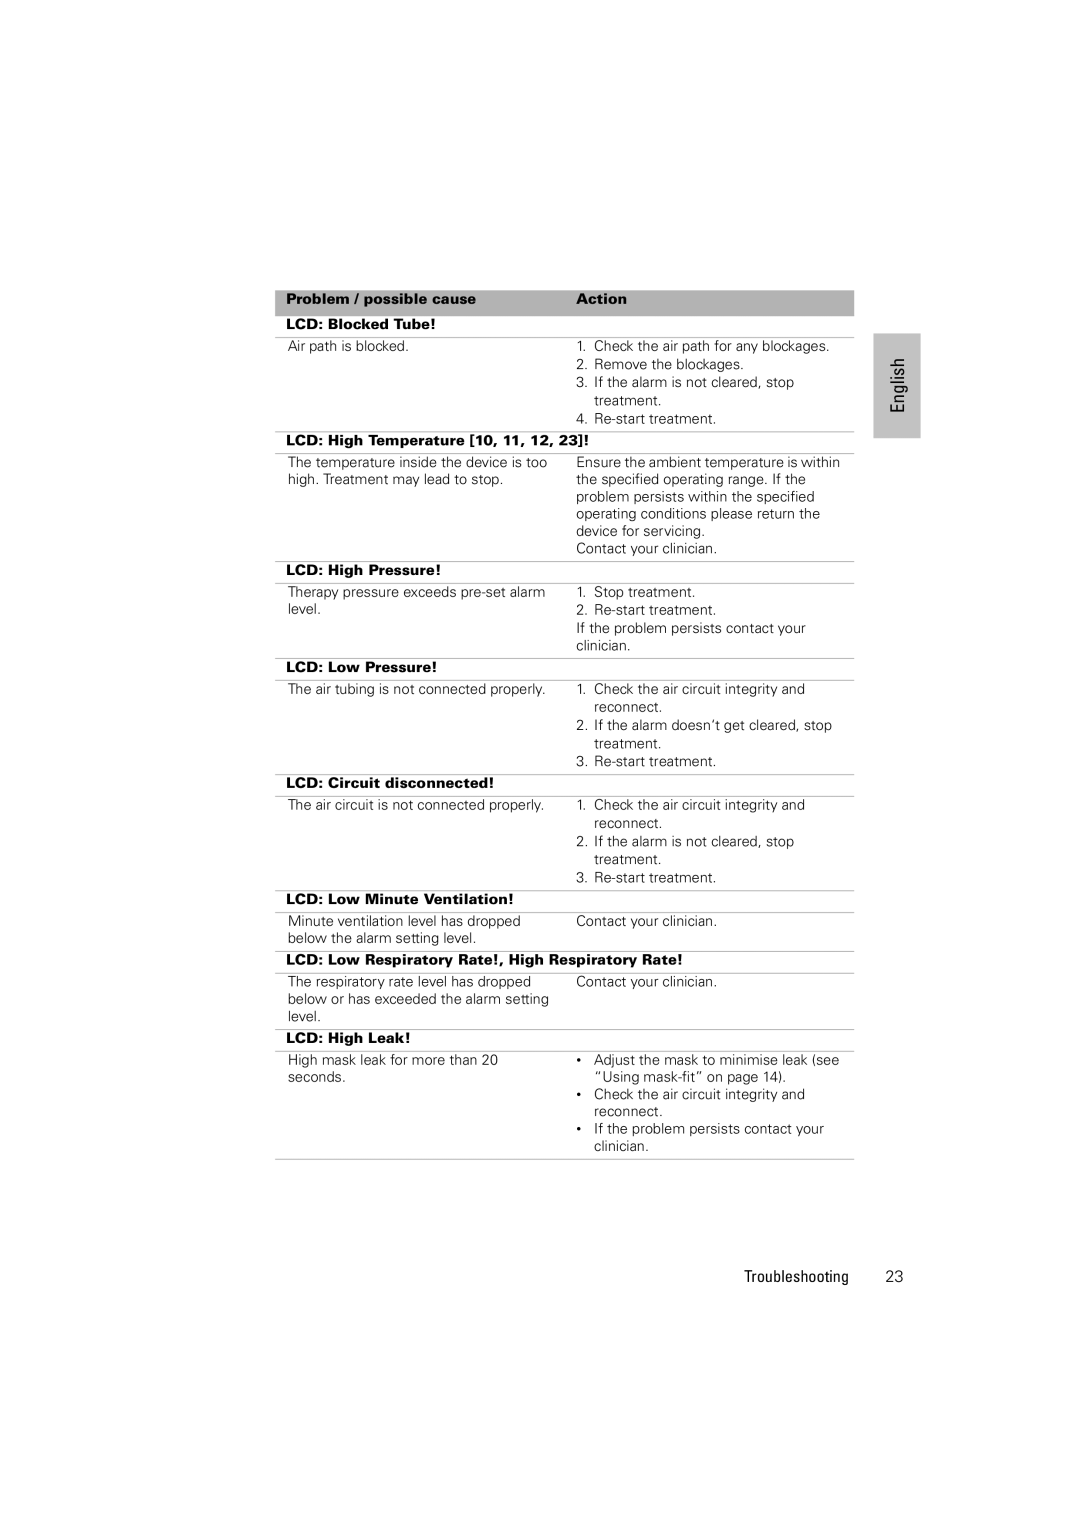
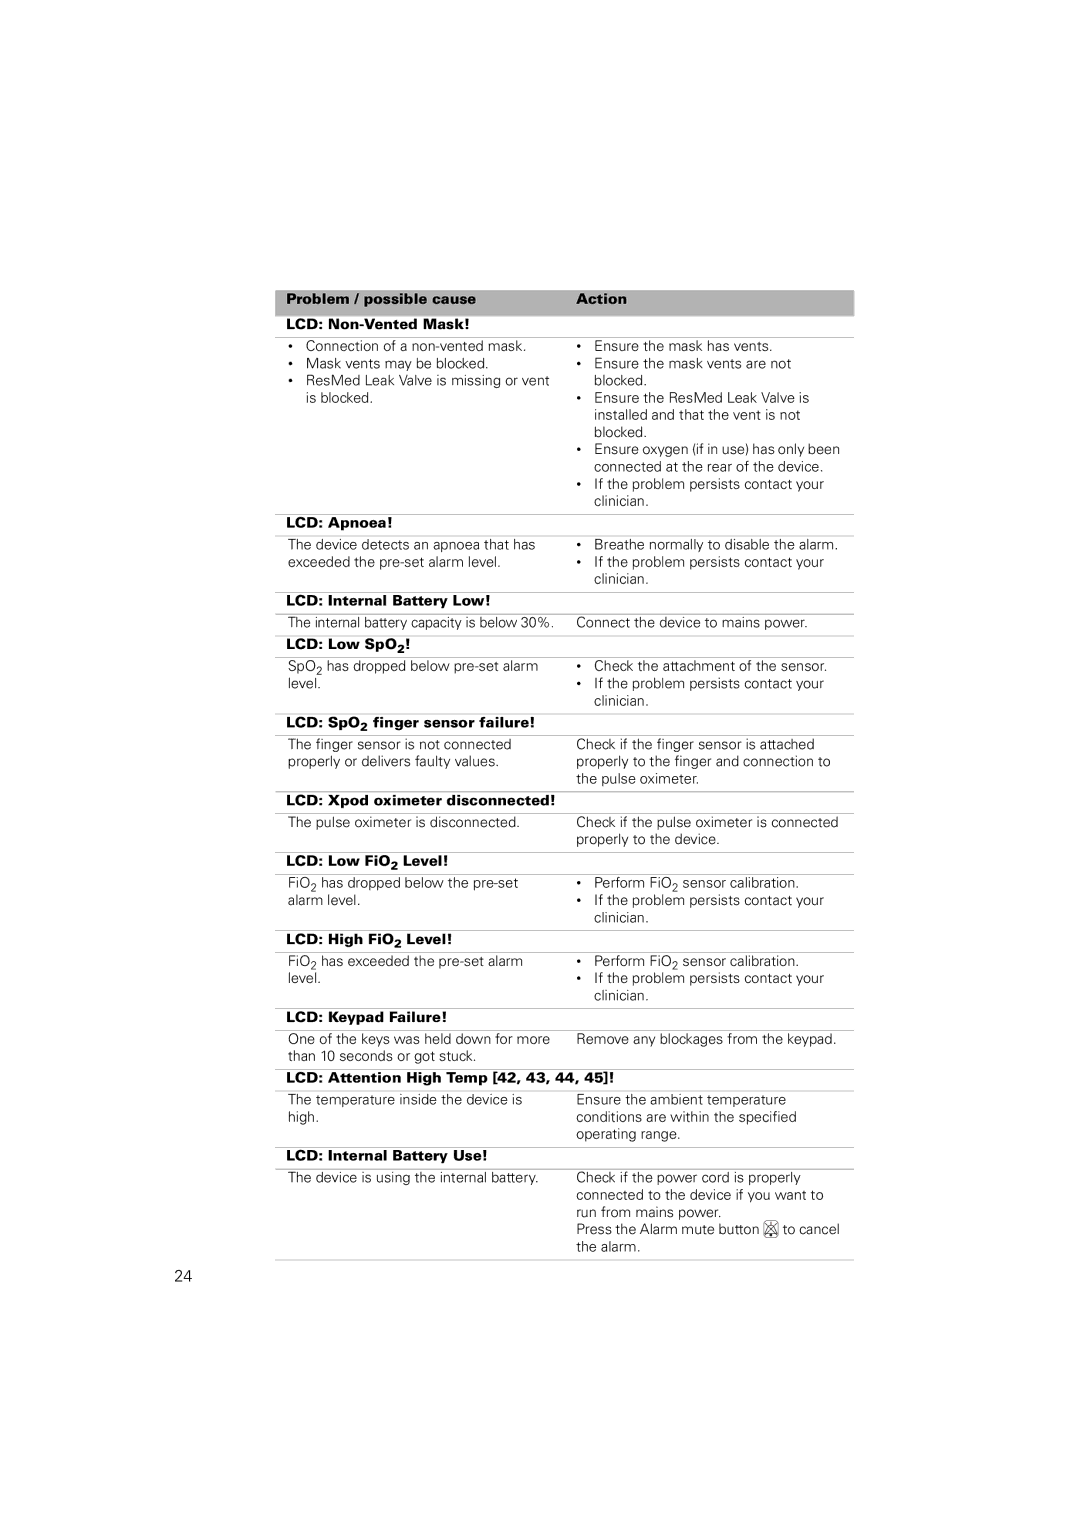
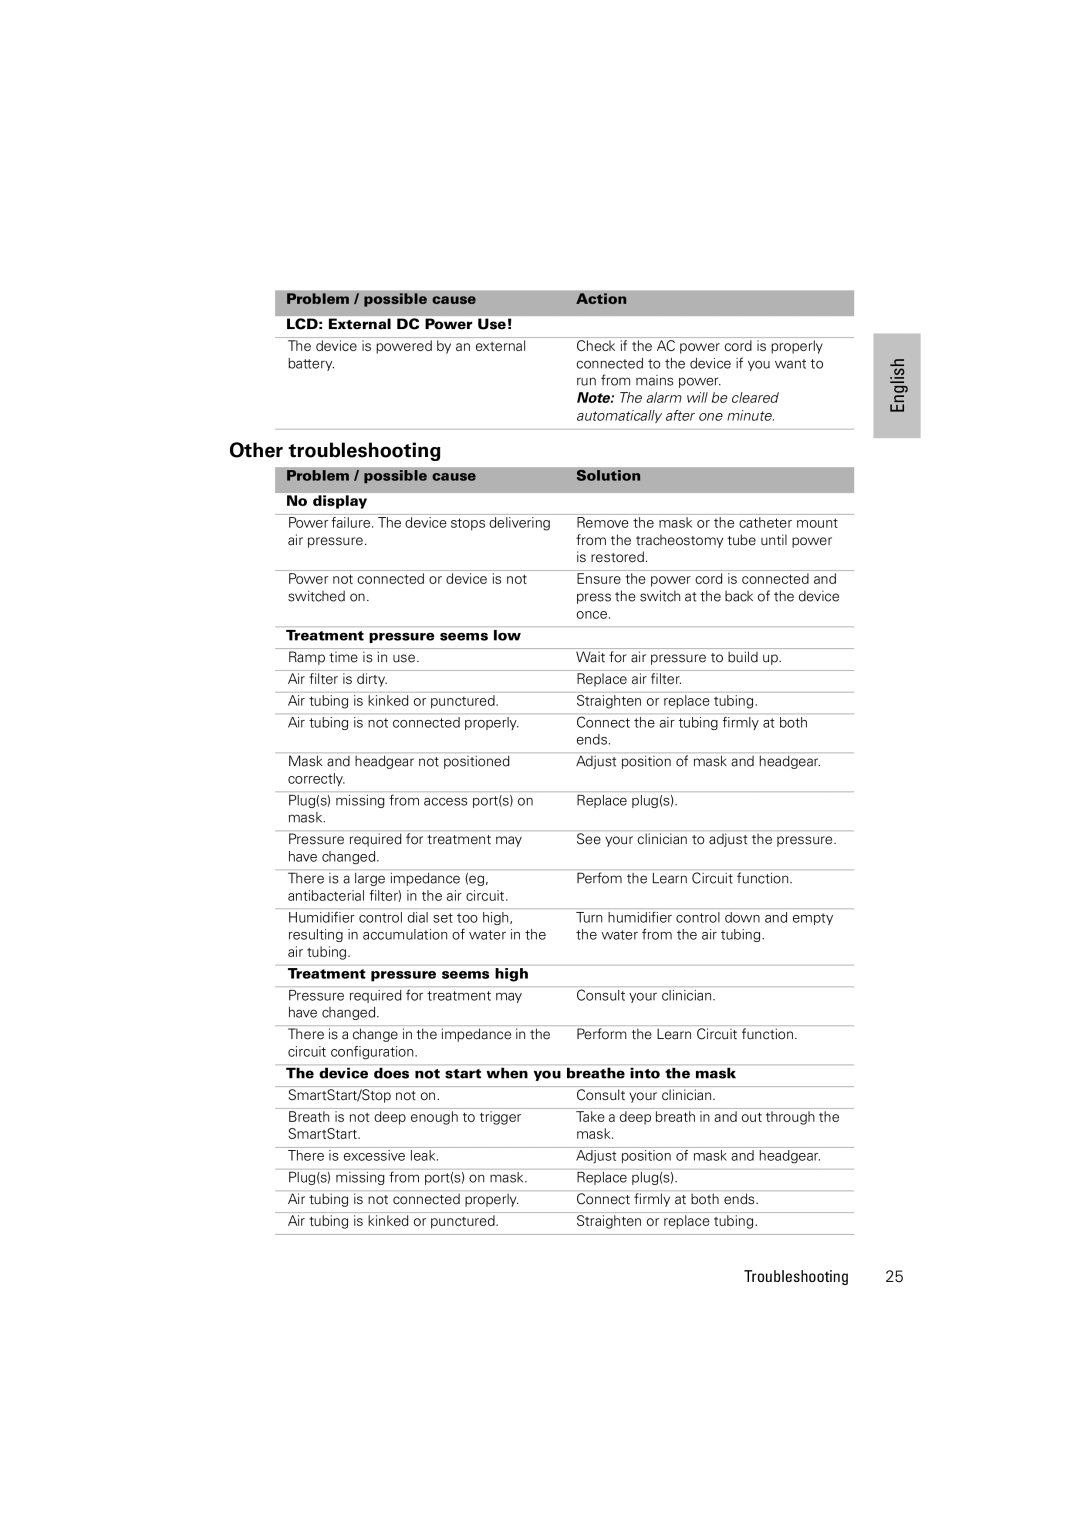
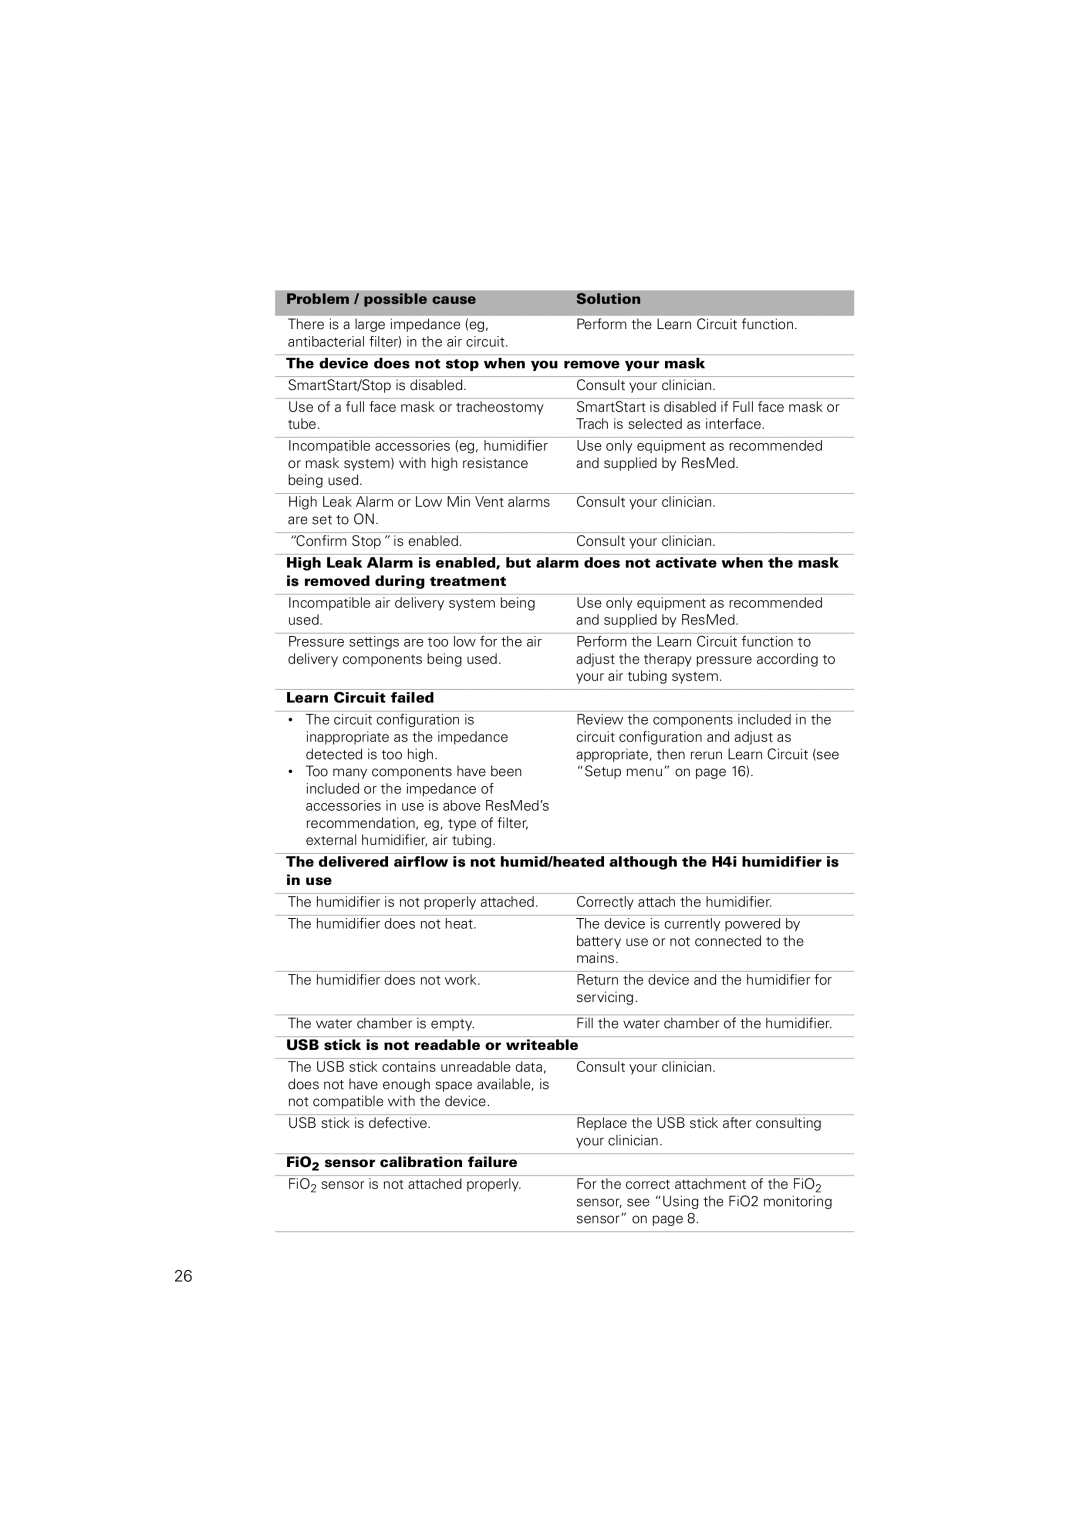
Additionally the Internal battery use alarm will be displayed. Press the Alarm mute button to clear the alarm.
To recharge the internal battery, connect the device to mains power. It can take up to three hours to fully recharge the internal battery, however this can vary depending on environmental conditions and if the device is in use.
Maintenance
The internal battery has to be discharged and recharged every six months.
1Remove the power cord while the Stellar is turned on
2Reconnect the power cord to the mains power. The internal battery will be fully recharged.
Storing
If the device is stored for a longer period the internal battery should be at the charge level of approximately 50% to increase the durability.
Note: Check the charge level every six months, if necessary recharge the internal battery to a charge level of 50%.
ResMed USB stick
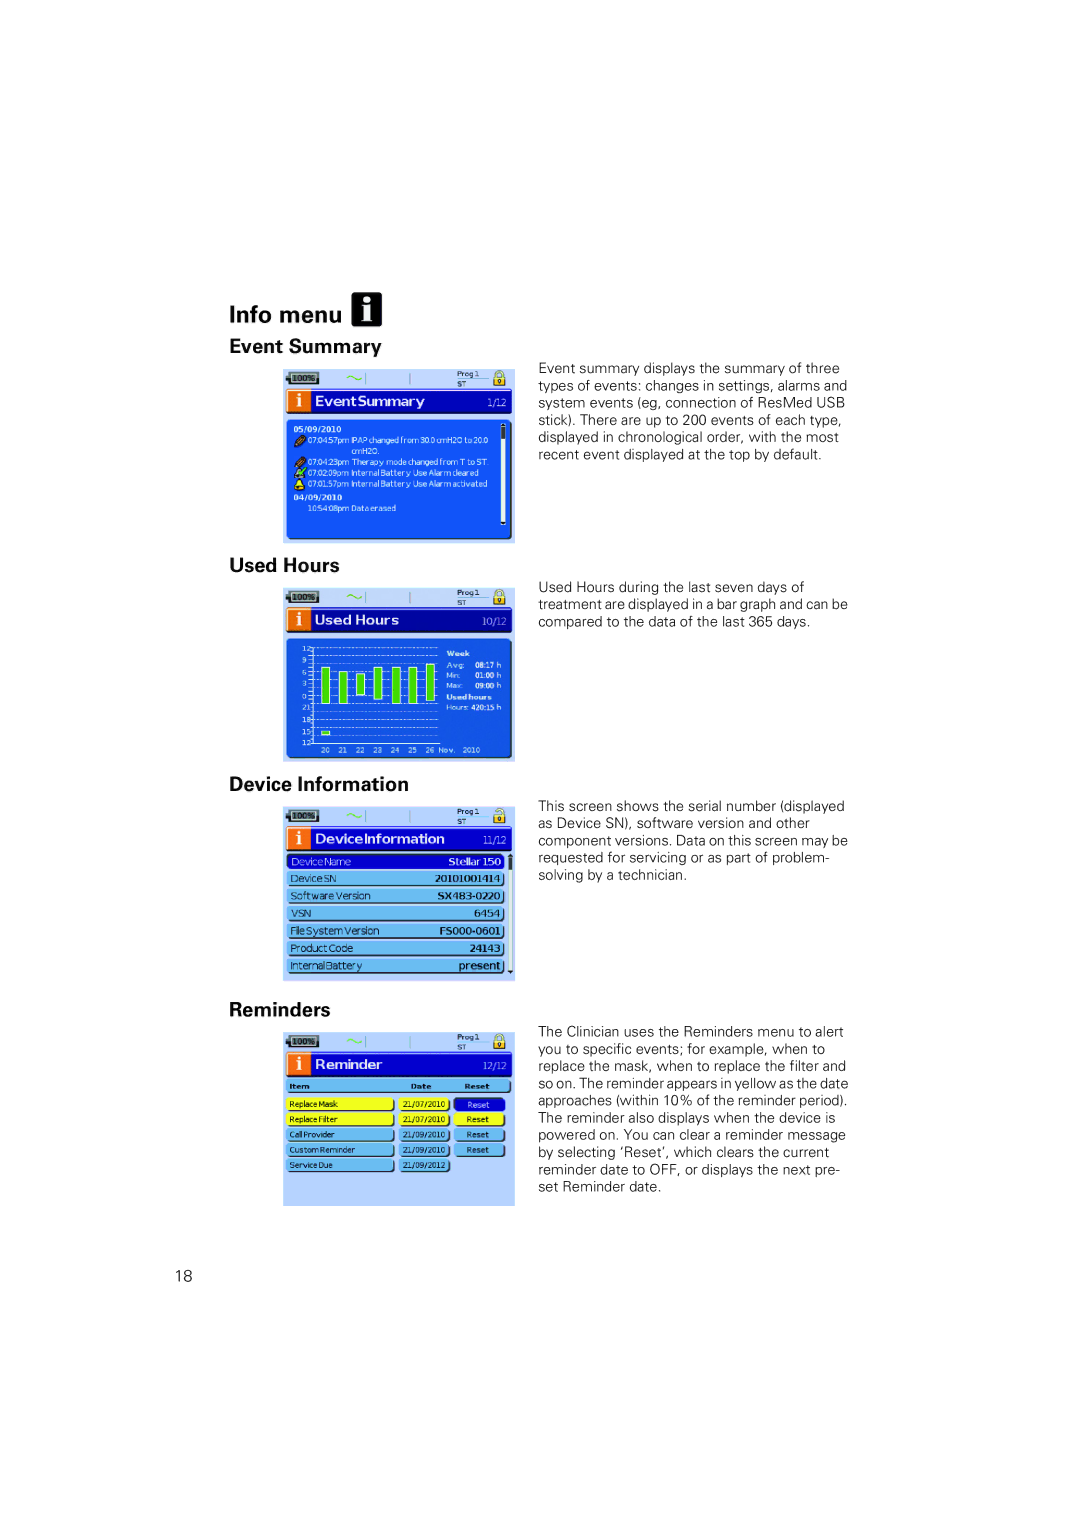
A ResMed USB stick may be used with the device either to help the clinician to monitor your treatment or to provide you with updated device settings. For more information, see “Data management” on page 19.
Use on an aircraft
ResMed confirms that the Stellar can be used during all phases of air travel without further testing or approval by the airline operator. See “Technical specifications” on page 27.
English |
Stellar at a glance | 3 |
