Installing the Router on a Workbench 23
Figure 10 Mounting the Router on a Vertical Surface
Installing the Router | You can install any Router 3000 on a workbench. |
on a Workbench | To install the router on a workbench, take the following precautions: |
| |
| ■ Ensure that the workbench is smooth and stable. |
| ■ Leave a |
| ■ Do not put heavy objects on the router. |
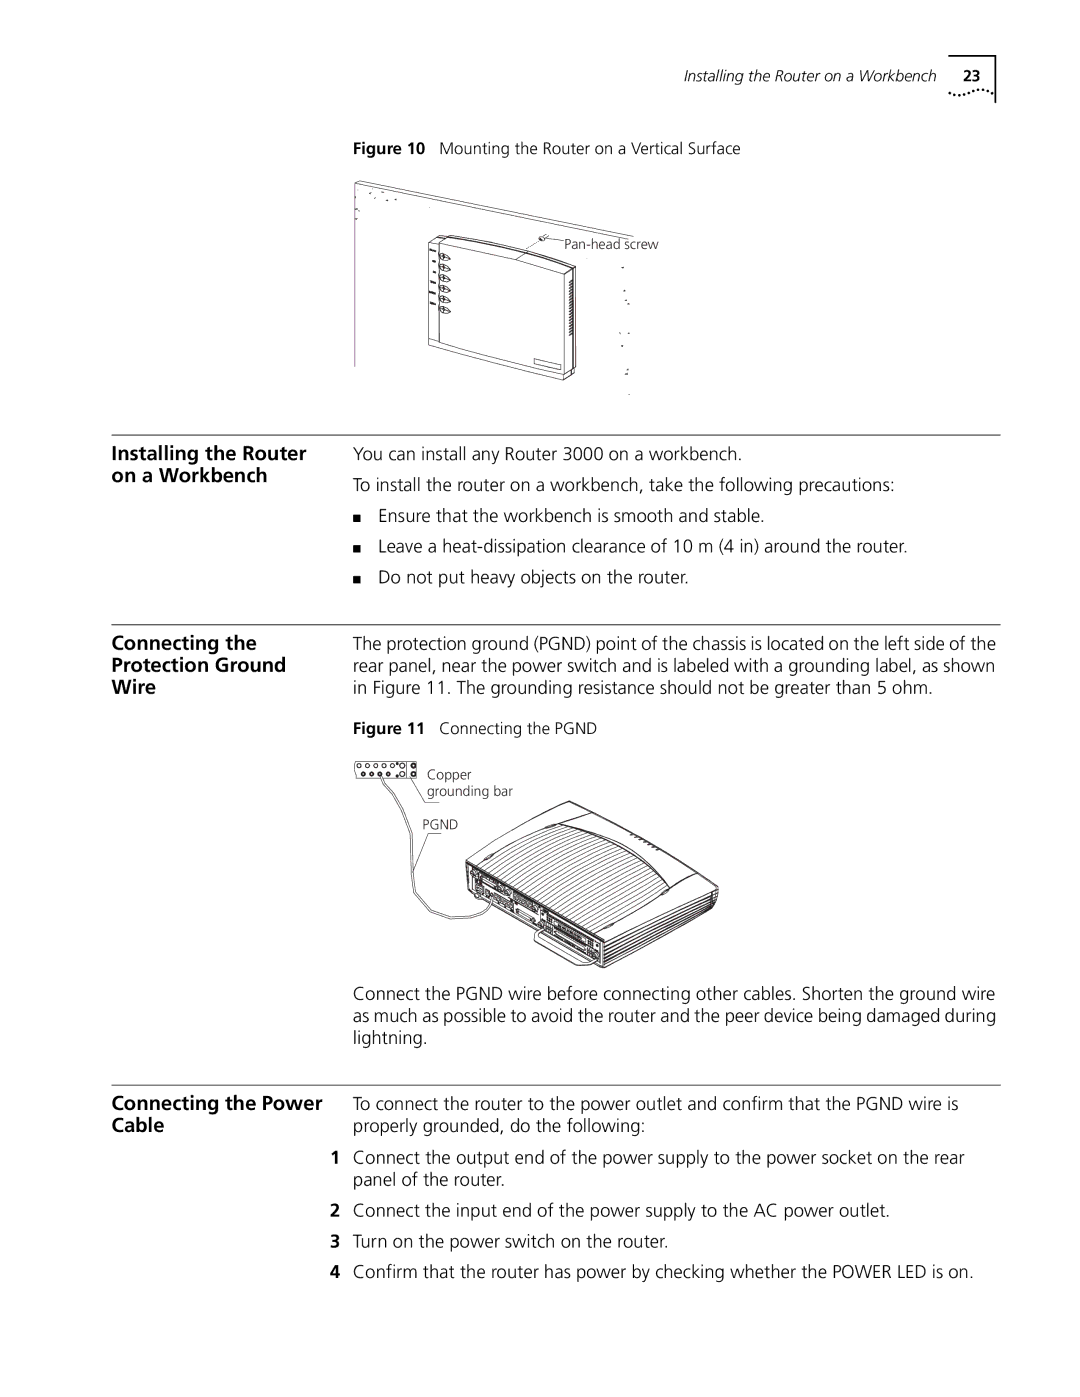
Connecting the | The protection ground (PGND) point of the chassis is located on the left side of the |
Protection Ground | rear panel, near the power switch and is labeled with a grounding label, as shown |
Wire | in Figure 11. The grounding resistance should not be greater than 5 ohm. |
| Figure 11 Connecting the PGND |
| Copper |
| grounding bar |
| PGND |
Connect the PGND wire before connecting other cables. Shorten the ground wire as much as possible to avoid the router and the peer device being damaged during lightning.
Connecting the Power To connect the router to the power outlet and confirm that the PGND wire is
Cable | properly grounded, do the following: |
1 | Connect the output end of the power supply to the power socket on the rear |
| panel of the router. |
2 | Connect the input end of the power supply to the AC power outlet. |
3 | Turn on the power switch on the router. |
4 | Confirm that the router has power by checking whether the POWER LED is on. |