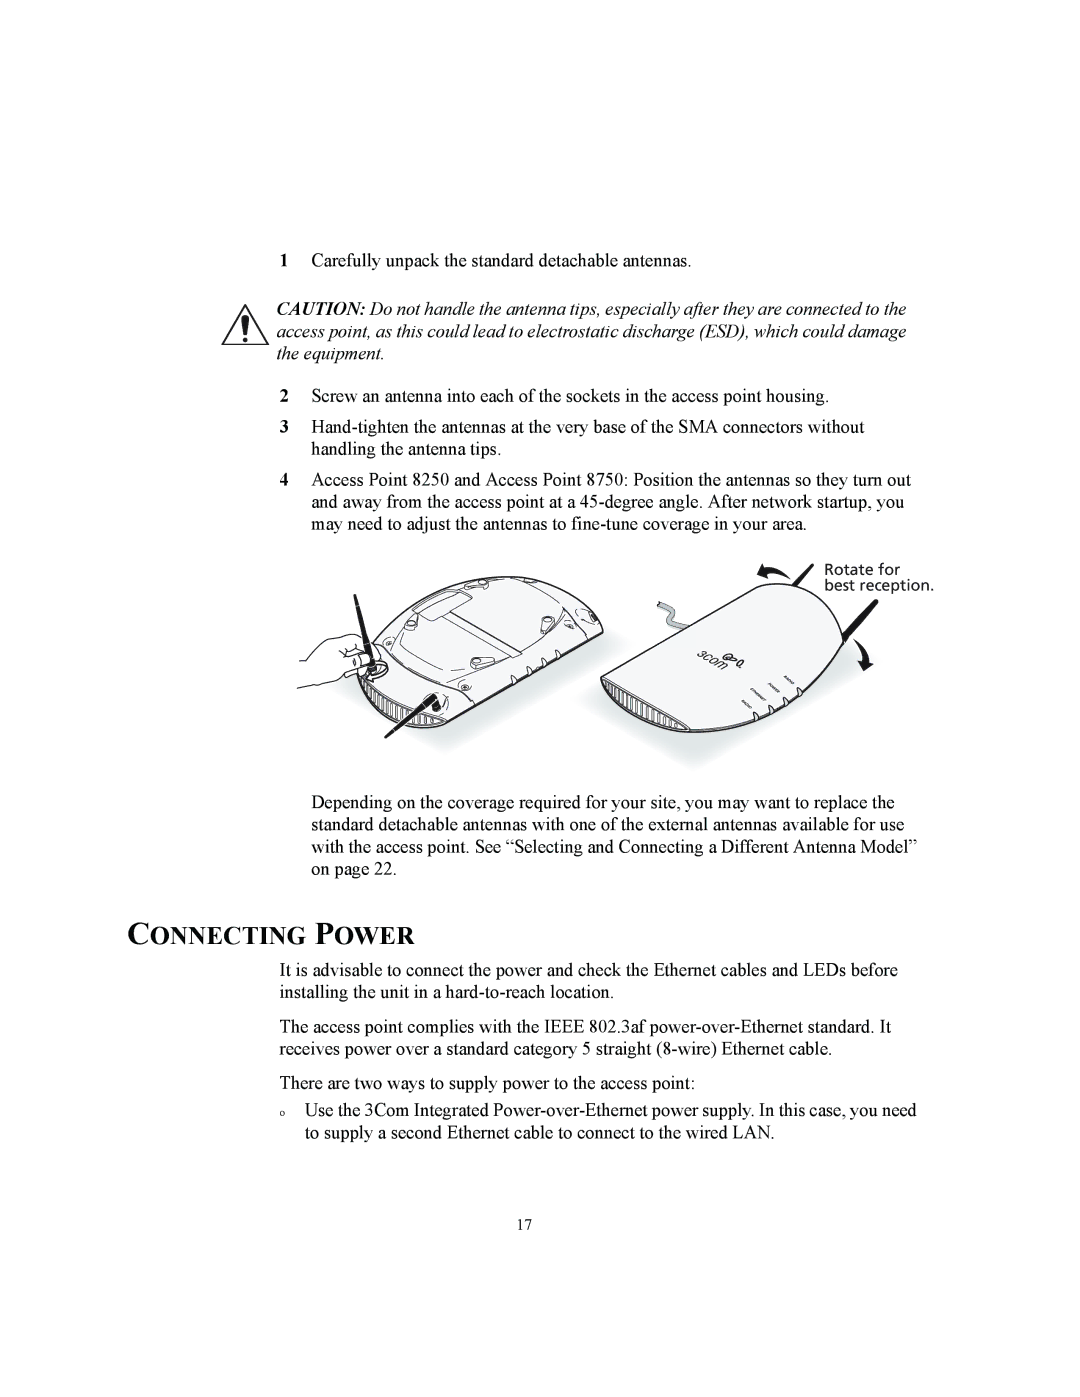
1Carefully unpack the standard detachable antennas.
CAUTION: Do not handle the antenna tips, especially after they are connected to the access point, as this could lead to electrostatic discharge (ESD), which could damage the equipment.
2Screw an antenna into each of the sockets in the access point housing.
3
4Access Point 8250 and Access Point 8750: Position the antennas so they turn out and away from the access point at a
Rotate for best reception.
Depending on the coverage required for your site, you may want to replace the standard detachable antennas with one of the external antennas available for use with the access point. See “Selecting and Connecting a Different Antenna Model” on page 22.
CONNECTING POWER
It is advisable to connect the power and check the Ethernet cables and LEDs before installing the unit in a
The access point complies with the IEEE 802.3af
There are two ways to supply power to the access point:
oUse the 3Com Integrated
17