15. Writing 3M™ iD Markers
The Write Mode enables the user to write information into 3M™ iD markers. It is also possible to edit the information to be written into an iD Marker.
Menu/OK [5:Toggle to MAIN MENU] + Write Mode [SK:1:1]
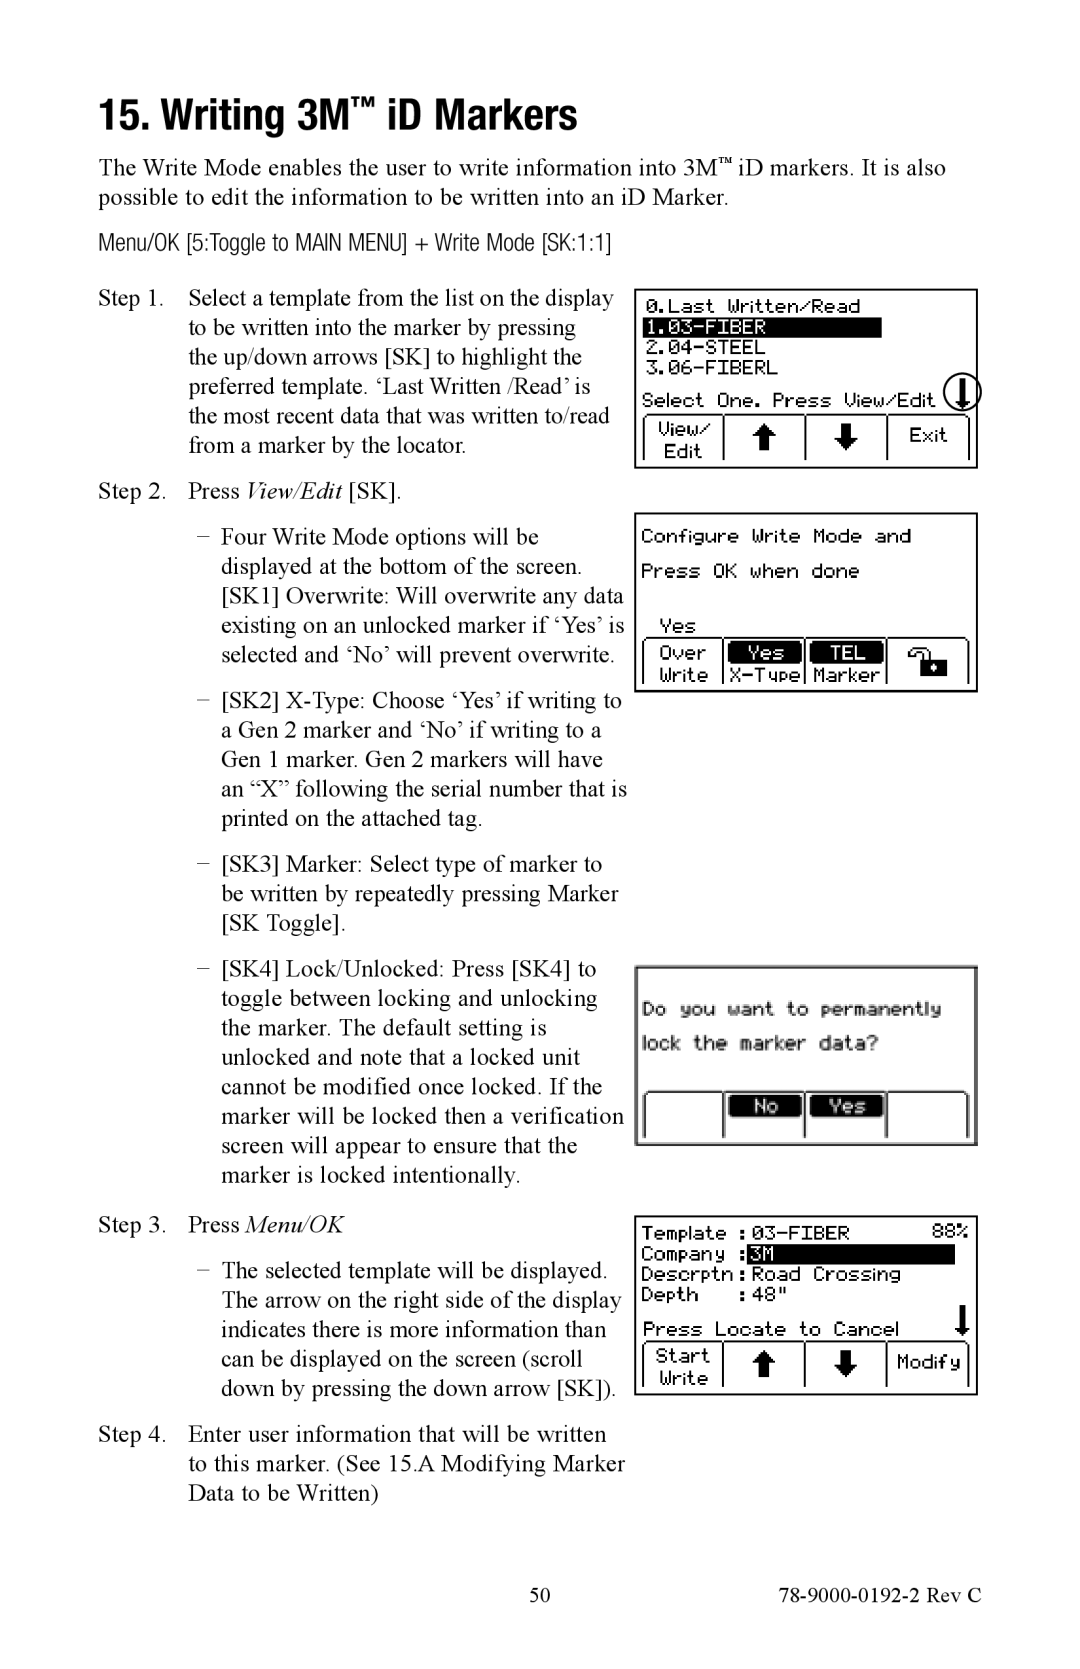
Step 1. Select a template from the list on the display to be written into the marker by pressing the up/down arrows [SK] to highlight the preferred template. ‘Last Written /Read’ is the most recent data that was written to/read from a marker by the locator.
Step 2. Press View/Edit [SK].
−− Four Write Mode options will be displayed at the bottom of the screen. [SK1] Overwrite: Will overwrite any data existing on an unlocked marker if ‘Yes’ is selected and ‘No’ will prevent overwrite.
−− [SK2]
−− [SK3] Marker: Select type of marker to be written by repeatedly pressing Marker [SK Toggle].
−− [SK4] Lock/Unlocked: Press [SK4] to toggle between locking and unlocking the marker. The default setting is unlocked and note that a locked unit cannot be modified once locked. If the marker will be locked then a verification screen will appear to ensure that the marker is locked intentionally.
Step 3. Press Menu/OK
−− The selected template will be displayed. The arrow on the right side of the display indicates there is more information than can be displayed on the screen (scroll down by pressing the down arrow [SK]).
Step 4. Enter user information that will be written to this marker. (See 15.A Modifying Marker Data to be Written)
50 |
|