CHAPTER 3: CREATE A NEW URL GAUGE STEP 3: DEFINE THE GAUGE
Step 3: Define the Gauge
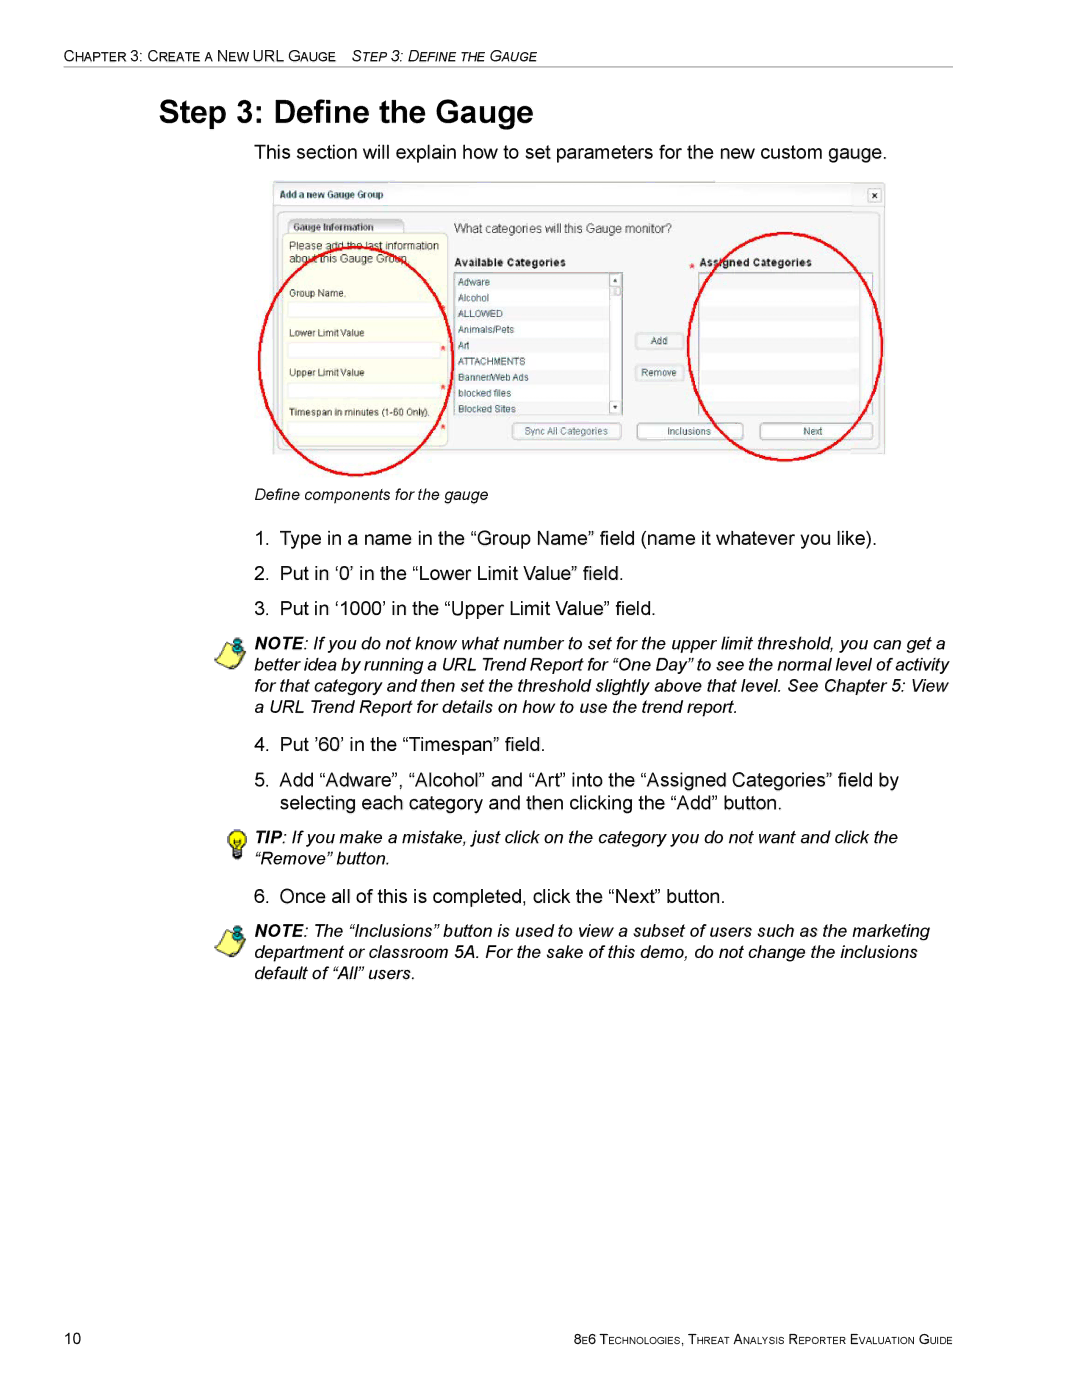
This section will explain how to set parameters for the new custom gauge.
Define components for the gauge
1.Type in a name in the “Group Name” field (name it whatever you like).
2.Put in ‘0’ in the “Lower Limit Value” field.
3.Put in ‘1000’ in the “Upper Limit Value” field.
NOTE: If you do not know what number to set for the upper limit threshold, you can get a better idea by running a URL Trend Report for “One Day” to see the normal level of activity for that category and then set the threshold slightly above that level. See Chapter 5: View a URL Trend Report for details on how to use the trend report.
4.Put ’60’ in the “Timespan” field.
5.Add “Adware”, “Alcohol” and “Art” into the “Assigned Categories” field by selecting each category and then clicking the “Add” button.
TIP: If you make a mistake, just click on the category you do not want and click the “Remove” button.
6. Once all of this is completed, click the “Next” button.
NOTE: The “Inclusions” button is used to view a subset of users such as the marketing department or classroom 5A. For the sake of this demo, do not change the inclusions default of “All” users.
10 | 8E6 TECHNOLOGIES, THREAT ANALYSIS REPORTER EVALUATION GUIDE |
