S19
S20
4. Assembly and Disassembly Procedures (continued) |
| ACER G24 |
|
| 15 | ||
| Go to cover page |
| |||||
|
|
|
|
| |||
|
|
|
|
| |||
Assemble the hinge cover into both two sides | S23 | Take two cushion foams; one is held the above |
| ||||
| side of LCD monitor, and another is held the |
| |||||
|
|
| |||||
below side.
Stick a screen card on the front bezel with two tapes.
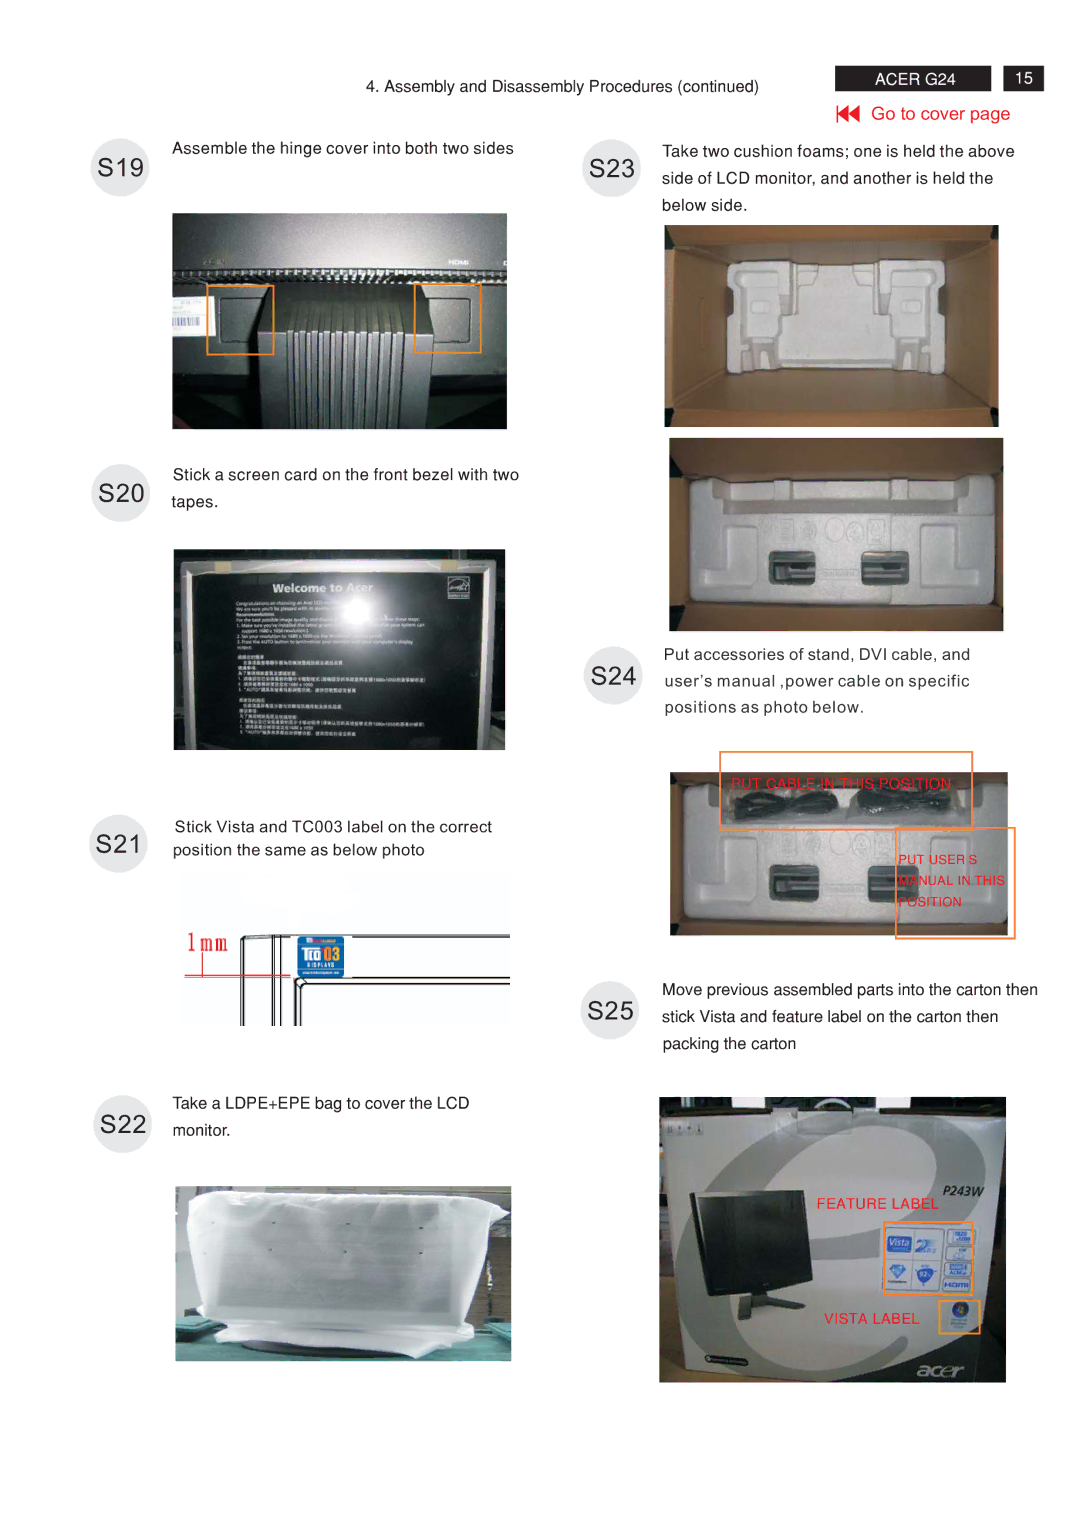
Put accessories of stand, DVI cable, and
S24 user’s manual ,power cable on specific
positions as photo below.
S21
Stick Vista and TC003 label on the correct position the same as below photo
PUT CABLE IN THIS POSITION
PUT USER S
MANUAL IN THIS
POSITION
S22
Move previous assembled parts into the carton then
S25 | stick Vista and feature label on the carton then |
| packing the carton |
Take a LDPE+EPE bag to cover the LCD
monitor.
FEATURE LABEL
VISTA LABEL