Manuals
/
Advantek Networks
/
Computer Equipment
/
Switch
Advantek Networks
ANS-24RV user manual The SmartSwitch Home overview
Models:
ANS-24RV
1
10
28
28
Download
28 pages
14.1 Kb
7
8
9
10
11
12
13
14
<
>
Install
Class of Service Configuration
Power Connecting
Setup HyperTerminal
Load Default Setting
Make Sure the Firewall Setting
Restore
In this page, you can set and update the IP Address, Subnet Mask, and
Login
Administrator
Page 10
Image 10
2.3 The SmartSwitch Home overview
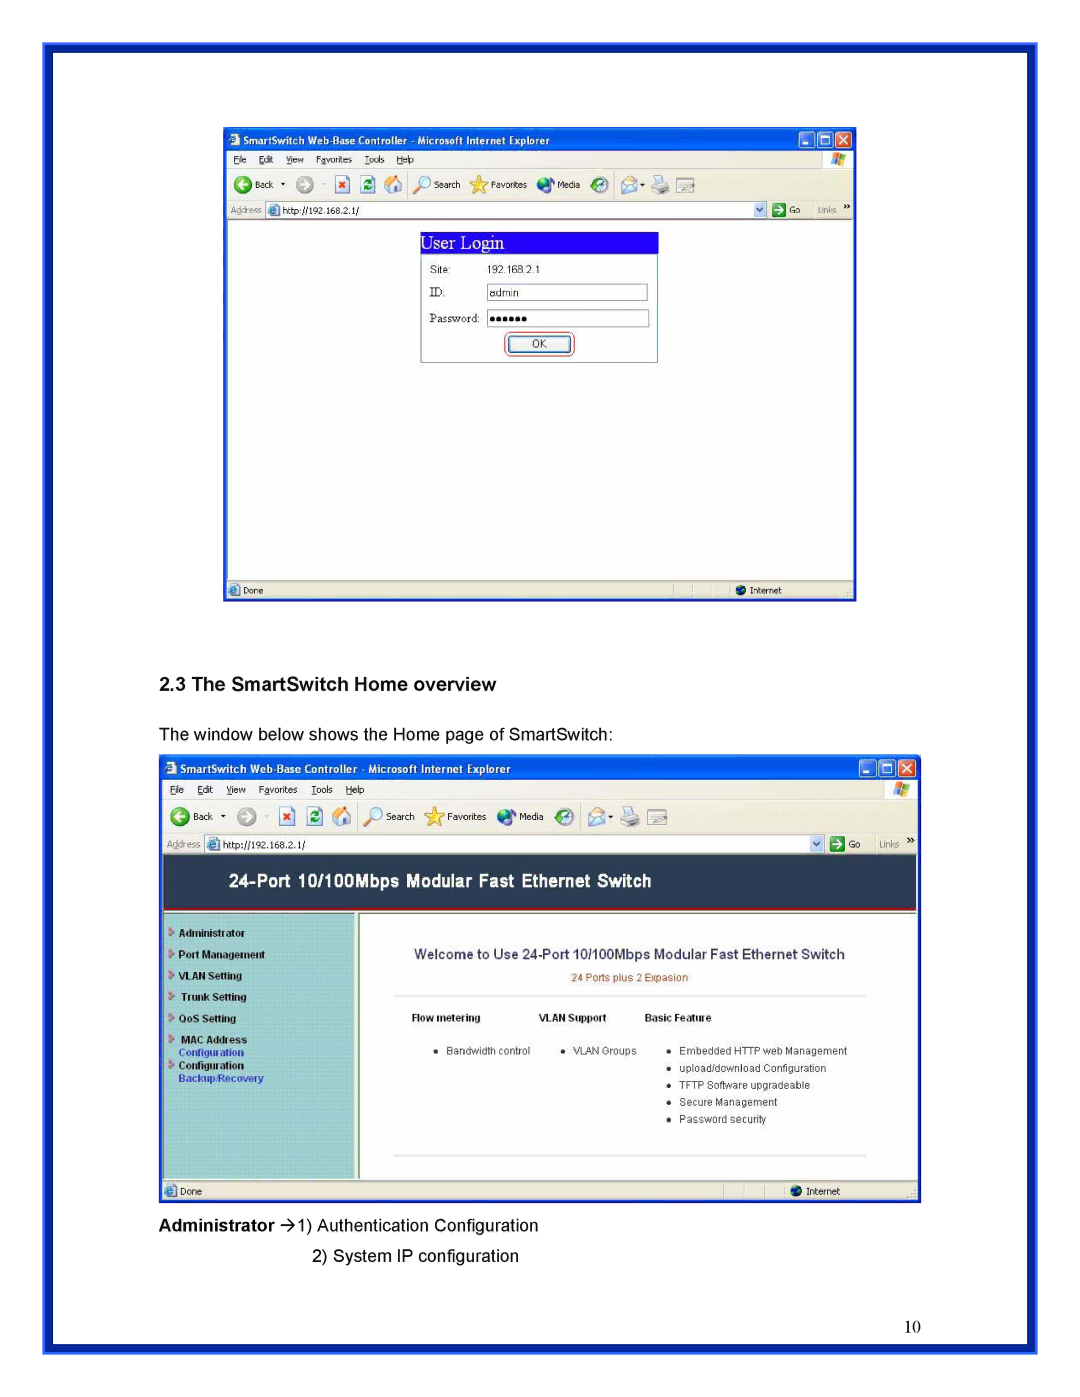
The window below shows the Home page of SmartSwitch:
Administrator
Æ
1) Authentication Configuration 2) System IP configuration
10
Page 9
Page 11
Page 10
Image 10
Page 9
Page 11
Contents
24 Port Fast Ethernet Switch with VLAN and Trunking User Manual
Model # ANS-24RV
CE Mark Warning
FCC Warning
Copyright1999 All Rights Reserved
Trademarks
Contents
2.10 Configuration
2.8.2 Class of Service Configuration
2.9.1 MAC Address Configuration
2.10.1 Configuration Backup/Recovery
1. Introduction
1.2 Product Features
1.3 Package contents
1.1 General Description
1.7 Connecting computers to the switch
1.4 Front panel LED indicators
1.6 Power Connecting
1.5 Rear panel
1.9 To prolong the operational life of your units
2.1 Configure system network
2. Installing the Fast Ethernet Switch
Step 2 Select “Internet Protocol TCP/IP”, and then click “Properties”
2.2 Login the Web
2.3 The SmartSwitch Home overview
The window below shows the Home page of SmartSwitch
2.4 Administrator
2.4.1 Authentication Configuration
Gateway
2.4.2 System IP Configuration
In this page, you can set and update the IP Address, Subnet Mask, and
2.4.3 System Status
process is
2.4.4 Load Default Setting
be set to default setting
completed, you will see the screen as below
2 Disable both TFTP server and DHCP server
2.4.5 Firmware update
1 Click “Control Panel” Æ “System Management Tool” Æ “Service”
3 Make Sure the Firewall Setting
Step1 Click the “Settings” item and set base Directory
5 Press the “Update” button which is shown on the Web page
2.5 Port Management
2.5.1 Port Configuration
2.5.2 Port Mirroring
2.5.3 Bandwidth Control
2.5.4 Broadcast Storm Control
2.6.1 Group VLAN Setting
2.6 VLAN Setting
2.6.2 Multi to 1 Setting
2.7.1 Trunk Configuration
2.7 Trunk Setting
“Destination address” or “SD &DA”
2.8.1 Priority Mode
2.8 QoS Setting
2.8.2 Class of Service Configuration
Priority”
2.9 MAC Address
2.9.1 MAC Address Configuration
2.10 Configuration
2.10.1 Configuration Backup/Recovery
3.2 Setup HyperTerminal
3.1 Connecting to the Switch Console Port
3. Console User Interface
correct icon
Step 3 Select “COM1” in the “Connect using” field and then click “OK”
and then click “Ok” button
Page
After you enter the Modular Console, the Switch Main Menu will appear
3.3 Configure Switching Hub via COM1 Port 3.3.1 Switch Main Menu
3.3.2 Load Default Setting
This page allows user to restore default port settings
to restore
In the 1st option to 3rd option 1. Restore switch default setting/2
Restore
default settings