Installing Your Analyzer
STEP 4. Configure the Analyzer
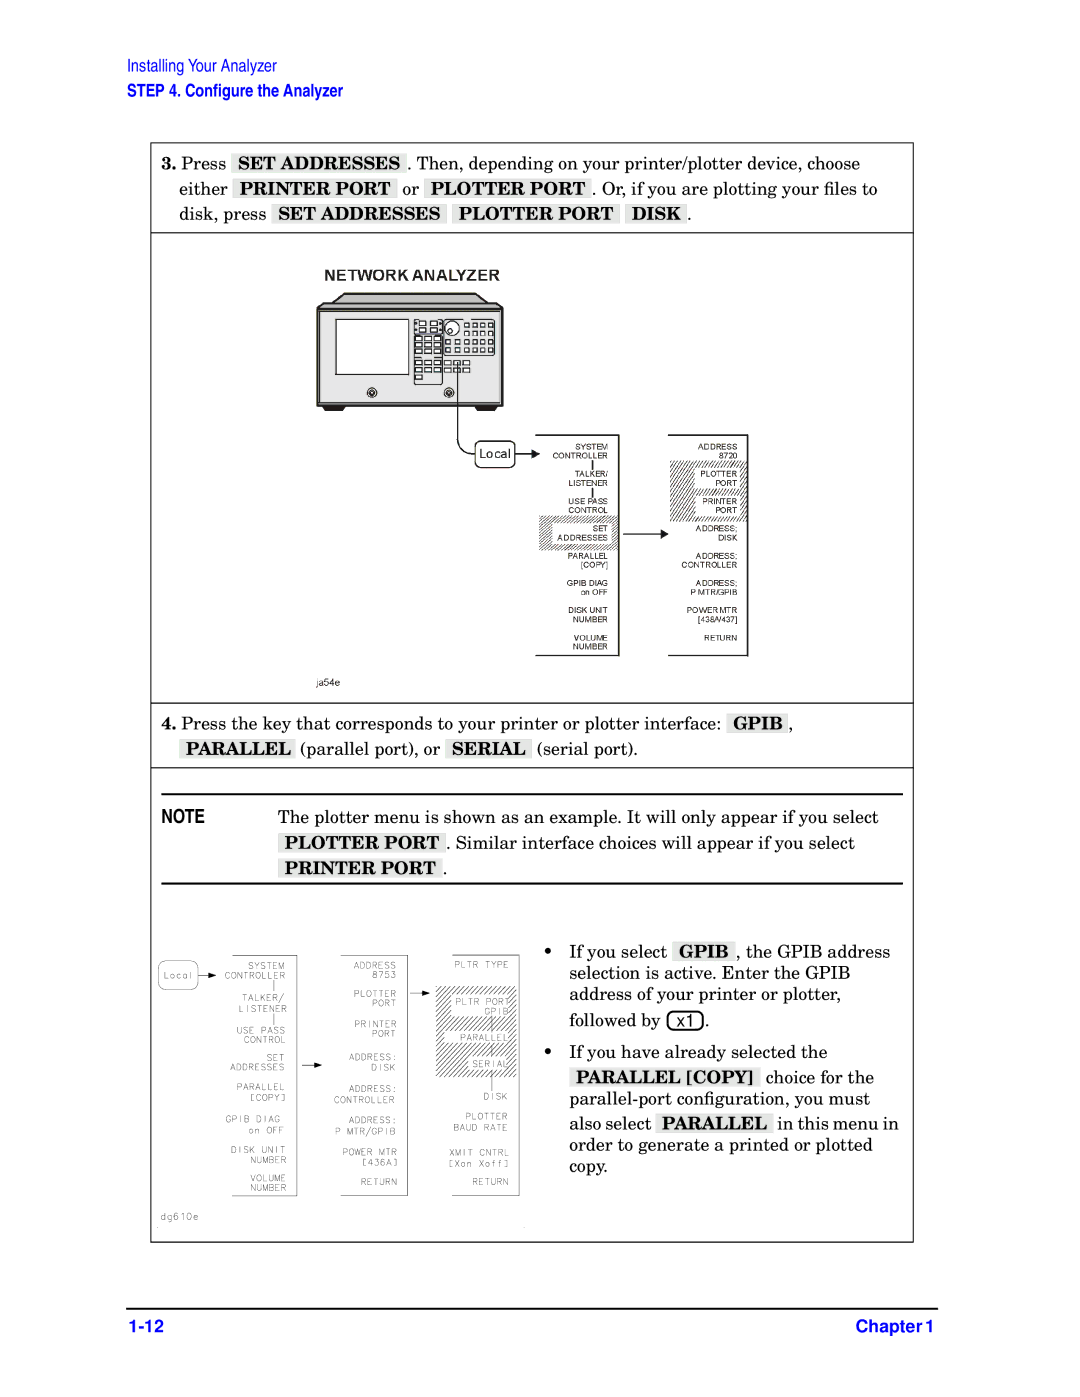
3.Press SET ADDRESSES . Then, depending on your printer/plotter device, choose either PRINTER PORT or PLOTTER PORT . Or, if you are plotting your files to disk, press SET ADDRESSES PLOTTER PORT DISK .
4.Press the key that corresponds to your printer or plotter interface: GPIB , PARALLEL (parallel port), or SERIAL (serial port).
NOTE | The plotter menu is shown as an example. It will only appear if you select | ||
|
|
| . Similar interface choices will appear if you select |
| PLOTTER PORT | ||
|
| . | |
| PRINTER PORT | ||
|
|
|
|
• If you select GPIB , the GPIB address selection is active. Enter the GPIB address of your printer or plotter,
followed by ![]() x1
x1![]() .
.
• If you have already selected the
PARALLEL [COPY] choice for the
Chapter 1 |
