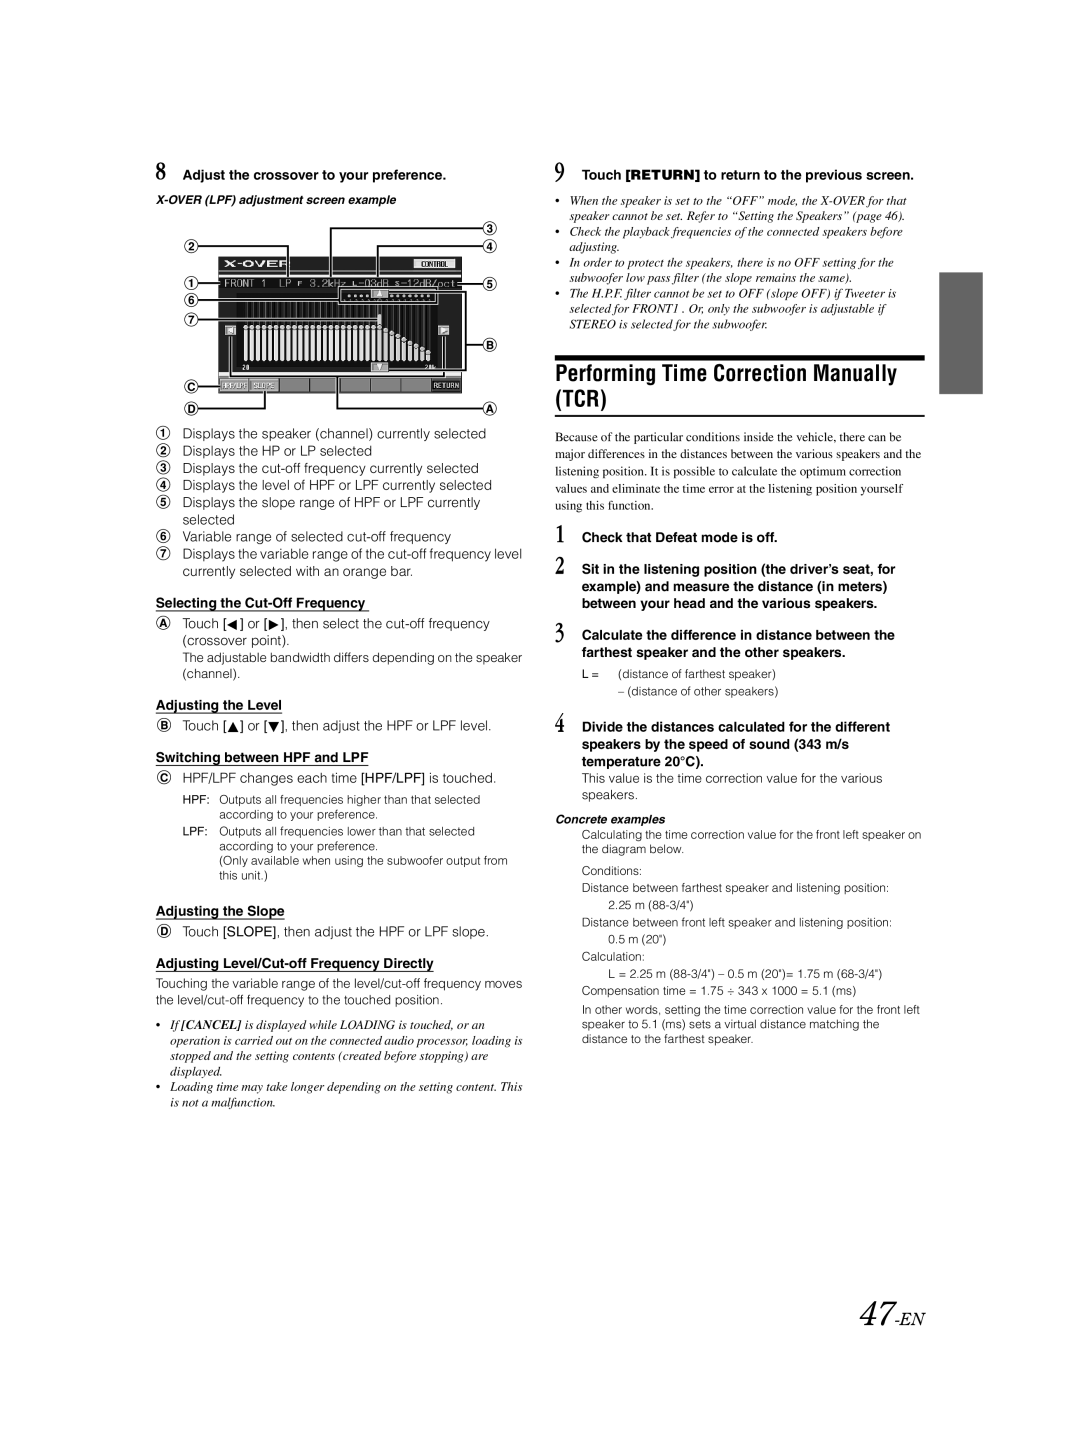
8 Adjust the crossover to your preference.
Displays the speaker (channel) currently selected Displays the HP or LP selected
Displays the
Variable range of selected
Displays the variable range of the
Selecting the Cut-Off Frequency
Touch [![]() ] or [
] or [![]() ], then select the
], then select the
The adjustable bandwidth differs depending on the speaker (channel).
Adjusting the Level
Touch [![]() ] or [
] or [![]() ], then adjust the HPF or LPF level.
], then adjust the HPF or LPF level.
Switching between HPF and LPF
HPF/LPF changes each time [HPF/LPF] is touched.
HPF: Outputs all frequencies higher than that selected according to your preference.
LPF: Outputs all frequencies lower than that selected according to your preference.
(Only available when using the subwoofer output from this unit.)
Adjusting the Slope
Touch [SLOPE], then adjust the HPF or LPF slope.
Adjusting Level/Cut-off Frequency Directly
Touching the variable range of the
•If [CANCEL] is displayed while LOADING is touched, or an operation is carried out on the connected audio processor, loading is stopped and the setting contents (created before stopping) are displayed.
•Loading time may take longer depending on the setting content. This is not a malfunction.
9 Touch [RETURN] to return to the previous screen.
•When the speaker is set to the “OFF” mode, the
•Check the playback frequencies of the connected speakers before adjusting.
•In order to protect the speakers, there is no OFF setting for the subwoofer low pass filter (the slope remains the same).
•The H.P.F. filter cannot be set to OFF (slope OFF) if Tweeter is selected for FRONT1 . Or, only the subwoofer is adjustable if STEREO is selected for the subwoofer.
Performing Time Correction Manually (TCR)
Because of the particular conditions inside the vehicle, there can be major differences in the distances between the various speakers and the listening position. It is possible to calculate the optimum correction values and eliminate the time error at the listening position yourself using this function.
1 Check that Defeat mode is off.
2 Sit in the listening position (the driver’s seat, for example) and measure the distance (in meters) between your head and the various speakers.
3 Calculate the difference in distance between the farthest speaker and the other speakers.
L = (distance of farthest speaker)
– (distance of other speakers)
4 Divide the distances calculated for the different speakers by the speed of sound (343 m/s temperature 20°C).
This value is the time correction value for the various speakers.
Concrete examples
Calculating the time correction value for the front left speaker on the diagram below.
Conditions:
Distance between farthest speaker and listening position: 2.25 m
Distance between front left speaker and listening position:
0.5m (20")
Calculation:
L = 2.25 m
In other words, setting the time correction value for the front left speaker to 5.1 (ms) sets a virtual distance matching the distance to the farthest speaker.