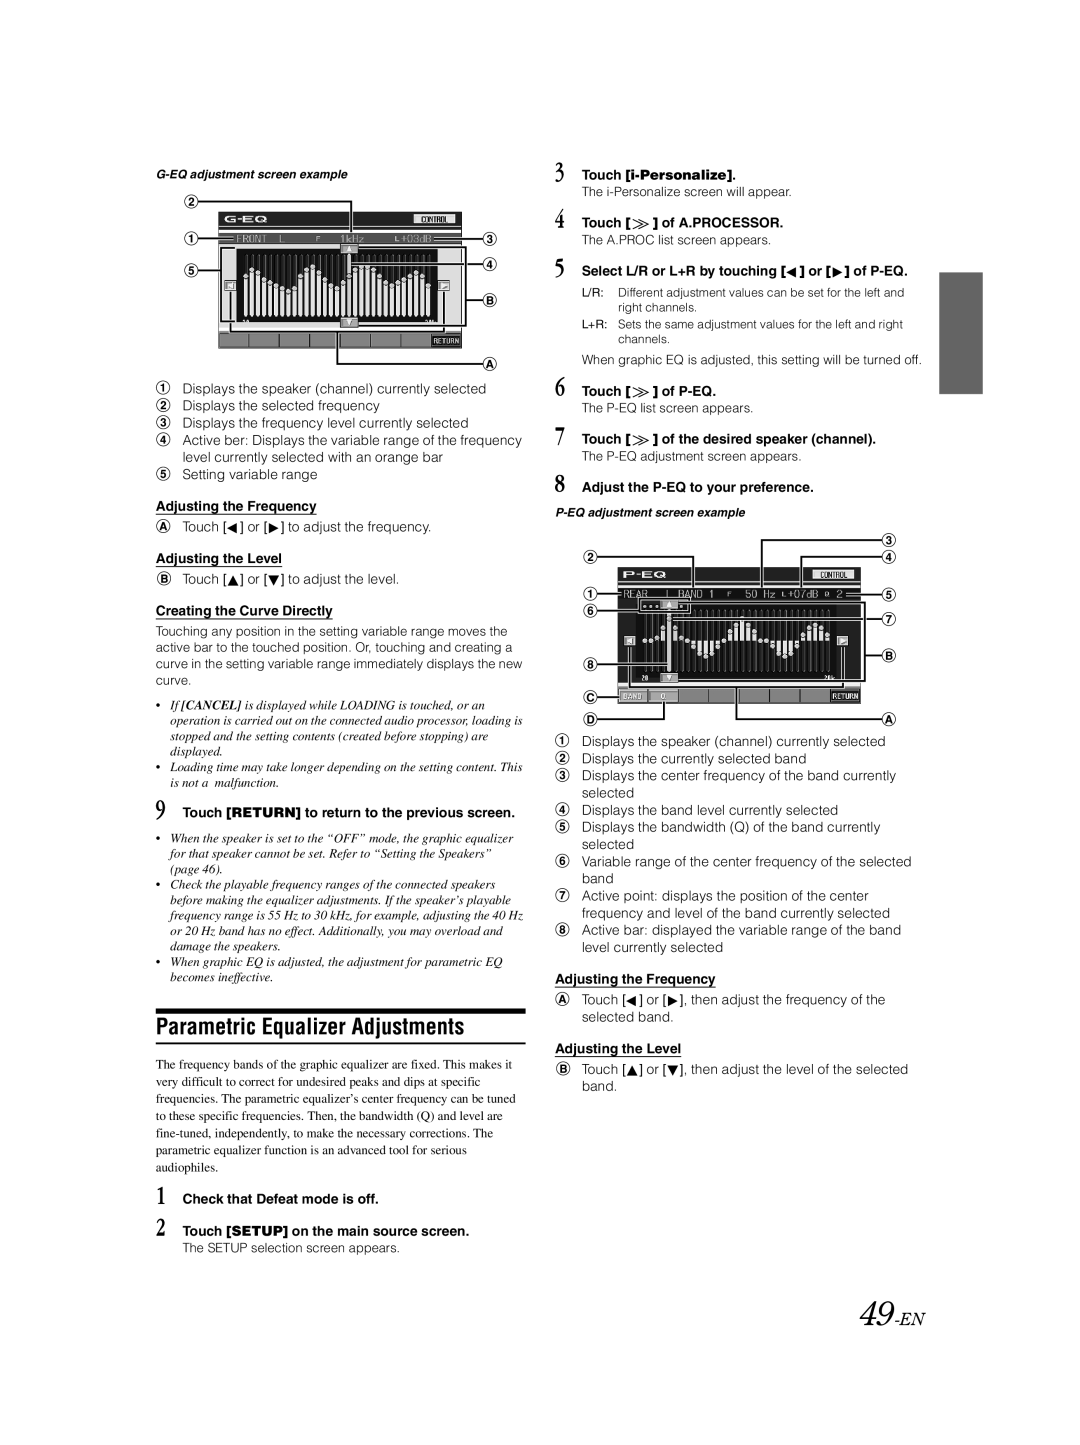
Displays the speaker (channel) currently selected Displays the selected frequency
Displays the frequency level currently selected
Active ber: Displays the variable range of the frequency level currently selected with an orange bar
Setting variable range
Adjusting the Frequency
Touch [![]() ] or [
] or [![]() ] to adjust the frequency.
] to adjust the frequency.
Adjusting the Level
Touch [![]() ] or [
] or [![]() ] to adjust the level.
] to adjust the level.
Creating the Curve Directly
Touching any position in the setting variable range moves the active bar to the touched position. Or, touching and creating a curve in the setting variable range immediately displays the new curve.
•If [CANCEL] is displayed while LOADING is touched, or an operation is carried out on the connected audio processor, loading is stopped and the setting contents (created before stopping) are displayed.
•Loading time may take longer depending on the setting content. This is not a malfunction.
9 Touch [RETURN] to return to the previous screen.
•When the speaker is set to the “OFF” mode, the graphic equalizer for that speaker cannot be set. Refer to “Setting the Speakers” (page 46).
•Check the playable frequency ranges of the connected speakers before making the equalizer adjustments. If the speaker’s playable frequency range is 55 Hz to 30 kHz, for example, adjusting the 40 Hz or 20 Hz band has no effect. Additionally, you may overload and damage the speakers.
•When graphic EQ is adjusted, the adjustment for parametric EQ becomes ineffective.
Parametric Equalizer Adjustments
The frequency bands of the graphic equalizer are fixed. This makes it very difficult to correct for undesired peaks and dips at specific frequencies. The parametric equalizer’s center frequency can be tuned to these specific frequencies. Then, the bandwidth (Q) and level are
1 Check that Defeat mode is off.
2 Touch [SETUP] on the main source screen.
The SETUP selection screen appears.
3 | Touch | |
| The | |
4 | Touch [ | ] of A.PROCESSOR. |
| The A.PROC list screen appears. | |
5 | Select L/R or L+R by touching [ ] or [ ] of | |
| L/R: Different adjustment values can be set for the left and | |
| right channels. | |
| L+R: Sets the same adjustment values for the left and right | |
| channels. | |
| When graphic EQ is adjusted, this setting will be turned off. | |
6 | Touch [ | ] of |
| The | |
7 | Touch [ | ] of the desired speaker (channel). |
| The | |
8 | Adjust the | |
Displays the speaker (channel) currently selected Displays the currently selected band
Displays the center frequency of the band currently selected
Displays the band level currently selected Displays the bandwidth (Q) of the band currently selected
Variable range of the center frequency of the selected band
Active point: displays the position of the center frequency and level of the band currently selected Active bar: displayed the variable range of the band level currently selected
Adjusting the Frequency
Touch [![]() ] or [
] or [![]() ], then adjust the frequency of the selected band.
], then adjust the frequency of the selected band.
Adjusting the Level
Touch [![]() ] or [
] or [![]() ], then adjust the level of the selected band.
], then adjust the level of the selected band.