OPERATION & SERVICE
Heating Element Ground Test
1Secure power to the water heater at the main breaker or disconnect switch.
2Verify with an AC volt meter that there is not any voltage present at the Power Distribution Block (see Figures 1 and 2 on pages 8 and 9) and at the two wiring terminals on the ends of all heating elements.
3Disconnect both power wires from the terminals on the top of all heating elements to be tested.
4Using an ohm meter: set the ohm meter to one of it’s lowest resistance ranges - 200 ohms or less initially. An audible beep continuity test setting can also be used on ohm meters so equipped.
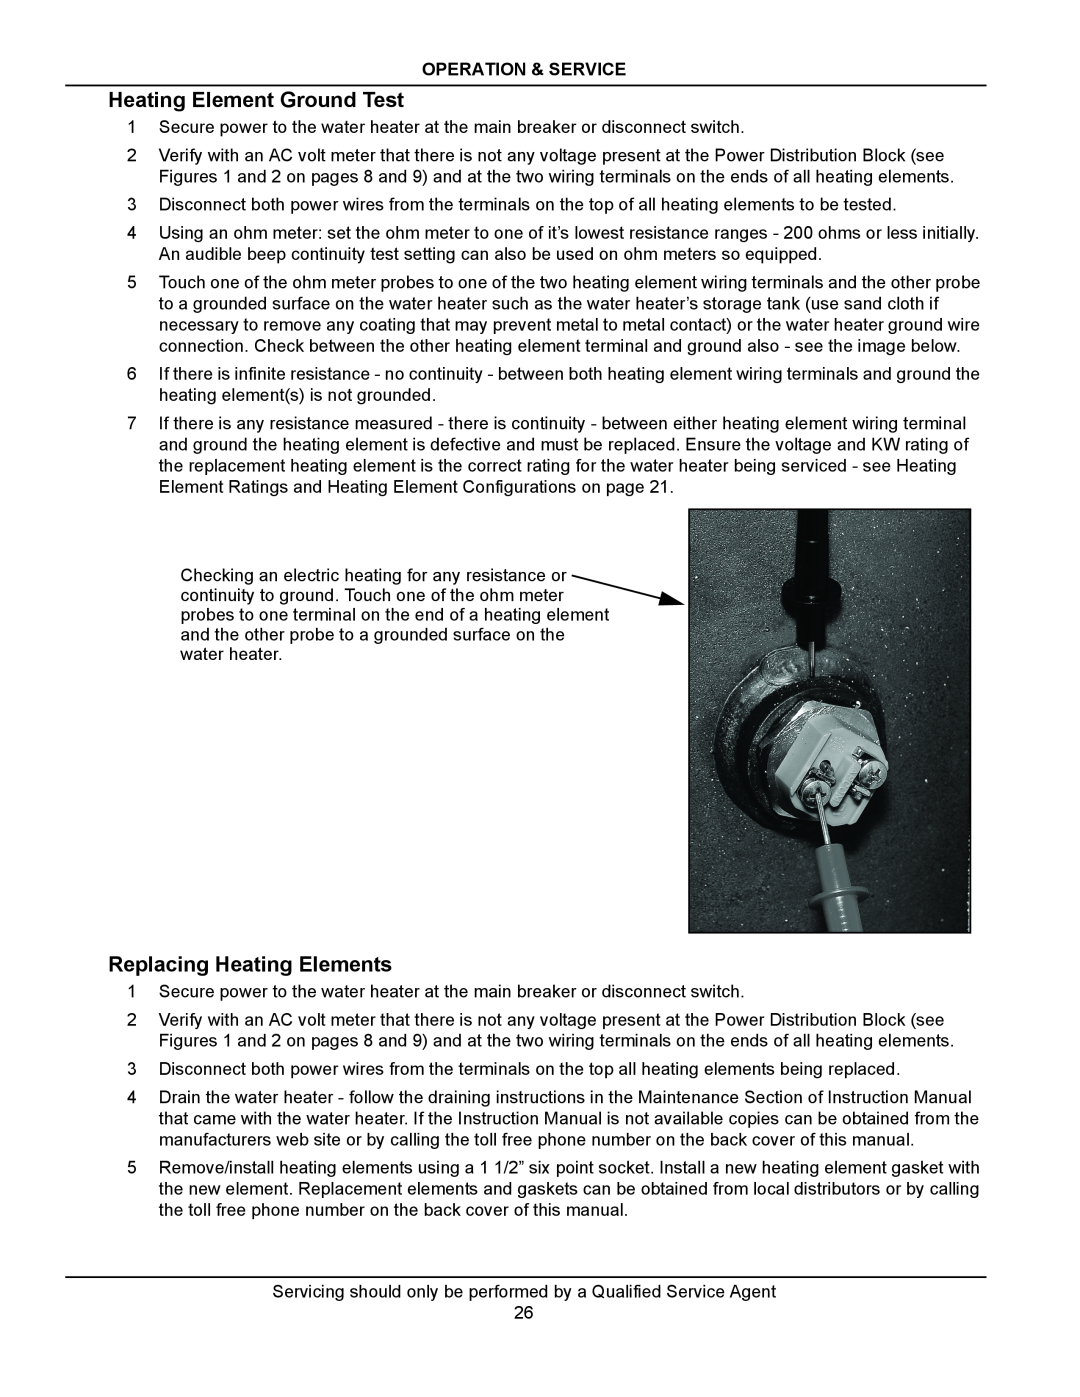
5Touch one of the ohm meter probes to one of the two heating element wiring terminals and the other probe to a grounded surface on the water heater such as the water heater’s storage tank (use sand cloth if necessary to remove any coating that may prevent metal to metal contact) or the water heater ground wire connection. Check between the other heating element terminal and ground also - see the image below.
6If there is infinite resistance - no continuity - between both heating element wiring terminals and ground the heating element(s) is not grounded.
7If there is any resistance measured - there is continuity - between either heating element wiring terminal and ground the heating element is defective and must be replaced. Ensure the voltage and KW rating of the replacement heating element is the correct rating for the water heater being serviced - see Heating Element Ratings and Heating Element Configurations on page 21.
Checking an electric heating for any resistance or continuity to ground. Touch one of the ohm meter probes to one terminal on the end of a heating element and the other probe to a grounded surface on the water heater.
Replacing Heating Elements
1Secure power to the water heater at the main breaker or disconnect switch.
2Verify with an AC volt meter that there is not any voltage present at the Power Distribution Block (see Figures 1 and 2 on pages 8 and 9) and at the two wiring terminals on the ends of all heating elements.
3Disconnect both power wires from the terminals on the top all heating elements being replaced.
4Drain the water heater - follow the draining instructions in the Maintenance Section of Instruction Manual that came with the water heater. If the Instruction Manual is not available copies can be obtained from the manufacturers web site or by calling the toll free phone number on the back cover of this manual.
5Remove/install heating elements using a 1 1/2” six point socket. Install a new heating element gasket with the new element. Replacement elements and gaskets can be obtained from local distributors or by calling the toll free phone number on the back cover of this manual.
Servicing should only be performed by a Qualified Service Agent
26
