Chapter 2 | Installing CoreModule 420 Options |
Removing the DiskOnChip (DOC)
CAUTION To prevent damage to the CoreModule 420 or the DiskOnChip, ensure the power supply to the CoreModule 420 is turned off and the power cord has been removed from the power source. Most AT power supplies will continue to provide standby current to the CoreModule 420 until the power cord is disconnected.
1.Ensure the CoreModule 420 power supply is turned off and the power cord is removed from the power supply.
CAUTION To prevent damage to the static sensitive components on the CoreModule 420, ensure you follow good Electrostatic Discharge principles. The CoreModule 420 and the DiskOnChip are sensitive to static electricity and can be easily damaged by improper handling. Do the following when handling the CoreModule 420 and its related DiskOnChip:
Always use an
Before you handle the CoreModule 420 or remove the DiskOnChip from the anti- static package, touch a grounded, unpainted metal surface to discharge any static electricity.
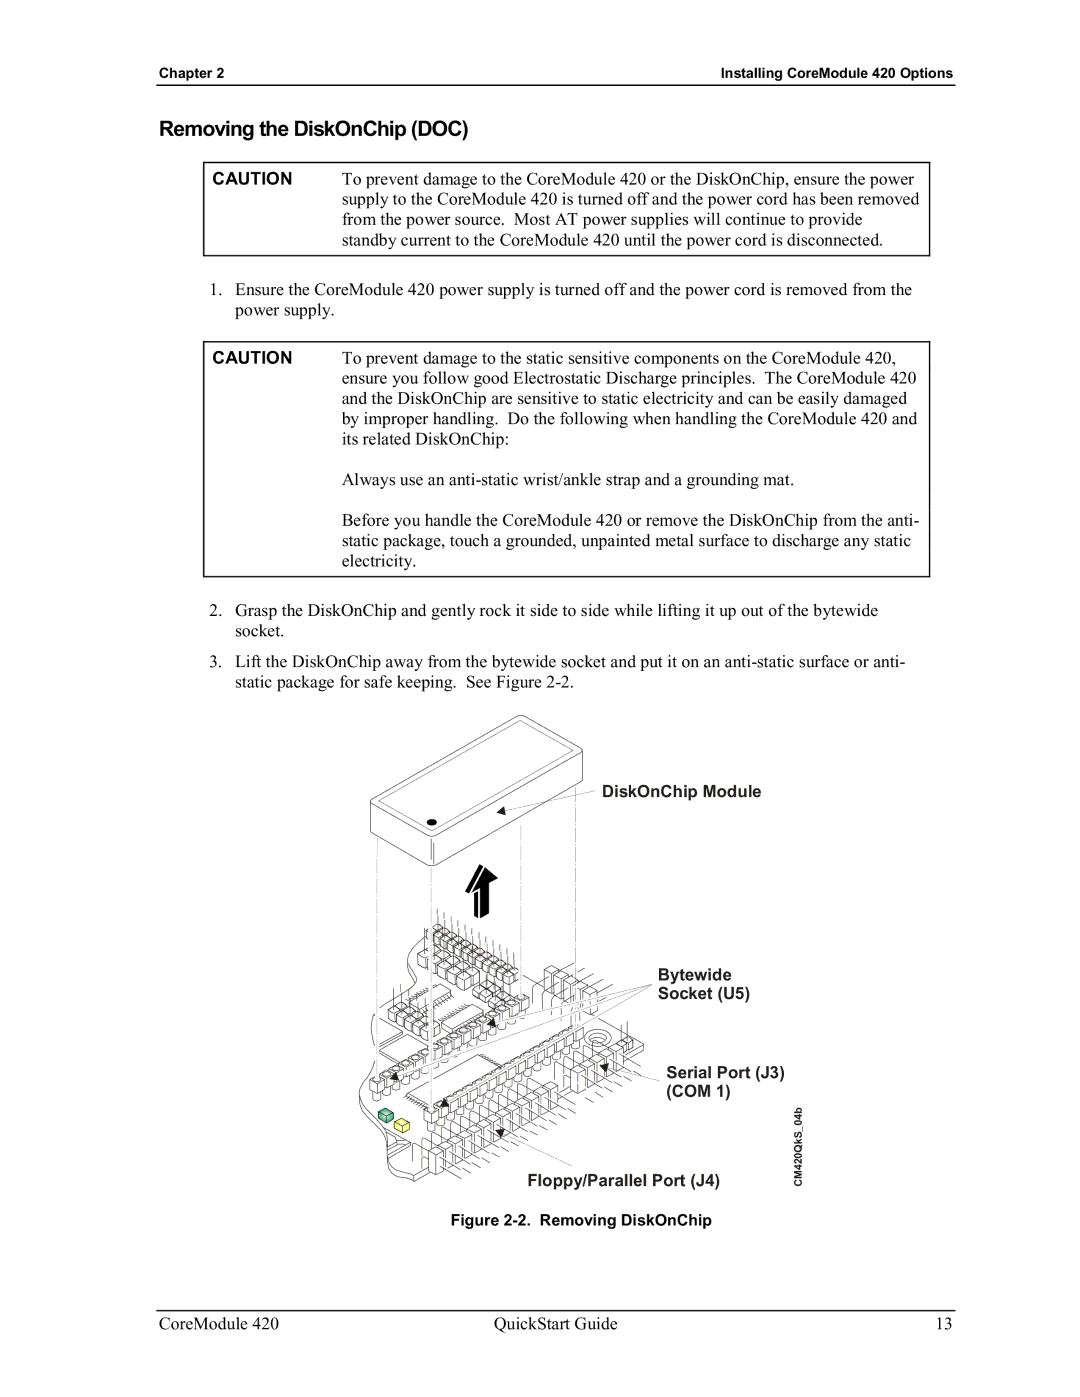
2.Grasp the DiskOnChip and gently rock it side to side while lifting it up out of the bytewide socket.
3.Lift the DiskOnChip away from the bytewide socket and put it on an
DiskOnChip Module
Bytewide
Socket (U5)
![]()
![]()
![]() Serial Port (J3) (COM 1)
Serial Port (J3) (COM 1)
Floppy/Parallel Port (J4)
CM420QkS_04b
Figure 2-2. Removing DiskOnChip
CoreModule 420 | QuickStart Guide | 13 |