
P80, A80 specifications
The Arcam P80 and A80 are two prominent products in the realm of high-fidelity audio, designed to offer audiophiles superior sound quality and a seamless listening experience. Arcam, renowned for its dedication to innovation and excellence, has equipped these models with advanced technologies that elevate their performance.The Arcam P80 is a robust power amplifier that delivers a remarkable 80 watts per channel into 8 ohms. This powerful amplification ensures that even the most demanding speakers will be driven effortlessly, providing dynamic sound reproduction. One of the standout features of the P80 is its Class G amplification design. This technology enhances efficiency by utilizing multiple output stages, allowing the amplifier to switch between power levels depending on the signal demands. This minimizes distortion and maximizes sound quality, resulting in crystal-clear audio across various frequencies.
Equipped with high-quality components, the P80 employs a toroidal transformer that minimizes electromagnetic interference and optimizes power delivery. This attention to detail translates to a more refined sound, making it an excellent choice for both music enthusiasts and home theater setups. The amplifier also features multiple input options, including both balanced and unbalanced connections, ensuring compatibility with a wide range of audio sources.
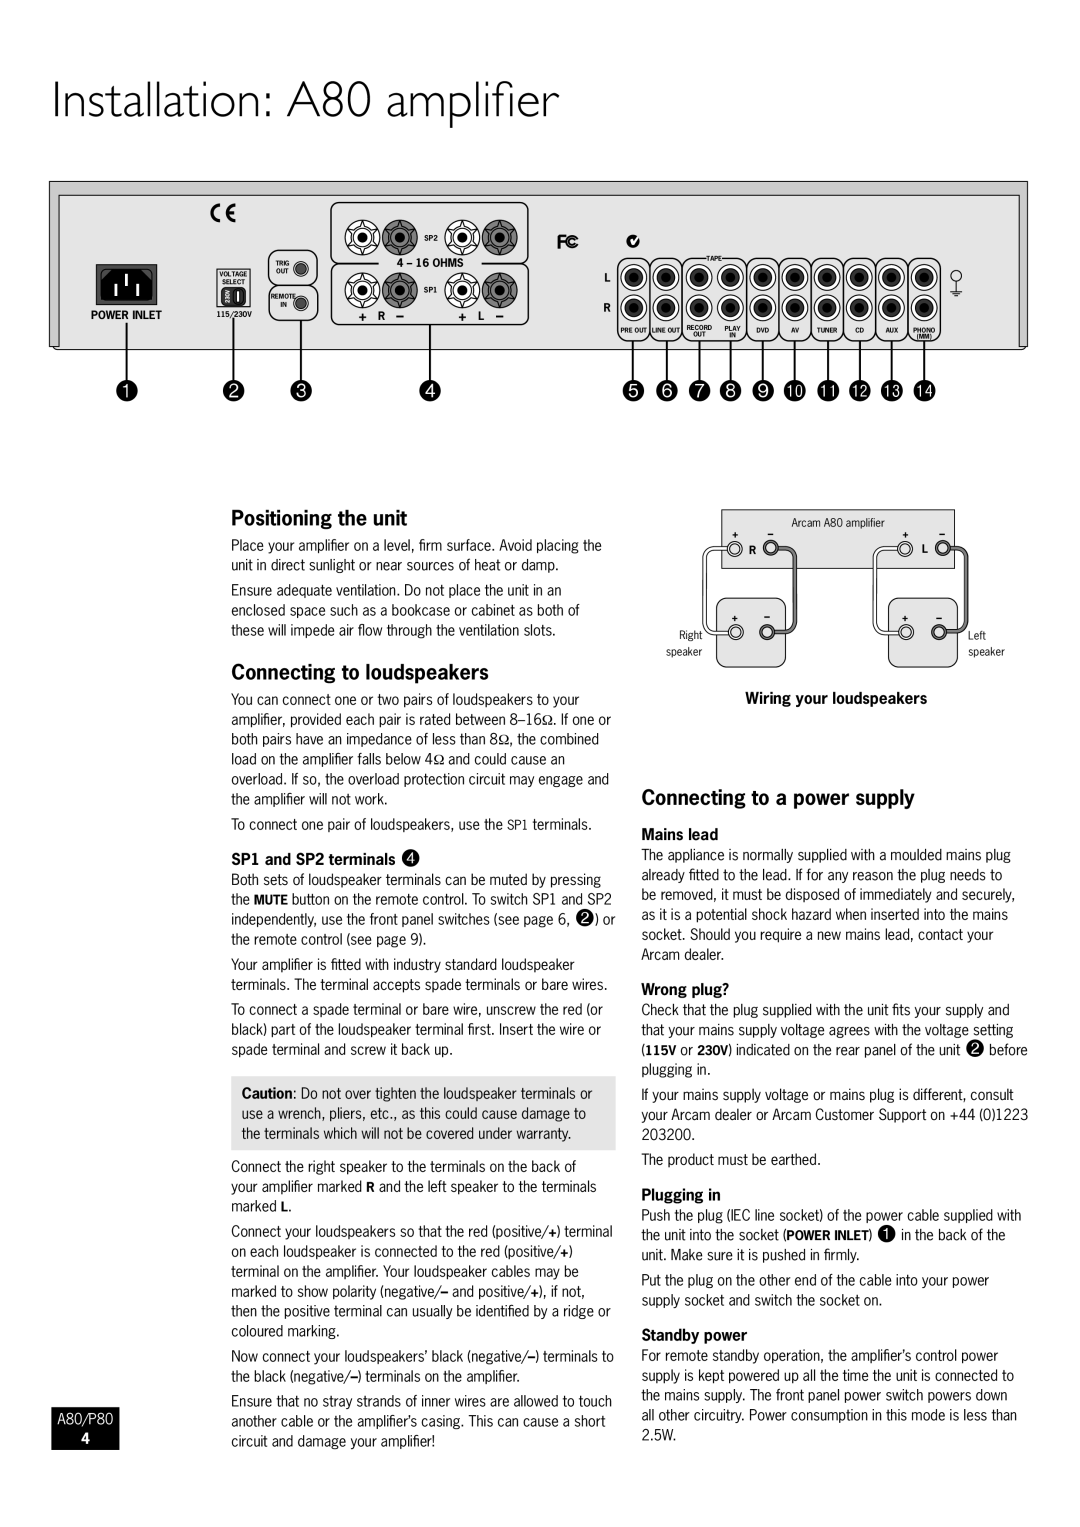
On the other hand, the Arcam A80 is an integrated amplifier that combines both preamplifier and power amplifier functionalities into a single unit. With an output of 80 watts per channel into 8 ohms, it shares the P80's commitment to power and performance. The A80 incorporates a high-quality digital-to-analog converter, enhancing the sound quality of digital sources, and features multiple inputs for flexibility when connecting various devices.
The A80 also utilizes a high-grade phono stage for vinyl enthusiasts, enabling users to connect turntables directly and enjoy their favorite records with outstanding fidelity. The design emphasizes simplicity and elegance, with a user-friendly interface and intuitive controls, making it a perfect addition to both contemporary and traditional home audio setups.
In summary, the Arcam P80 and A80 represent the pinnacle of audio engineering, incorporating advanced technologies such as Class G amplification, high-quality DACs, and versatile input options. They deliver an exceptional listening experience, providing power, clarity, and musicality that will satisfy even the most discerning audiophiles. Whether used individually or as a part of a comprehensive audio system, these amplifiers exemplify the quality that has made Arcam a trusted name in high-fidelity sound.