Provisioning Access Points
Chapter 2
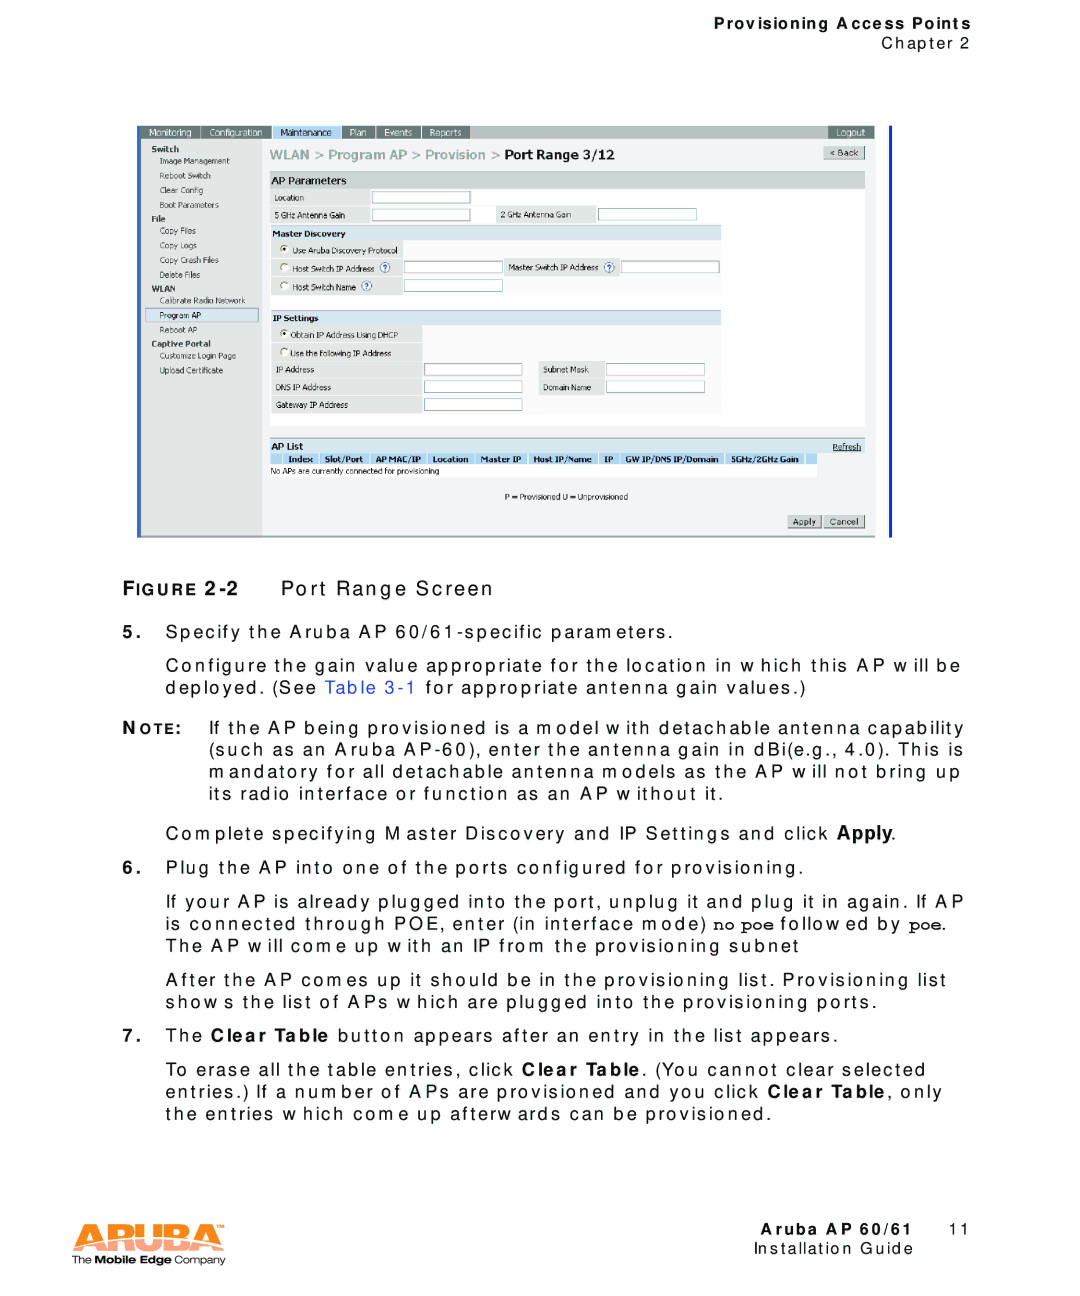
FIGURE 2-2 Port Range Screen
5.Specify the Aruba AP
Configure the gain value appropriate for the location in which this AP will be deployed. (See Table
NOTE: If the AP being provisioned is a model with detachable antenna capability (such as an Aruba
Complete specifying Master Discovery and IP Settings and click Apply.
6.Plug the AP into one of the ports configured for provisioning.
If your AP is already plugged into the port, unplug it and plug it in again. If AP is connected through POE, enter (in interface mode) no poe followed by poe. The AP will come up with an IP from the provisioning subnet
After the AP comes up it should be in the provisioning list. Provisioning list shows the list of APs which are plugged into the provisioning ports.
7.The Clear Table button appears after an entry in the list appears.
To erase all the table entries, click Clear Table. (You cannot clear selected entries.) If a number of APs are provisioned and you click Clear Table, only the entries which come up afterwards can be provisioned.
Aruba AP 60/61 11
Installation Guide