Provisioning Access Points
Chapter 2
where the following fields are required:
Building Number | A unique number |
| your campus. |
|
|
Floor Number | Within any building, a unique number |
| required for each floor. |
|
|
Device Number | Within any floor, a unique number |
| for each access point or air monitor. |
|
|
If you performed the recommended site survey using the Aruba RF Plan tool, the location data for all access points and air monitors can be found on the tool’s deployment page (see the ArubaOS User Guide).
If you prefer to enter the location data manually, record the location ID you set for each access point and air monitor along with the following:
Device | Note the intended function of the device (access point | |
Description | or dedicated air monitor) and a brief description of its | |
| service location. | |
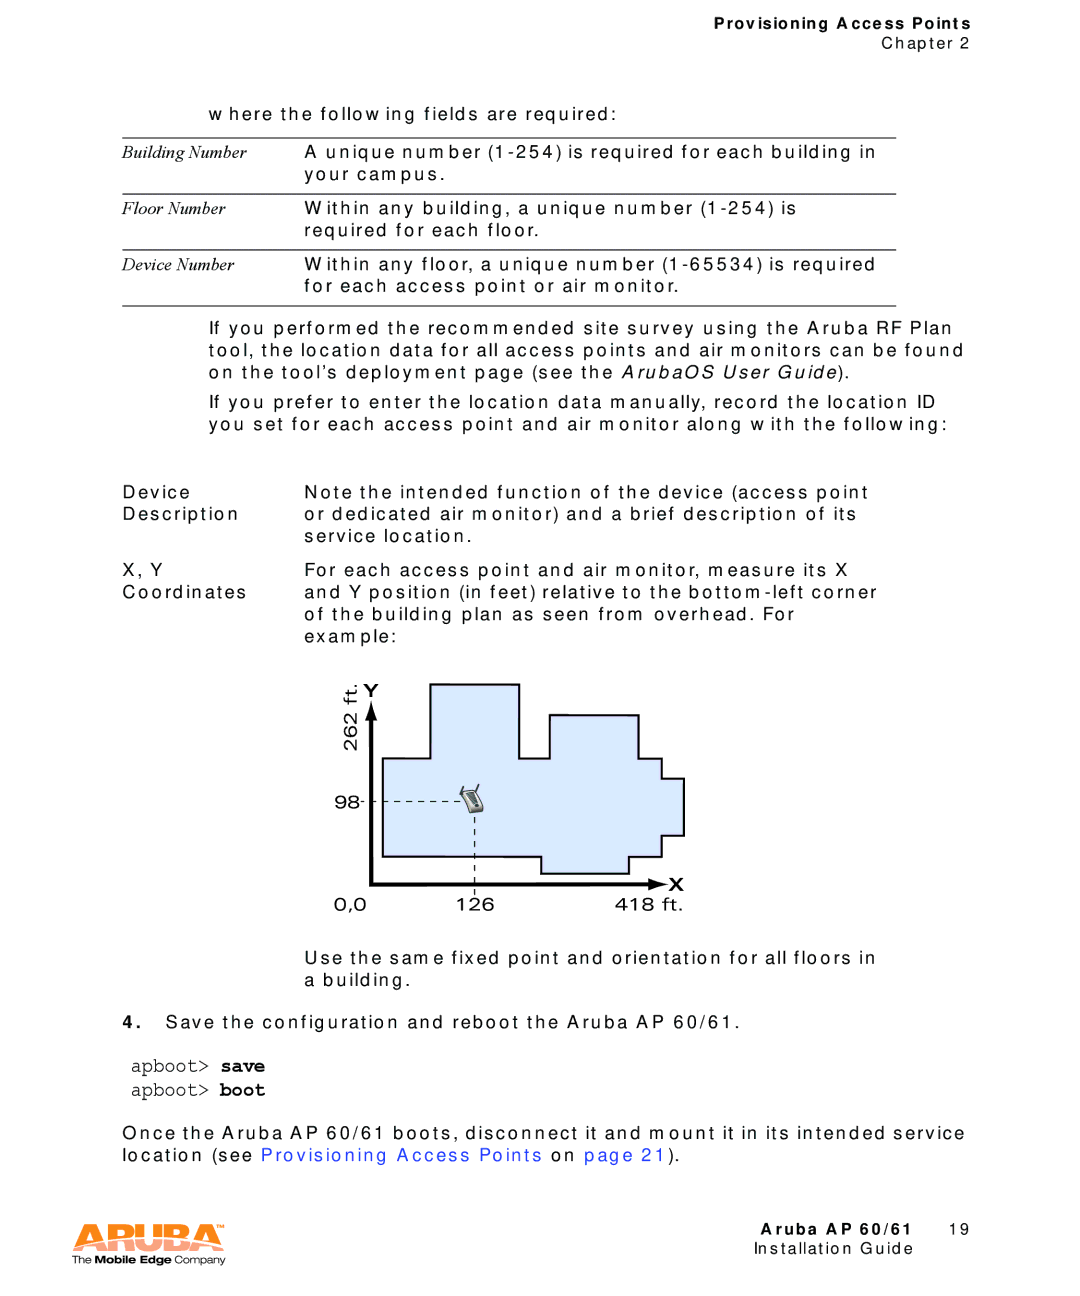
X, Y | For each access point and air monitor, measure its X | |
Coordinates | and Y position (in feet) relative to the | |
| of the building plan as seen from overhead. For | |
| example: | |
| ft.262 | Y |
|
| |
98
0,0 | 126 | X |
418 ft. |
Use the same fixed point and orientation for all floors in
abuilding.
4.Save the configuration and reboot the Aruba AP 60/61.
apboot> save apboot> boot
Once the Aruba AP 60/61 boots, disconnect it and mount it in its intended service location (see Provisioning Access Points on page 21).
Aruba AP 60/61 19
Installation Guide
