AT-LP60-USB specifications
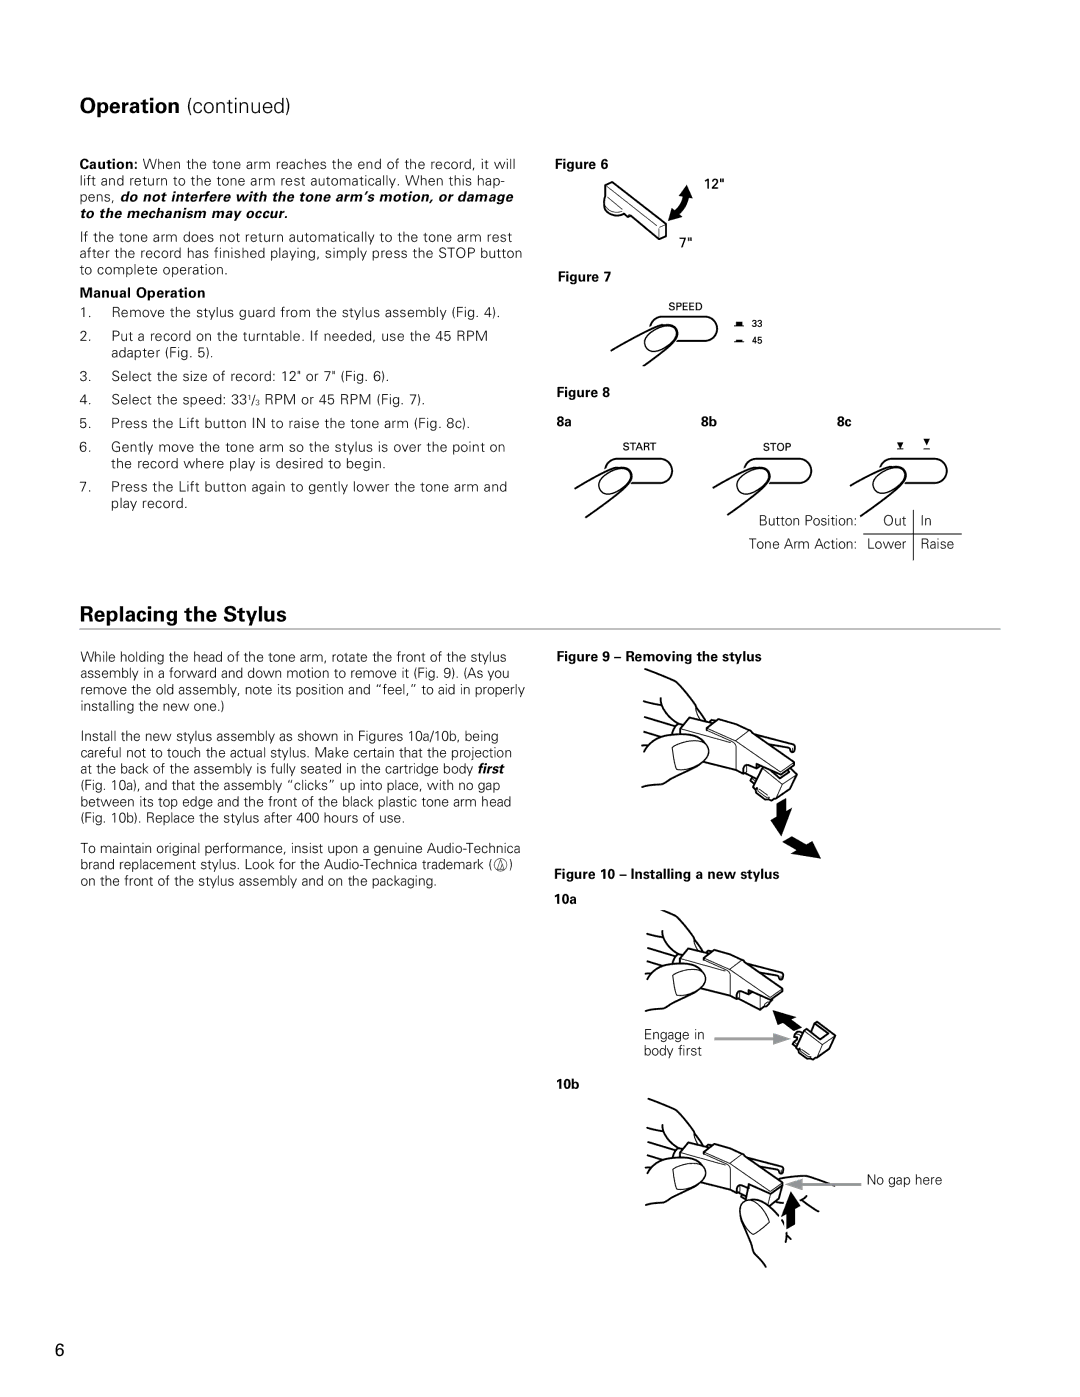
The Audio-Technica AT-LP60-USB is a remarkable entry-level turntable that bridges the gap between classic vinyl enjoyment and modern digital convenience. Designed for both novice listeners and audiophiles alike, this fully automatic belt-drive turntable stands out for its combination of affordability, performance, and user-friendliness.One of the key features of the AT-LP60-USB is its fully automatic operation. With just the push of a button, users can start the turntable with ease. The tonearm lifts and lowers automatically, ensuring minimal contact with the record. This feature not only enhances convenience but also helps to preserve vinyl records over time, as the stylus minimizes the risk of scratching.
Equipped with a high-quality dual-magnet cartridge, the AT-LP60-USB delivers exceptional audio fidelity, ensuring that listeners can enjoy the warm, rich sound inherent to vinyl. The included ATN3600L stylus provides clarity and precision, capturing the full spectrum of sound from any record. This model is compatible with both 33 1/3 RPM and 45 RPM records, allowing users an extensive range of vinyl options.
Another standout feature of this turntable is its USB output, which provides the ability to convert vinyl records into digital formats. This aspect is especially appealing for those who wish to preserve their collections in a more modern, portable format. By connecting the AT-LP60-USB to a computer, users can easily digitize their favorite albums, making them accessible for playback on various digital devices.
In terms of build quality, the turntable boasts a sleek, minimalist design that fits well in any home setting. Its lightweight plastic chassis and detachable dust cover contribute to its user-friendly design. Additionally, the unit comes with a built-in dual RCA output, making it easy to connect to a variety of audio systems.
The AT-LP60-USB also incorporates an anti-resonance design, which aids in minimizing vibrations and enhancing sound quality. This thoughtful engineering allows the turntable to deliver a clean and uninterrupted audio experience, crucial for enjoying the authenticity of vinyl playback.
In conclusion, the Audio-Technica AT-LP60-USB is an exceptional choice for anyone looking to experience the magic of vinyl in an intuitive and high-quality package. With its automatic operation, USB capability, and impressive sound fidelity, it's an excellent gateway for both new listeners and seasoned vinyl enthusiasts.