
DVL Insert EF II specifications
The Avalon Stoves DVL Insert EF II is an impressive addition to any home, combining functionality, efficiency, and aesthetic appeal. Designed to convert traditional wood-burning fireplaces into an efficient heating source, the DVL Insert EF II stands out due to its exceptional engineering and innovative features.One of the main characteristics of the DVL Insert EF II is its high-efficiency rating. With an impressive efficiency of up to 85%, this insert maximizes heat output while minimizing wood consumption. This translates to fewer trips to the woodpile, allowing homeowners to enjoy extended warmth and comfort during the cold months.
Key technologies incorporated into the DVL Insert EF II include a sophisticated air wash system that keeps the glass clean, ensuring a clear view of the captivating flames. This feature not only enhances the aesthetic appeal of the insert but also reduces the maintenance required to keep the glass sparkling. Additionally, the DVL Insert EF II employs a secondary combustion system that ensures more complete burning of the wood, which increases both efficiency and heat output while reducing smoke emissions.
The DVL Insert EF II comes with a robust firebox, made from high-quality steel, which is designed to withstand high temperatures and offer durability over time. Its large viewing area is framed by a cast-iron door, giving it a timeless and elegant appearance that complements various styles of decor. The insert is available in multiple finishes, allowing homeowners to choose a look that fits their personal style and existing interior.
Another notable feature is the built-in blower system, which helps distribute heat more evenly throughout the room, enhancing comfort. This option can be particularly beneficial in larger spaces, as it allows for better temperature regulation and extends the reach of the warmth generated.
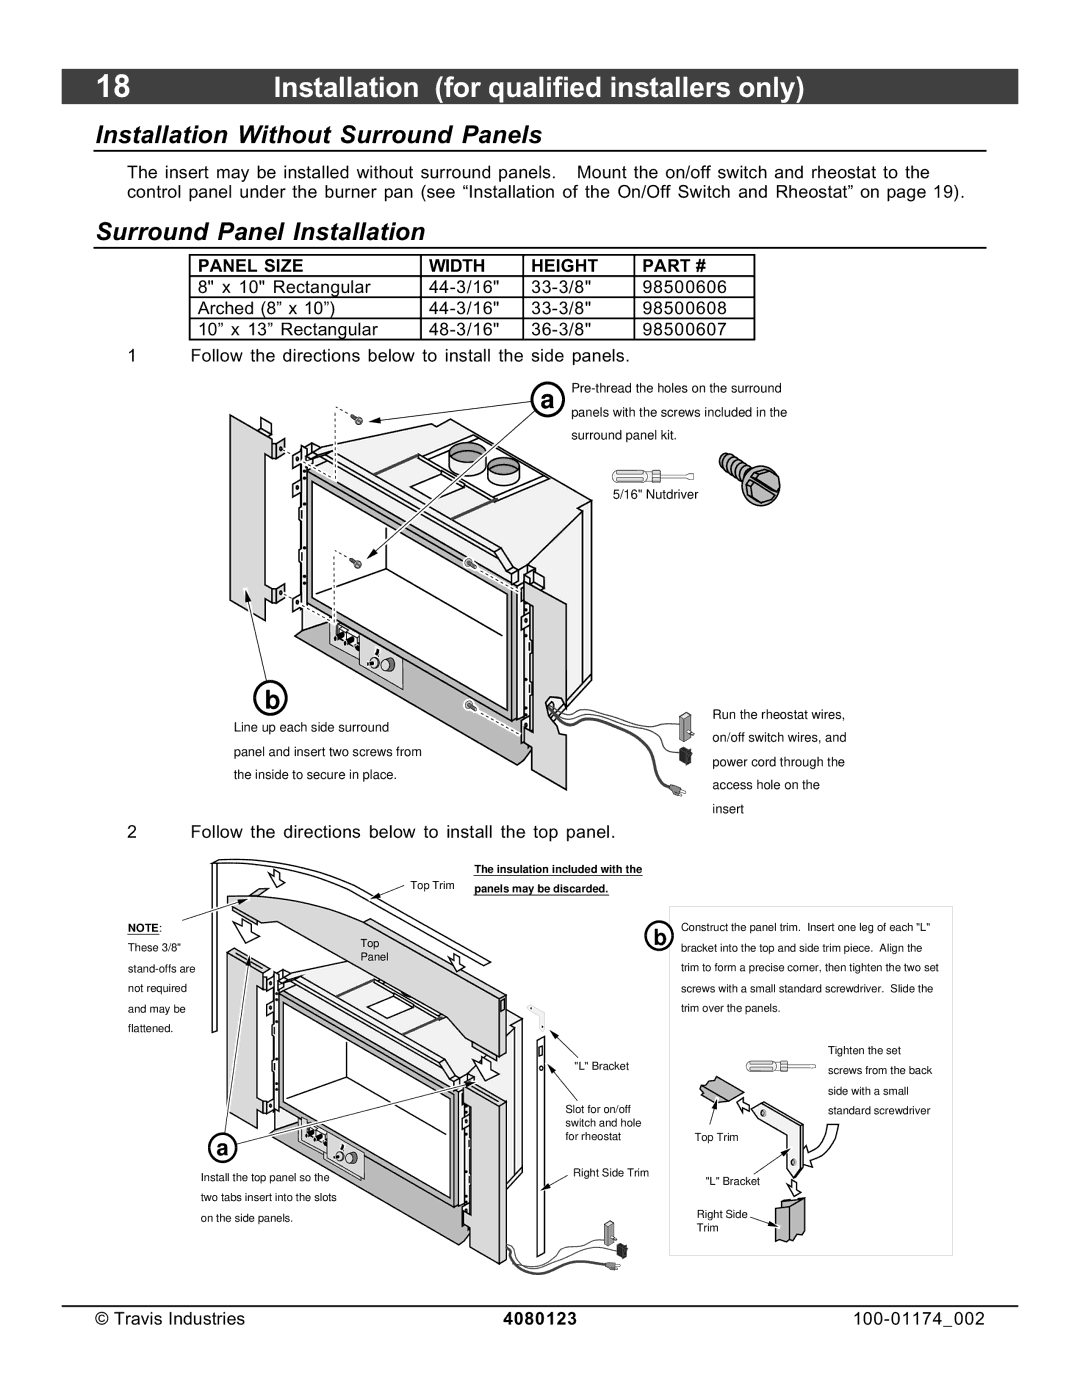
Installation flexibility is also a key characteristic of the DVL Insert EF II. It can be fitted into most standard fireplaces, making it a versatile choice for many homes. Its compact design ensures that it can fit effortlessly into the existing structure while still providing powerful heating capabilities.
In summary, the Avalon Stoves DVL Insert EF II is a highly efficient, aesthetically pleasing option for homeowners looking to upgrade their fireplace capabilities. With advanced technologies such as an air wash system, secondary combustion, and a built-in blower, this insert delivers both convenience and performance, making it an excellent addition to any living space.