Intuity Mailbox User
Creating a Mailing List
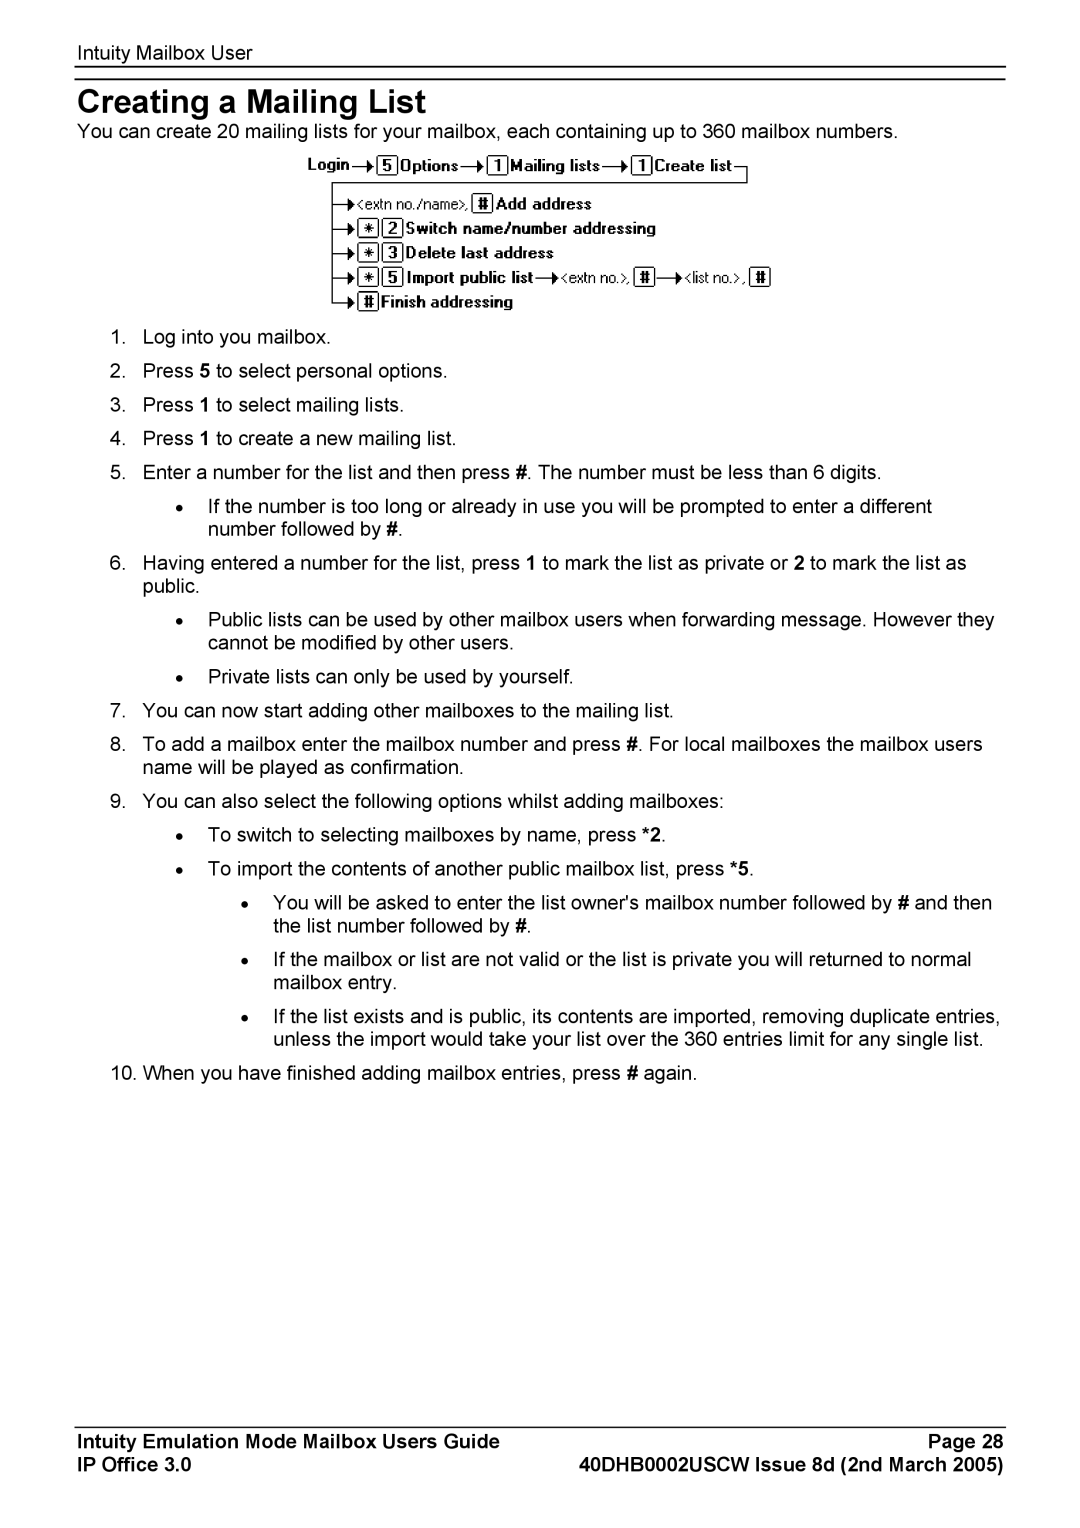
You can create 20 mailing lists for your mailbox, each containing up to 360 mailbox numbers.
1.Log into you mailbox.
2.Press 5 to select personal options.
3.Press 1 to select mailing lists.
4.Press 1 to create a new mailing list.
5.Enter a number for the list and then press #. The number must be less than 6 digits.
•If the number is too long or already in use you will be prompted to enter a different number followed by #.
6.Having entered a number for the list, press 1 to mark the list as private or 2 to mark the list as public.
•Public lists can be used by other mailbox users when forwarding message. However they cannot be modified by other users.
•Private lists can only be used by yourself.
7.You can now start adding other mailboxes to the mailing list.
8.To add a mailbox enter the mailbox number and press #. For local mailboxes the mailbox users name will be played as confirmation.
9.You can also select the following options whilst adding mailboxes:
•To switch to selecting mailboxes by name, press *2.
•To import the contents of another public mailbox list, press *5.
•You will be asked to enter the list owner's mailbox number followed by # and then the list number followed by #.
•If the mailbox or list are not valid or the list is private you will returned to normal mailbox entry.
•If the list exists and is public, its contents are imported, removing duplicate entries, unless the import would take your list over the 360 entries limit for any single list.
10.When you have finished adding mailbox entries, press # again.
Intuity Emulation Mode Mailbox Users Guide | Page 28 |
IP Office 3.0 | 40DHB0002USCW Issue 8d (2nd March 2005) |