Name |
| Function | |
|
|
|
|
(5) | Target Path |
| To locate on where user want to save the file |
|
|
|
|
(6) | Event (%) |
| Display the backup progress rate of event in percentage |
|
|
|
|
(7) | Total (%) |
| Display the total backup progress rate in percentage |
|
|
|
|
(8) | Stop |
| Stop backup progress |
|
|
|
|
(9) | Start |
| Start backup progress |
|
|
|
|
(10) | Select All |
| Select all listed recorded video events. Click the check box again to |
| cancel for selecting all events. | ||
|
|
| |
5.3To Backup Recorded Video File
1.Please have the hard disk which was recording video on the DVR system install on your PC or using external USB enclosure to connect to your PC.
2.To run the HDD Backup application, click the HDD Backup button on USB Playback Application main interface.
3.Click Browse in Source Disk to locate the recorded video file.
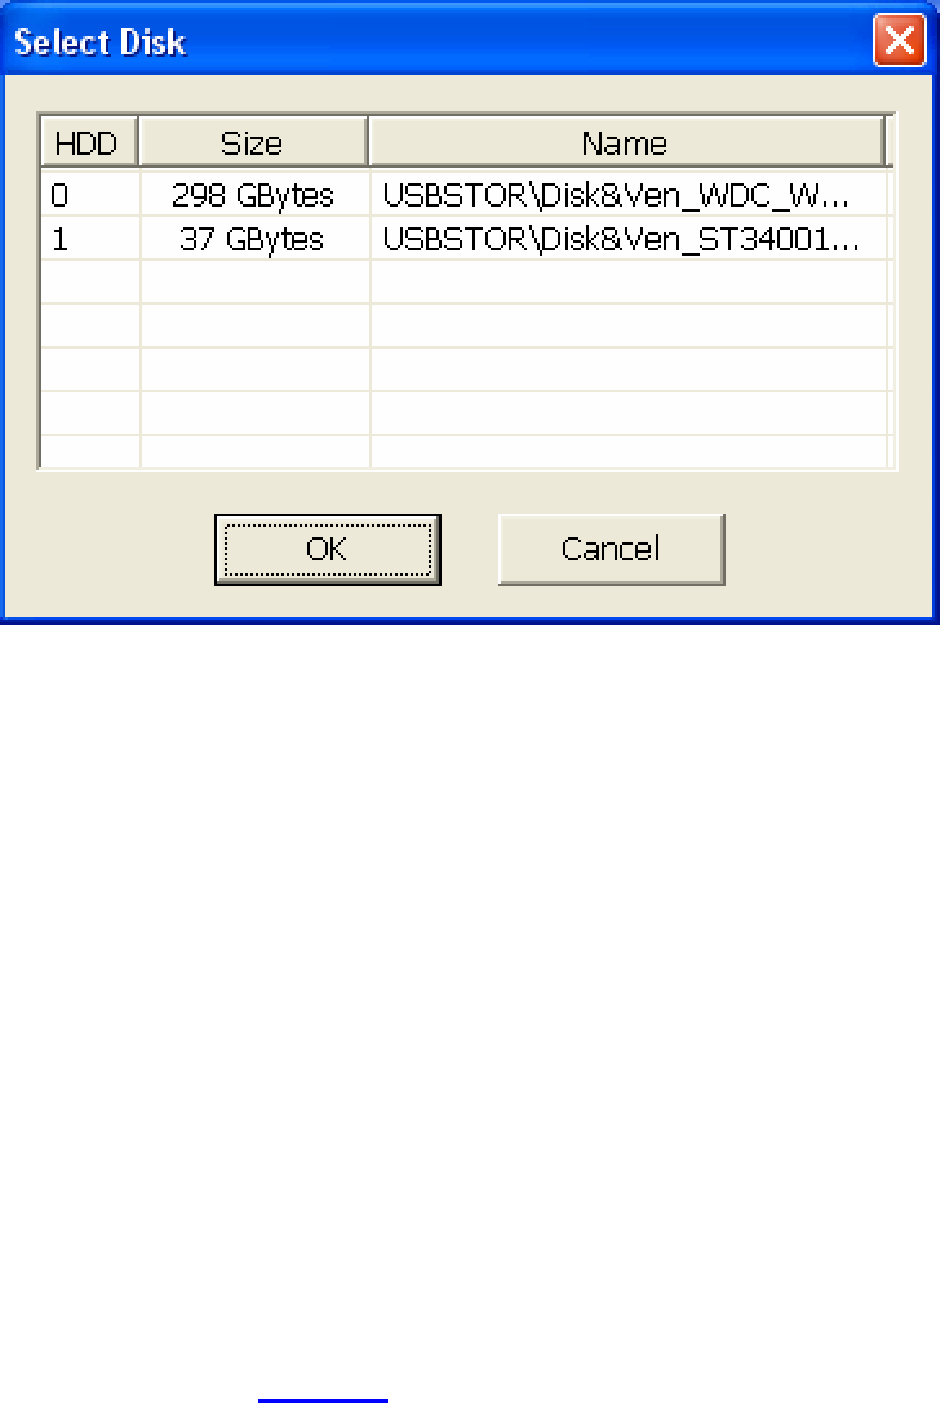
4.And then, the Select Disk windows will appear as below:
5.Select the hard disk drive from Select Disk windows. All available hard disk will list on the Select Disk windows with size and name
6.Select the hard disk drive and click OK
7.And then, all the recorded video files will list out.
8.Select the event which user wants to backup. Or mark the Select All to select all listed recorded video event
9.Locate on where user wants to save the backup file
10.Click Start to process backup
11.To stop the backup progress, click Stop
12.To play the backup file, see 4.3.3.
31