block turns red when it is selected. The block that appears in white doesn’t have data. You can only select one block when you choose Download and Playback.
3.Click OK to proceed and Cancel to void this operation.
4.If you select Download Playback and after making the selection, the system divides the selected hour into 16 video thumbnails. In the Time Selection screen, click on the video thumbnail you want to download (see also Chapter 8.3.2).
8.3.1 Familiarizing the Local Playback Buttons
(13)
(12)
(11)
(10)
(9)
(8)
(7)
| (1) | (2) | (3) | (4) | (5) | (6) | ||
Name |
|
|
|
| Function |
|
|
|
|
|
| ||||||
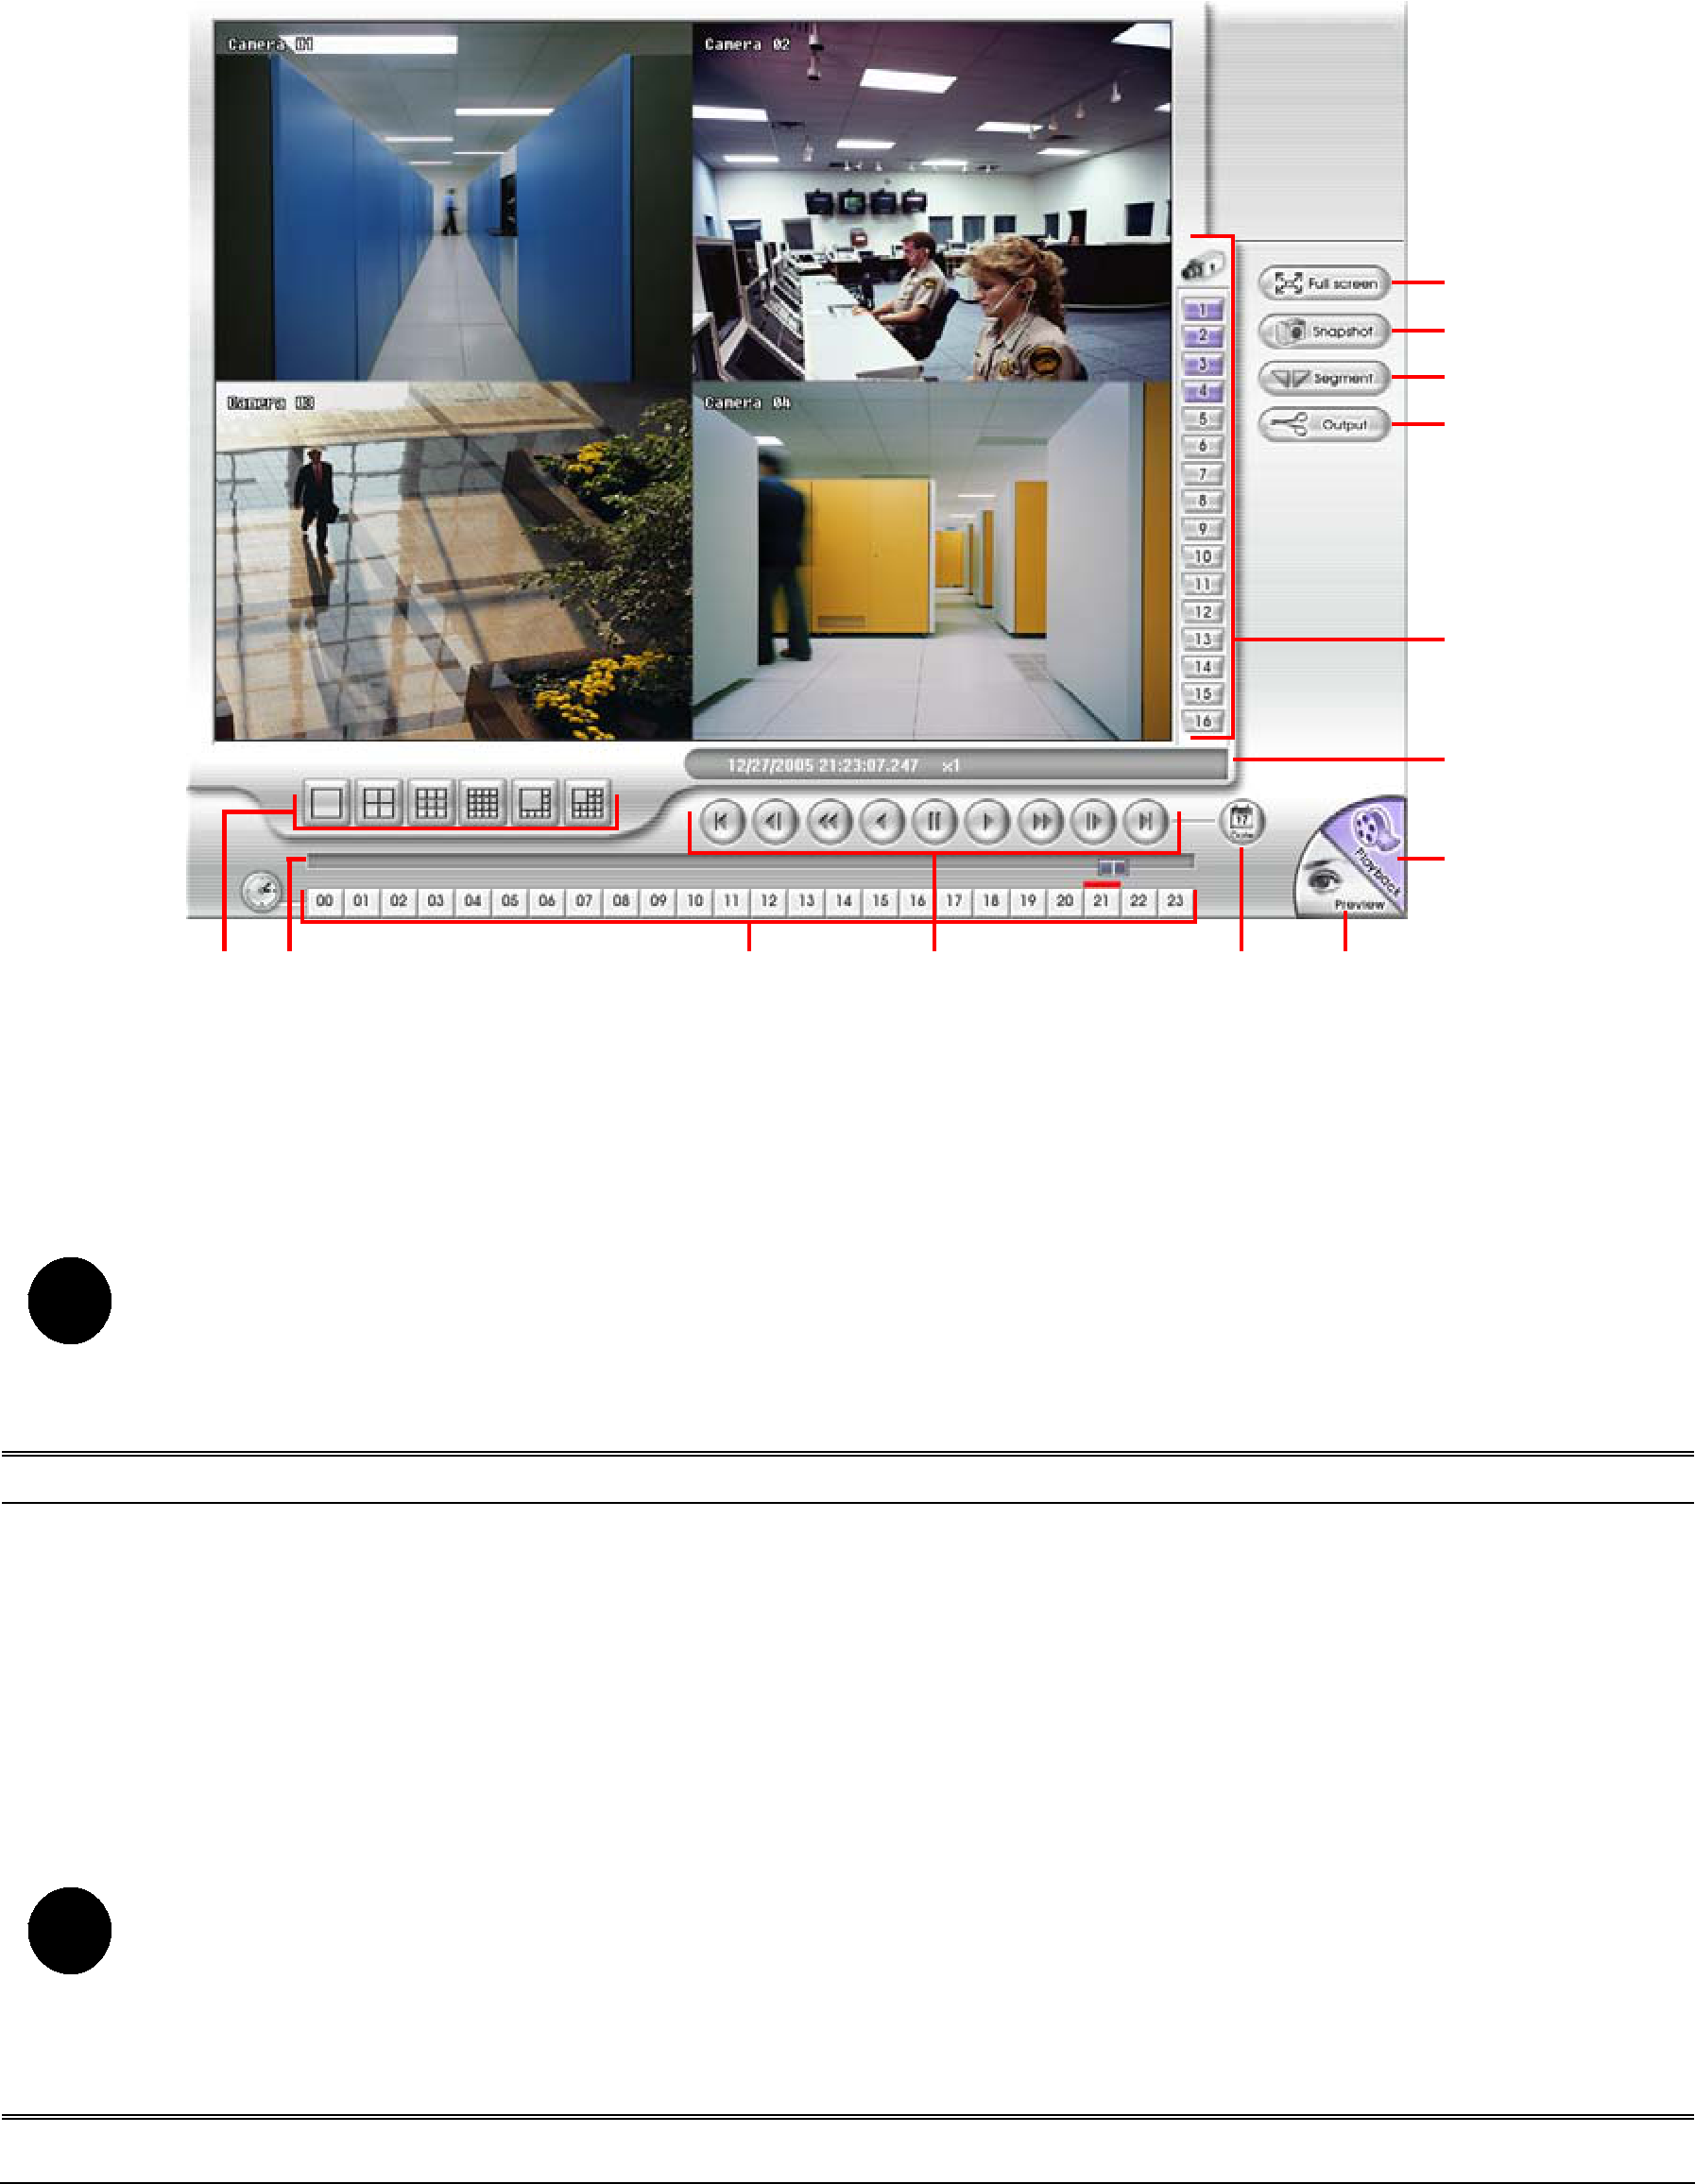
(1) Split Screen Mode |
| Select from six (6) different split screen type to playback the | ||||||
|
|
|
|
| recorded video file of all the camera, or one camera over the other | |||
|
|
|
|
| or alongside on a single screen. |
|
| |
i | - | If there are only 4 cameras, you won’t be able to switch to 9, 16, and 13 split screen | ||||||
| mode. |
|
|
|
|
| ||
-To zoom in an area on the screen, Right click and Drag a square on the area you want to enlarge. To back to normal view, right click the channel screen again.
(2) | Progress bar | Show the progress of the file being played. You may move the bar |
|
| to seek at any location of the track. |
|
| |
Name | Function | |
(3) | Hour Buttons | Select and click to playback the recorded video file on the specific |
|
| time frame. |
|
| |
i | The Hour buttons represent the time in | |
hour button indicates that there is a recorded video file on that period of time. If | ||
there is no recorded data within the hour, there will be no color bar on top of the hour button. While the red bar indicates that you are currently viewing the recorded video file.
47