P73074/F1U119/AM/man.qxd 4/19/00 4:25 PM Page 14
Windows® 95/98 (continued)
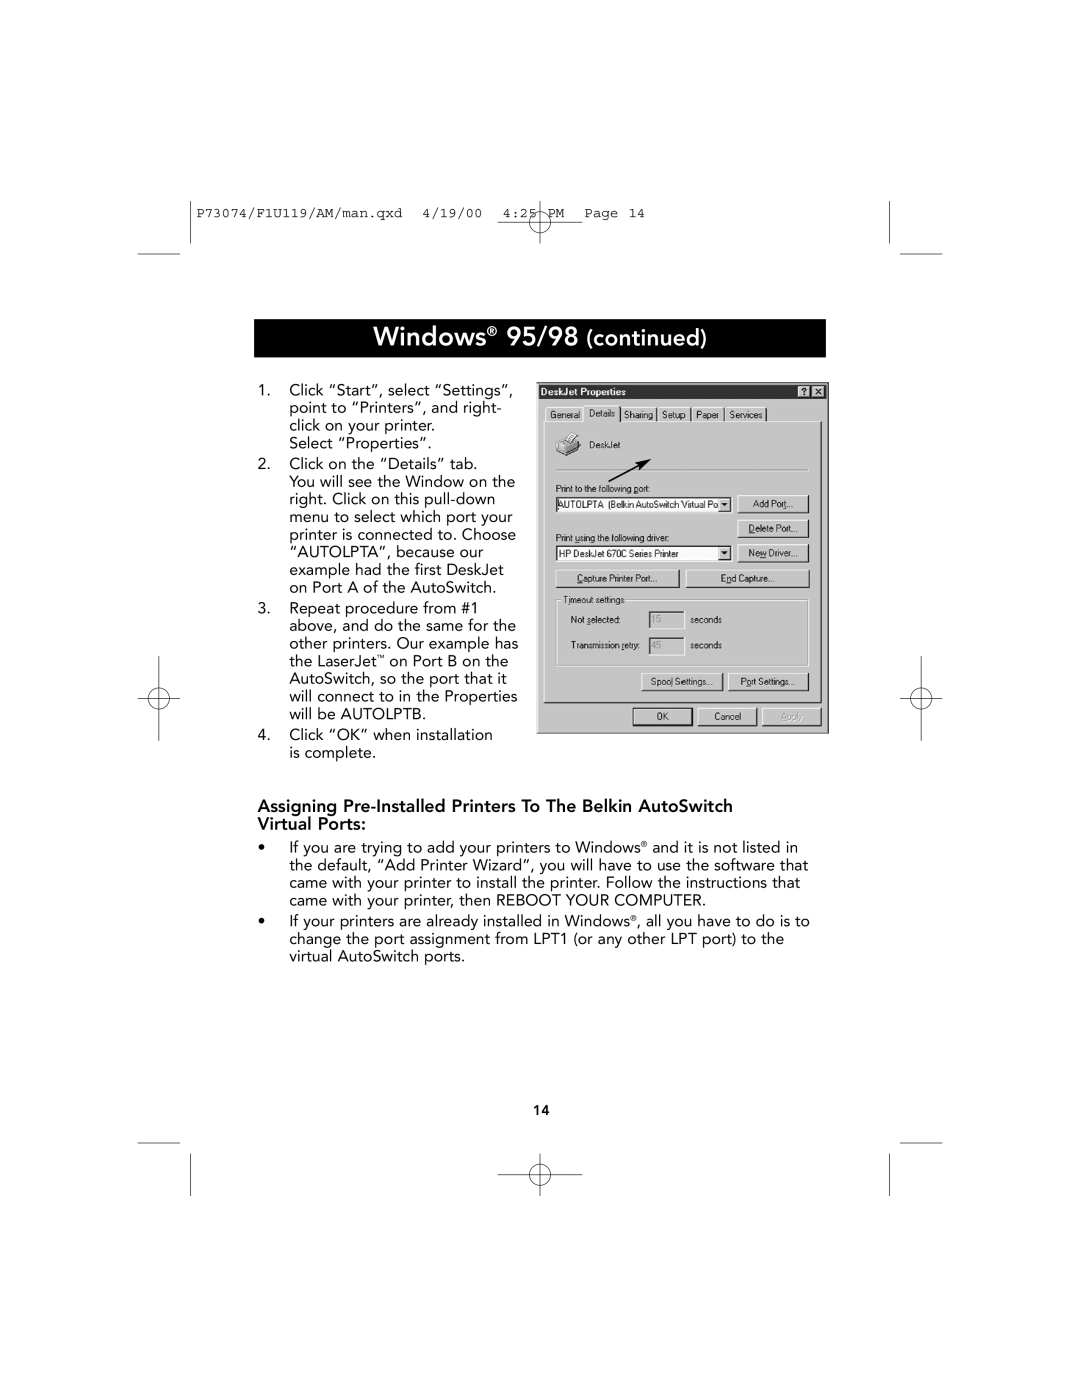
1.Click “Start”, select “Settings”, point to “Printers”, and right- click on your printer.
Select “Properties”.
2. Click on the “Details” tab.
You will see the Window on the right. Click on this
3.Repeat procedure from #1 above, and do the same for the other printers. Our example has the LaserJet™ on Port B on the AutoSwitch, so the port that it will connect to in the Properties will be AUTOLPTB.
4.Click “OK” when installation is complete.
Assigning
•If you are trying to add your printers to Windows® and it is not listed in the default, “Add Printer Wizard”, you will have to use the software that came with your printer to install the printer. Follow the instructions that came with your printer, then REBOOT YOUR COMPUTER.
•If your printers are already installed in Windows®, all you have to do is to change the port assignment from LPT1 (or any other LPT port) to the virtual AutoSwitch ports.
14