Correcting keystone
Keystoning refers to the situation where the projected image is noticeably wider at either the top or bottom. It occurs when the projector is not perpendicular to the screen.
Manual keystone correction
To correct keystoning manually, you can perform the following steps.
1. | Adjust the projection angle of the | ||
| projector. |
|
|
2. | Press the Auto (or AUTO/CH.) button. | ||
3. | If the image is still distorted, you will need | ||
| to manually correct it following ONE of | ||
| these steps. |
|
|
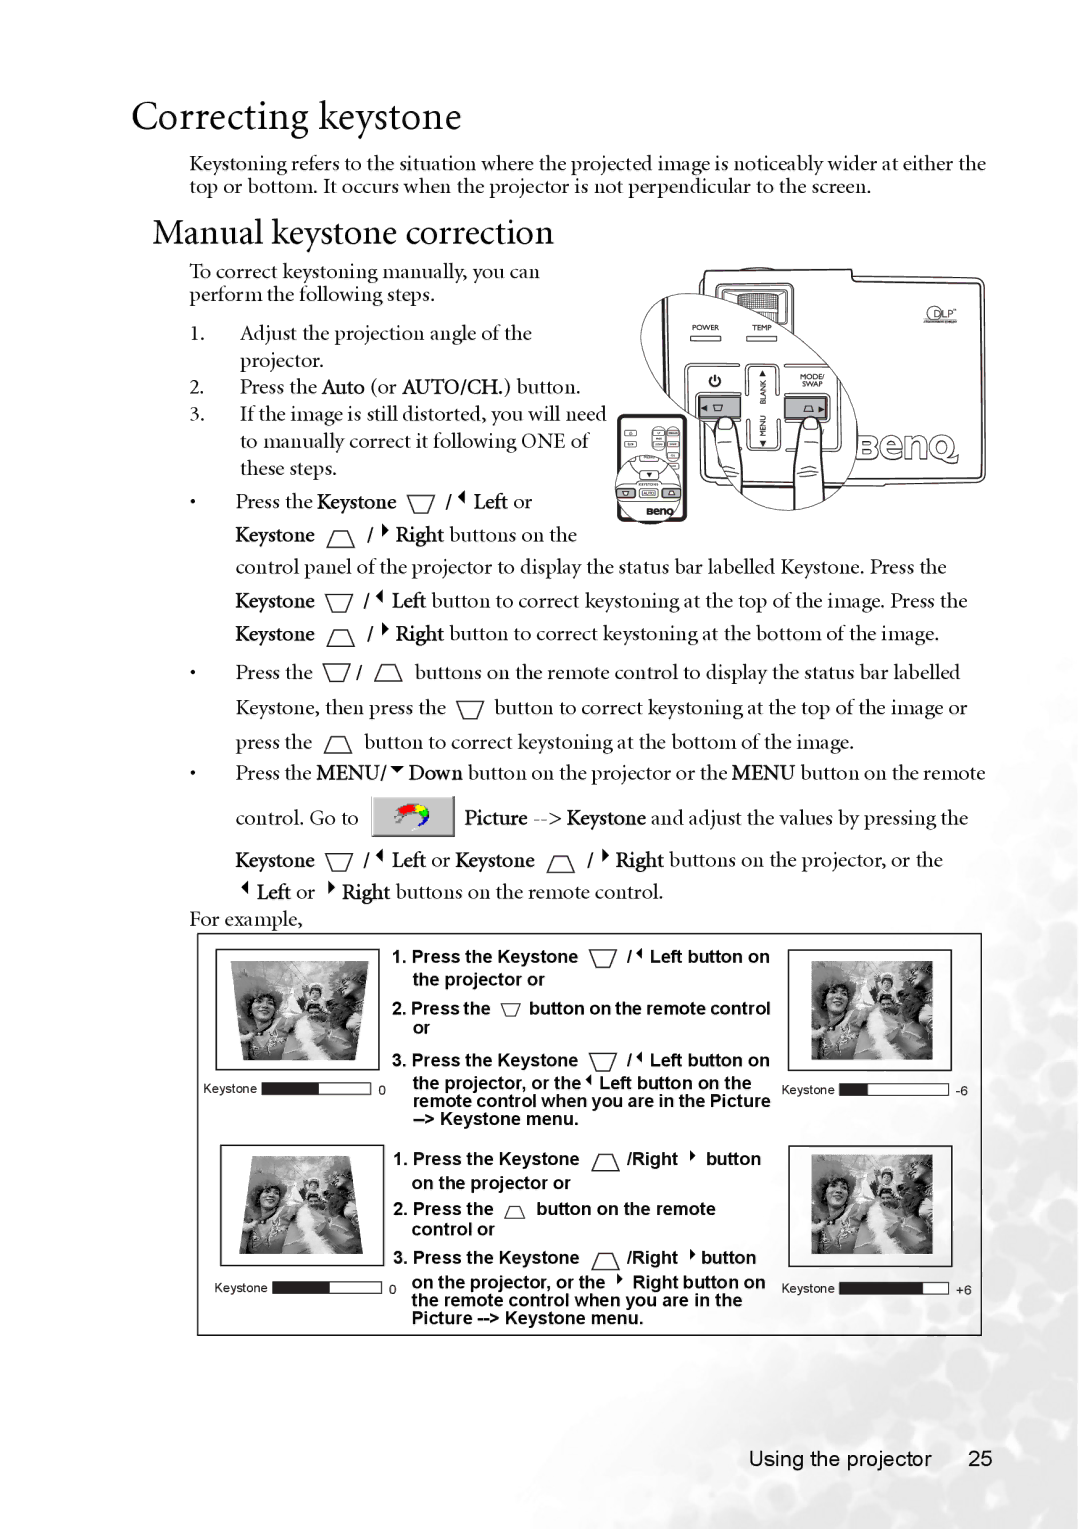
• | Press the Keystone | /3Left or | |
| Keystone | /4Right buttons on the | |
| control panel of the projector to display the status bar labelled Keystone. Press the | ||
| Keystone | /3Left button to correct keystoning at the top of the image. Press the | |
| Keystone | /4Right button to correct keystoning at the bottom of the image. | |
•Press the ![]() /
/ ![]() buttons on the remote control to display the status bar labelled
buttons on the remote control to display the status bar labelled
Keystone, then press the ![]() button to correct keystoning at the top of the image or
button to correct keystoning at the top of the image or
press the ![]() button to correct keystoning at the bottom of the image.
button to correct keystoning at the bottom of the image.
•Press the MENU/6Down button on the projector or the MENU button on the remote
control. Go to ![]() Picture
Picture
Keystone ![]() /3Left or Keystone
/3Left or Keystone ![]() /4Right buttons on the projector, or the
/4Right buttons on the projector, or the
3Left or 4Right buttons on the remote control. For example,
Keystone ![]()
![]() 0
0
Keystone ![]()
1.Press the Keystone ![]() /3Left button on the projector or
/3Left button on the projector or
2.Press the ![]() button on the remote control or
button on the remote control or
3.Press the Keystone ![]() /3Left button on the projector, or the3Left button on the remote control when you are in the Picture
/3Left button on the projector, or the3Left button on the remote control when you are in the Picture
1.Press the Keystone ![]() /Right 4 button on the projector or
/Right 4 button on the projector or
2.Press the ![]() button on the remote control or
button on the remote control or
3.Press the Keystone ![]() /Right 4button
/Right 4button
0on the projector, or the 4 Right button on the remote control when you are in the Picture
Keystone ![]()
Keystone
+6
Using the projector | 25 |