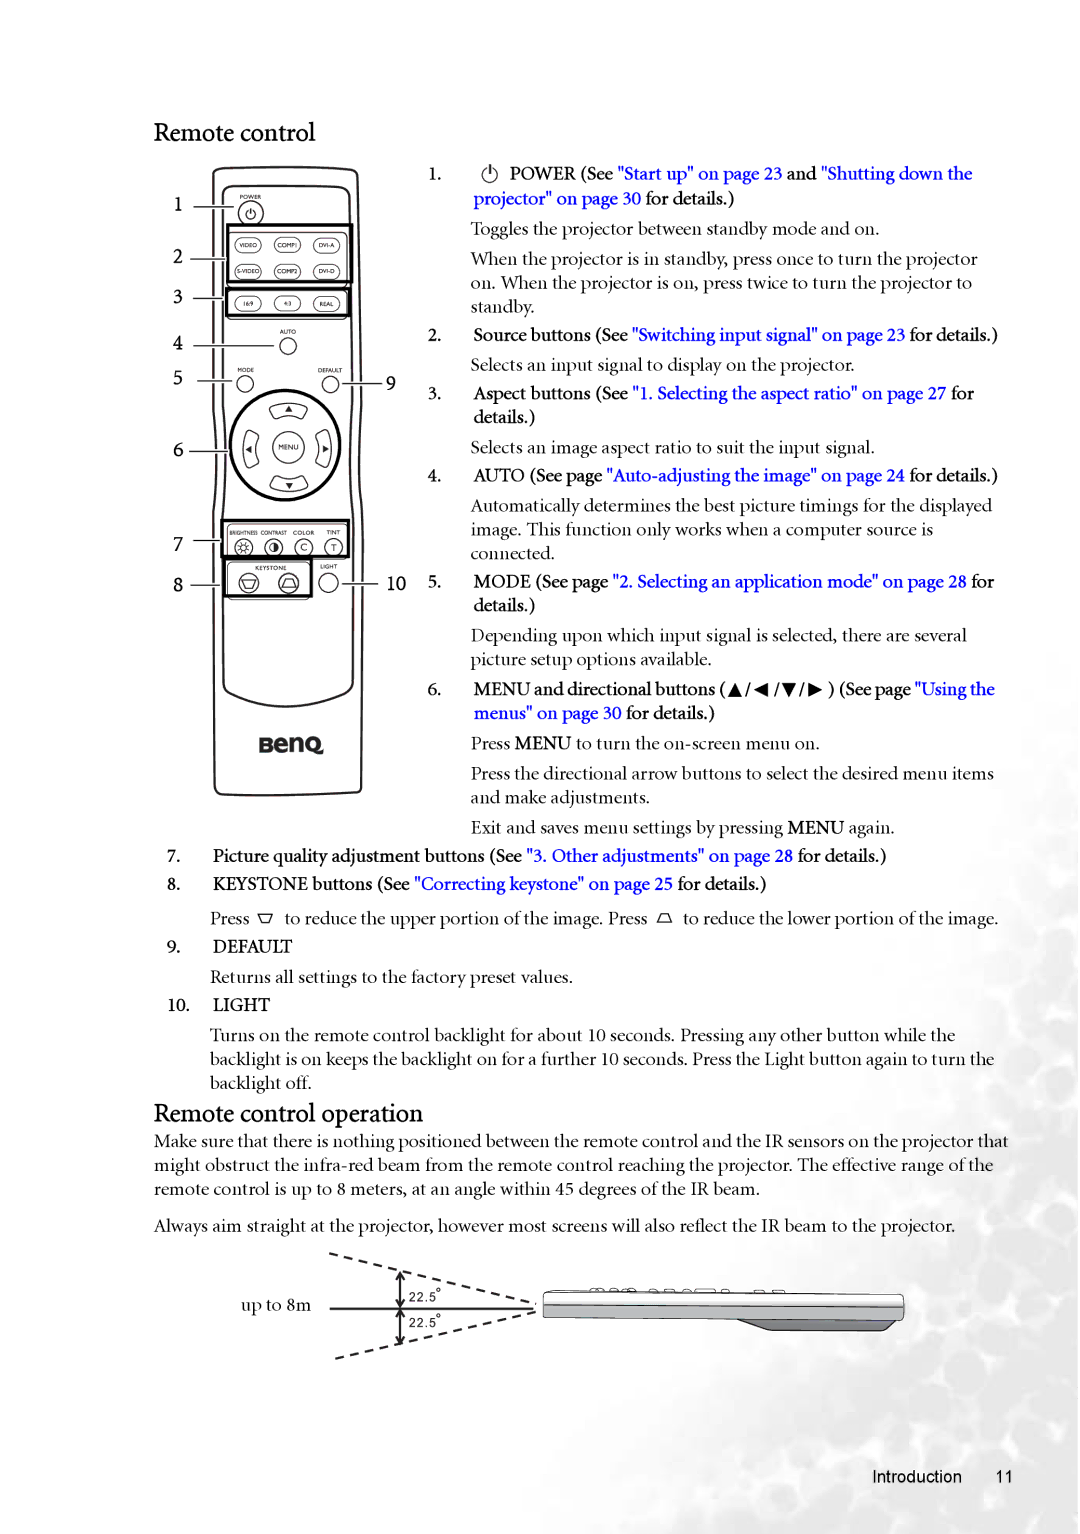
Remote control
1
2
3
4
5
6
7
8
C | T |
9
10
1. | I | POWER (See "Start up" on page 23 and "Shutting down the |
|
projector" on page 30 for details.)
Toggles the projector between standby mode and on.
When the projector is in standby, press once to turn the projector on. When the projector is on, press twice to turn the projector to standby.
2.Source buttons (See "Switching input signal" on page 23 for details.) Selects an input signal to display on the projector.
3.Aspect buttons (See "1. Selecting the aspect ratio" on page 27 for details.)
Selects an image aspect ratio to suit the input signal.
4.AUTO (See page
Automatically determines the best picture timings for the displayed image. This function only works when a computer source is connected.
5.MODE (See page "2. Selecting an application mode" on page 28 for details.)
Depending upon which input signal is selected, there are several picture setup options available.
6.MENU and directional buttons (![]() /
/ ![]() /
/![]() /
/ ![]() ) (See page "Using the menus" on page 30 for details.)
) (See page "Using the menus" on page 30 for details.)
Press MENU to turn the
Press the directional arrow buttons to select the desired menu items and make adjustments.
Exit and saves menu settings by pressing MENU again.
7.Picture quality adjustment buttons (See "3. Other adjustments" on page 28 for details.)
8.KEYSTONE buttons (See "Correcting keystone" on page 25 for details.)
Press ![]() to reduce the upper portion of the image. Press
to reduce the upper portion of the image. Press ![]() to reduce the lower portion of the image.
to reduce the lower portion of the image.
9.DEFAULT
Returns all settings to the factory preset values.
10.LIGHT
Turns on the remote control backlight for about 10 seconds. Pressing any other button while the backlight is on keeps the backlight on for a further 10 seconds. Press the Light button again to turn the backlight off.
Remote control operation
Make sure that there is nothing positioned between the remote control and the IR sensors on the projector that might obstruct the
Always aim straight at the projector, however most screens will also reflect the IR beam to the projector.
up to 8m
Introduction 11
