Controls and functions
Projector
13
14
| 8 | 7 | 12 | 6 |
|
| |||
|
|
|
| |
| 1 |
|
| 5 |
| 9 |
|
| 10 |
| 2 |
|
| 4 |
| 3 | 11 |
| |
|
|
| ||
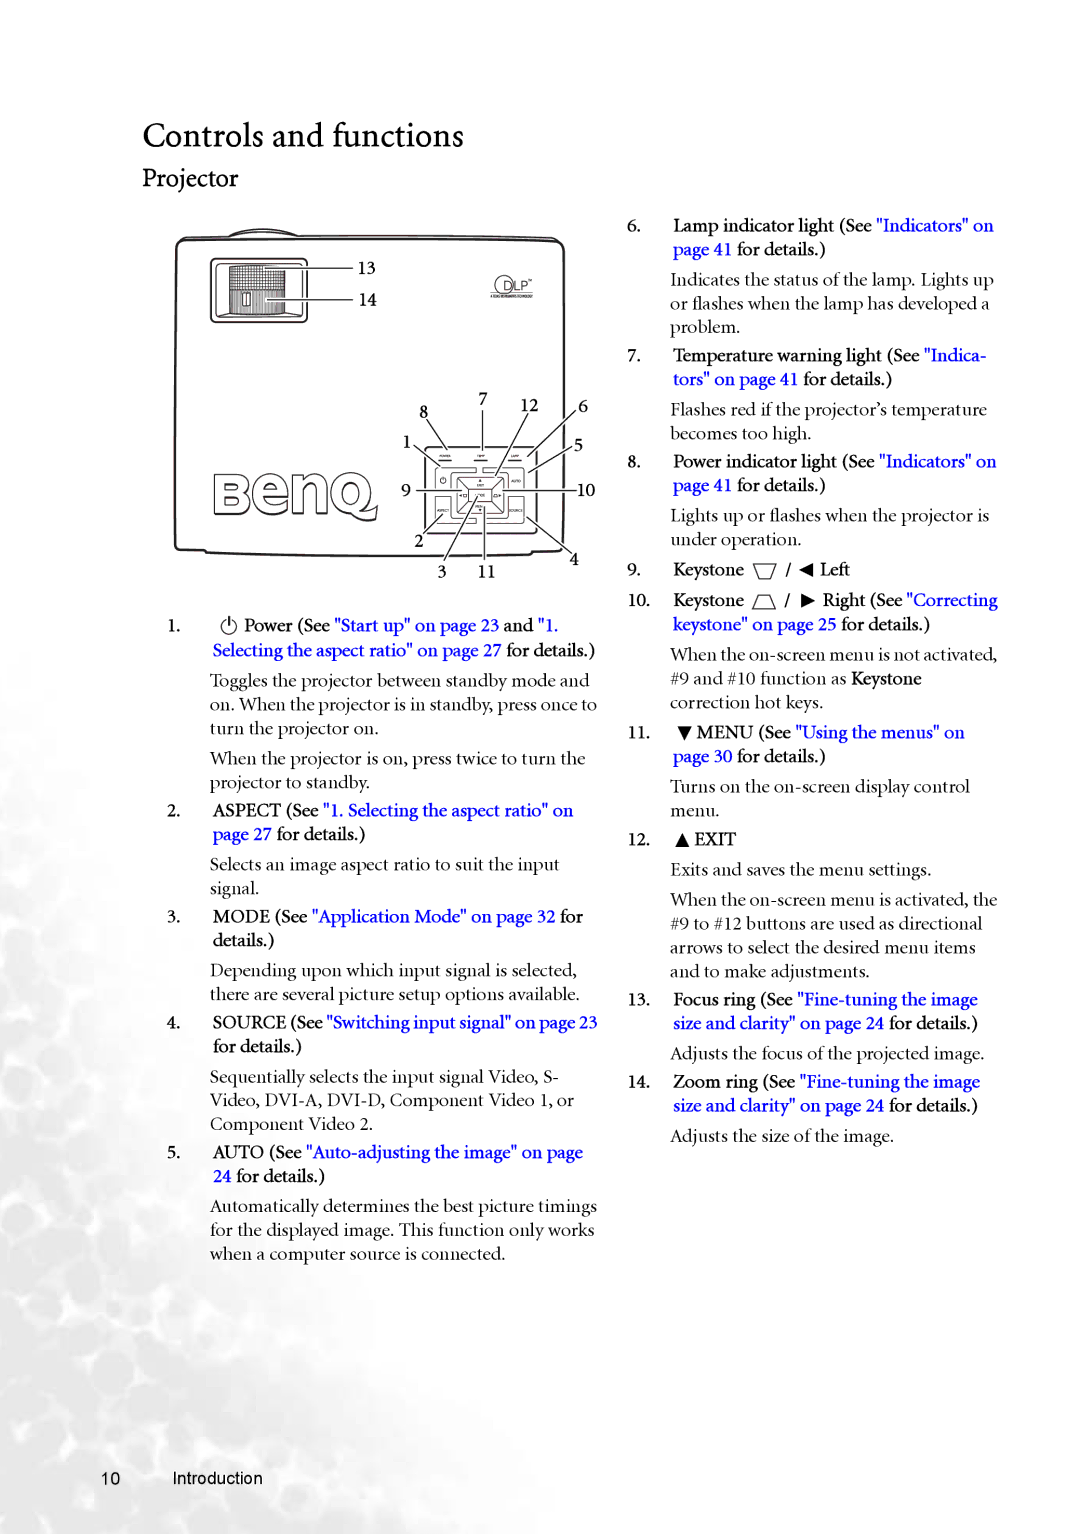
1. | I Power (See "Start up" on page 23 and "1. |
| ||
| Selecting the aspect ratio" on page 27 for details.) | |||
Toggles the projector between standby mode and on. When the projector is in standby, press once to turn the projector on.
When the projector is on, press twice to turn the projector to standby.
2.ASPECT (See "1. Selecting the aspect ratio" on page 27 for details.)
Selects an image aspect ratio to suit the input signal.
3.MODE (See "Application Mode" on page 32 for details.)
Depending upon which input signal is selected, there are several picture setup options available.
4.SOURCE (See "Switching input signal" on page 23 for details.)
Sequentially selects the input signal Video, S- Video,
5.AUTO (See "Auto-adjusting the image" on page 24 for details.)
Automatically determines the best picture timings for the displayed image. This function only works when a computer source is connected.
6.Lamp indicator light (See "Indicators" on page 41 for details.)
Indicates the status of the lamp. Lights up or flashes when the lamp has developed a problem.
7.Temperature warning light (See "Indica- tors" on page 41 for details.)
Flashes red if the projector’s temperature becomes too high.
8.Power indicator light (See "Indicators" on page 41 for details.)
Lights up or flashes when the projector is under operation.
9.Keystone  /
/  Left
Left
10.Keystone ![]() /
/ ![]() Right (See "Correcting keystone" on page 25 for details.)
Right (See "Correcting keystone" on page 25 for details.)
When the
11.![]() MENU (See "Using the menus" on page 30 for details.)
MENU (See "Using the menus" on page 30 for details.)
Turns on the
12. EXIT
EXIT
Exits and saves the menu settings.
When the
13.Focus ring (See
Adjusts the focus of the projected image.
14.Zoom ring (See
Adjusts the size of the image.
10 Introduction