Remote control
1 ![]()
![]()
![]()
![]() 14
14
2
| 15 | |
3 | 16 | |
| ||
4 | 17 | |
5 | ||
18 | ||
6 | ||
15 | ||
7 | ||
19 | ||
8 | ||
| ||
9 |
| |
10 |
| |
11 | 20 | |
12 | ||
| ||
13 |
|
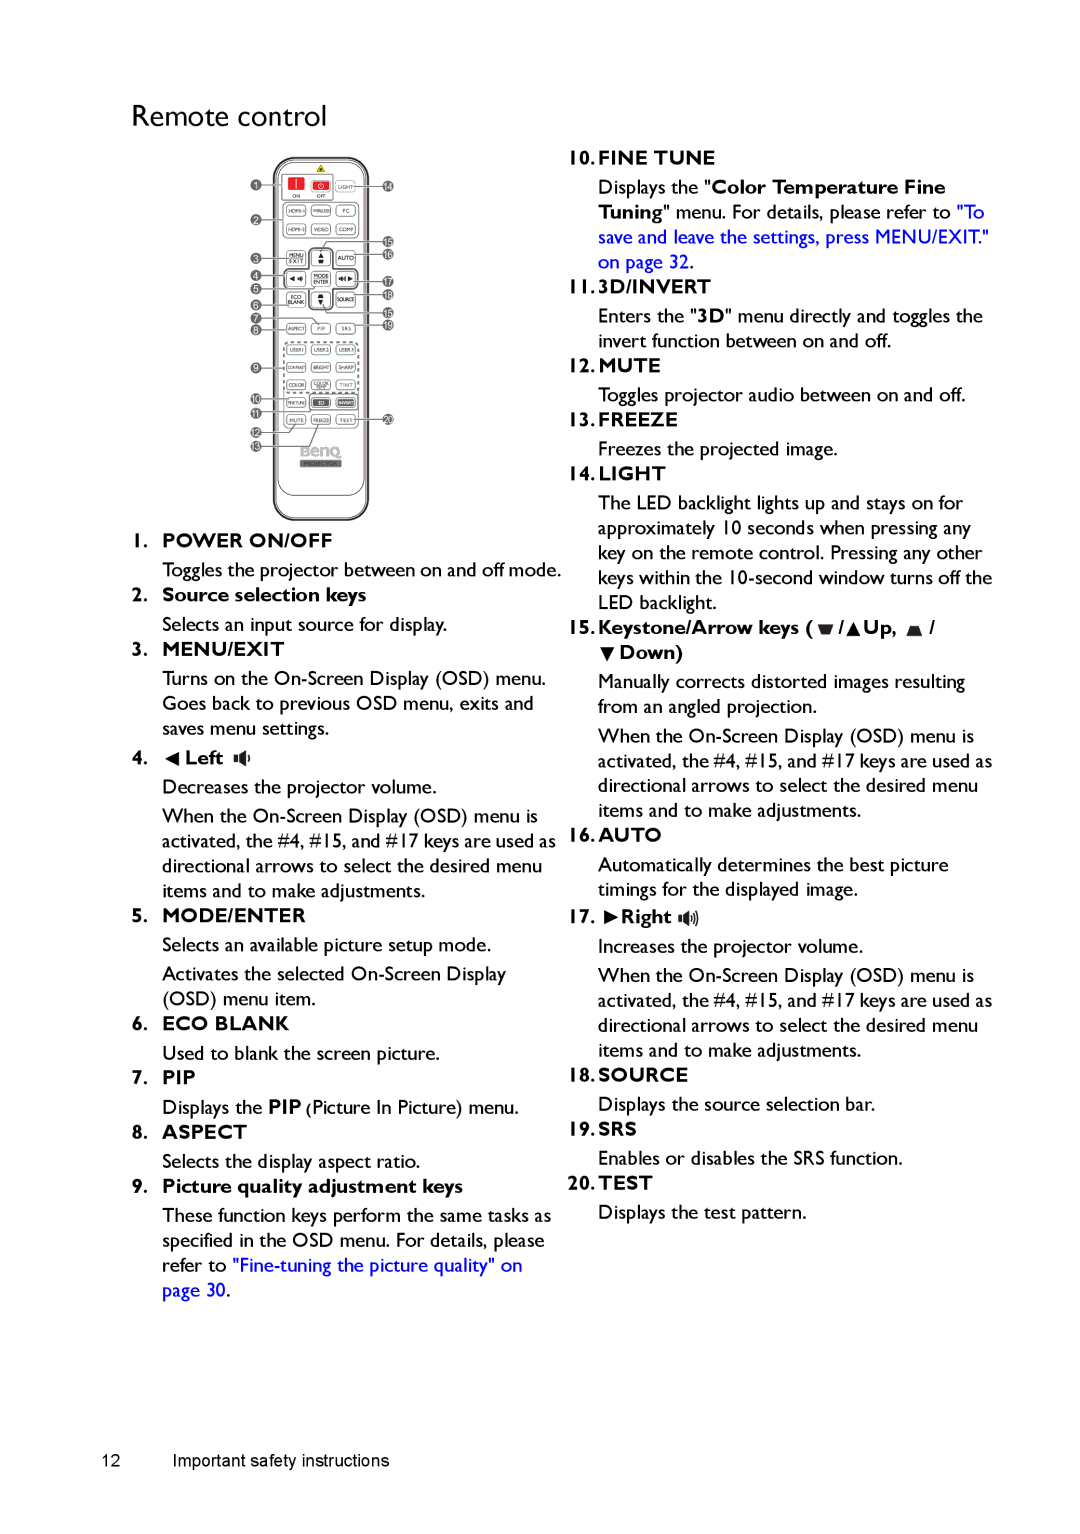
1.POWER ON/OFF
Toggles the projector between on and off mode.
2.Source selection keys
Selects an input source for display.
3.MENU/EXIT
Turns on the
4. Left
Left 


Decreases the projector volume.
When the
5.MODE/ENTER
Selects an available picture setup mode.
Activates the selected
6.ECO BLANK
Used to blank the screen picture.
7.PIP
Displays the PIP (Picture In Picture) menu.
8.ASPECT
Selects the display aspect ratio.
9.Picture quality adjustment keys
These function keys perform the same tasks as specified in the OSD menu. For details, please refer to
10.FINE TUNE
Displays the "Color Temperature Fine Tuning" menu. For details, please refer to "To save and leave the settings, press MENU/EXIT." on page 32.
11.3D/INVERT
Enters the "3D" menu directly and toggles the invert function between on and off.
12.MUTE
Toggles projector audio between on and off.
13.FREEZE
Freezes the projected image.
14.LIGHT
The LED backlight lights up and stays on for approximately 10 seconds when pressing any key on the remote control. Pressing any other keys within the
15.Keystone/Arrow keys (  /
/ Up,
Up, 
 /
/
![]() Down)
Down)
Manually corrects distorted images resulting from an angled projection.
When the
16.AUTO
Automatically determines the best picture timings for the displayed image.
17. Right
Right 


Increases the projector volume.
When the
18.SOURCE
Displays the source selection bar.
19.SRS
Enables or disables the SRS function.
20.TEST
Displays the test pattern.
12 Important safety instructions
