1.In the Picture
2.Highlight Primary Color and press ![]() /
/ ![]() to select a color from among Red, Green, Blue, Cyan, Magenta and Yellow.
to select a color from among Red, Green, Blue, Cyan, Magenta and Yellow.
3.Press ![]() to highlight Hue and press
to highlight Hue and press ![]() /
/ ![]() to select its range. Increase in the range will include colors consisted of more proportions of its two adjacent colors.
to select its range. Increase in the range will include colors consisted of more proportions of its two adjacent colors.
Red Yellow Green
Magenta Cyan
Blue
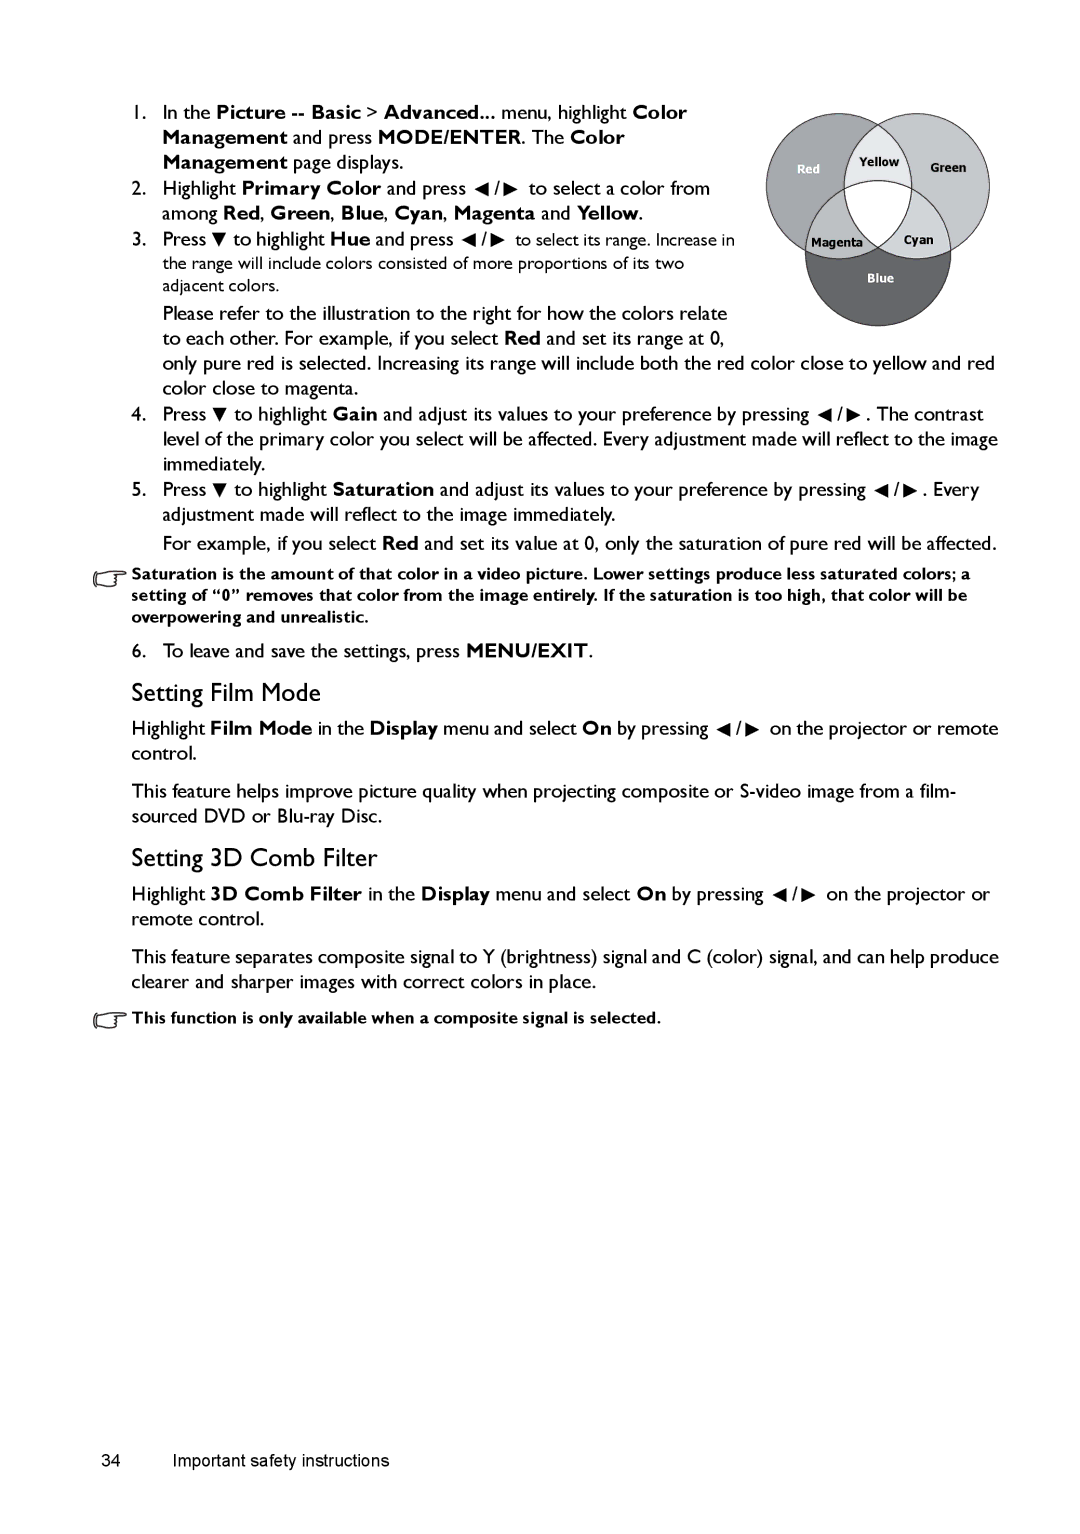
Please refer to the illustration to the right for how the colors relate to each other. For example, if you select Red and set its range at 0,
only pure red is selected. Increasing its range will include both the red color close to yellow and red color close to magenta.
4.Press ![]() to highlight Gain and adjust its values to your preference by pressing
to highlight Gain and adjust its values to your preference by pressing ![]() /
/ ![]() . The contrast level of the primary color you select will be affected. Every adjustment made will reflect to the image immediately.
. The contrast level of the primary color you select will be affected. Every adjustment made will reflect to the image immediately.
5.Press ![]() to highlight Saturation and adjust its values to your preference by pressing
to highlight Saturation and adjust its values to your preference by pressing ![]() /
/ ![]() . Every adjustment made will reflect to the image immediately.
. Every adjustment made will reflect to the image immediately.
For example, if you select Red and set its value at 0, only the saturation of pure red will be affected.
Saturation is the amount of that color in a video picture. Lower settings produce less saturated colors; a setting of “0” removes that color from the image entirely. If the saturation is too high, that color will be overpowering and unrealistic.
6. To leave and save the settings, press MENU/EXIT.
Setting Film Mode
Highlight Film Mode in the Display menu and select On by pressing ![]() /
/ ![]() on the projector or remote control.
on the projector or remote control.
This feature helps improve picture quality when projecting composite or
Setting 3D Comb Filter
Highlight 3D Comb Filter in the Display menu and select On by pressing ![]() /
/ ![]() on the projector or remote control.
on the projector or remote control.
This feature separates composite signal to Y (brightness) signal and C (color) signal, and can help produce clearer and sharper images with correct colors in place.
![]() This function is only available when a composite signal is selected.
This function is only available when a composite signal is selected.
