![]() BM 2610007877
BM 2610007877
Saw Operations
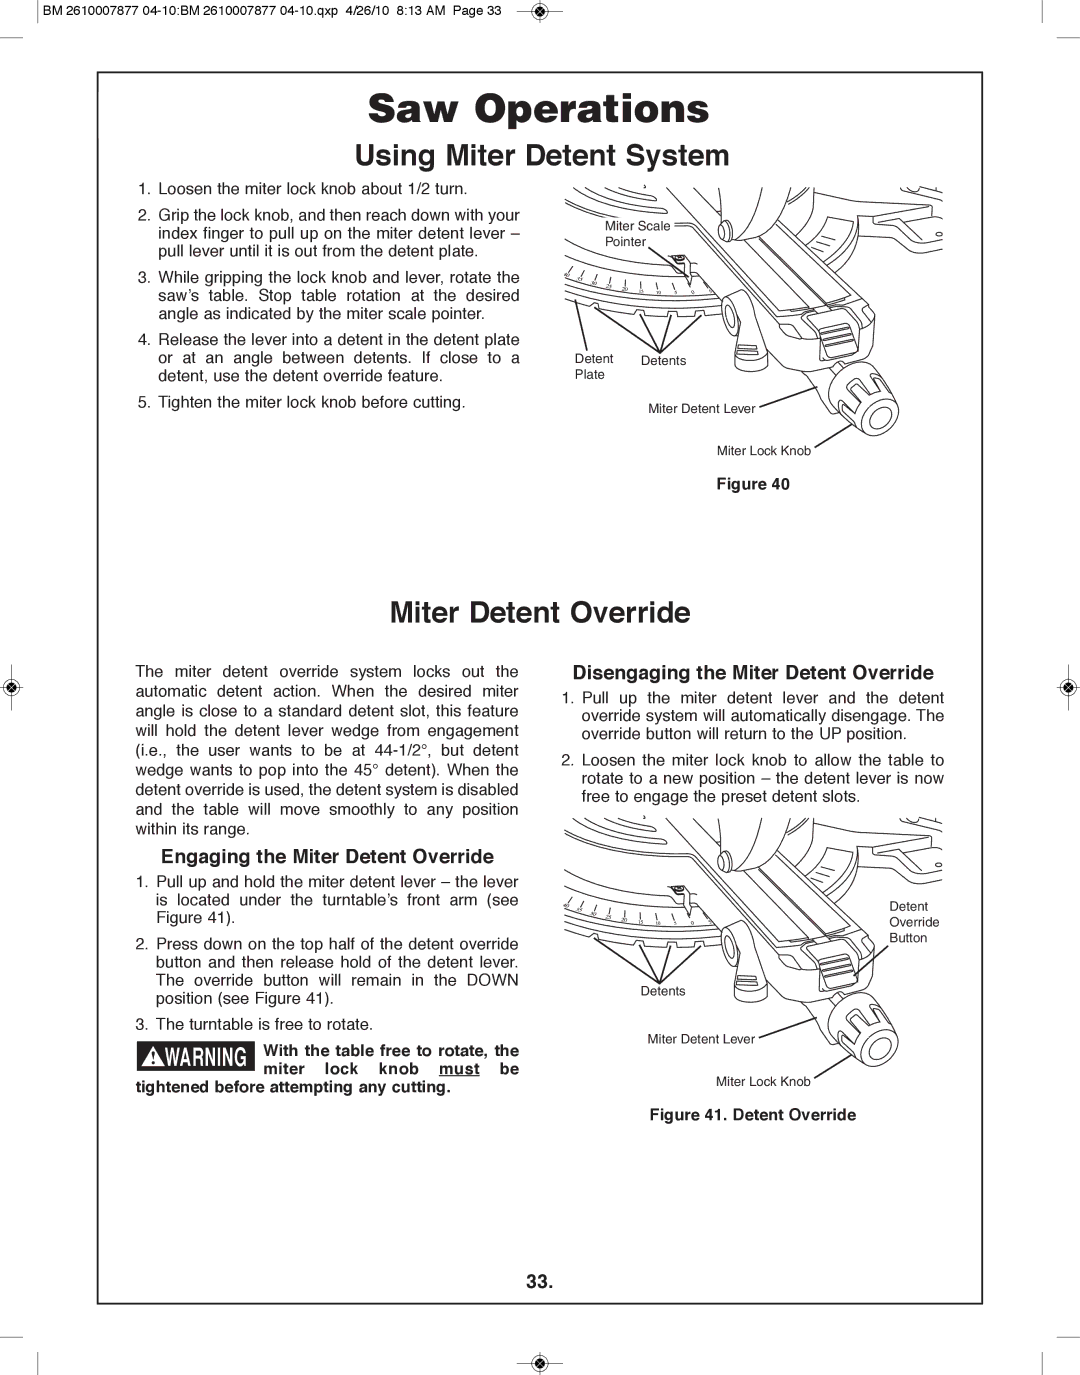
Using Miter Detent System
1.Loosen the miter lock knob about 1/2 turn.
2.Grip the lock knob, and then reach down with your index finger to pull up on the miter detent lever – pull lever until it is out from the detent plate.
3.While gripping the lock knob and lever, rotate the saw’s table. Stop table rotation at the desired angle as indicated by the miter scale pointer.
4.Release the lever into a detent in the detent plate or at an angle between detents. If close to a detent, use the detent override feature.
5.Tighten the miter lock knob before cutting.
Miter Scale
Pointer
Detent Detents
Plate
Miter Detent Lever
Miter Lock Knob
figure 40
Miter Detent Override
The miter detent override system locks out the automatic detent action. When the desired miter angle is close to a standard detent slot, this feature will hold the detent lever wedge from engagement (i.e., the user wants to be at
Engaging the Miter Detent Override
1.Pull up and hold the miter detent lever – the lever is located under the turntable’s front arm (see Figure 41).
2.Press down on the top half of the detent override button and then release hold of the detent lever. The override button will remain in the DOWN position (see Figure 41).
3.The turntable is free to rotate.
!WARNING With the table free to rotate, the miter lock knob must be
tightened before attempting any cutting.
Disengaging the Miter Detent Override
1.Pull up the miter detent lever and the detent override system will automatically disengage. The override button will return to the UP position.
2.Loosen the miter lock knob to allow the table to rotate to a new position – the detent lever is now free to engage the preset detent slots.
Detent
Override
Button
Detents
Miter Detent Lever
Miter Lock Knob
figure 41. Detent Override
33.