Brother XL5300, XL5200, XL5100 instruction manual Phase Partie cousue Modèle Comment coudre

Models: XL5100 XL5300 XL5200

1 88
Download 88 pages 46.47 Kb
Page 61
Image 61

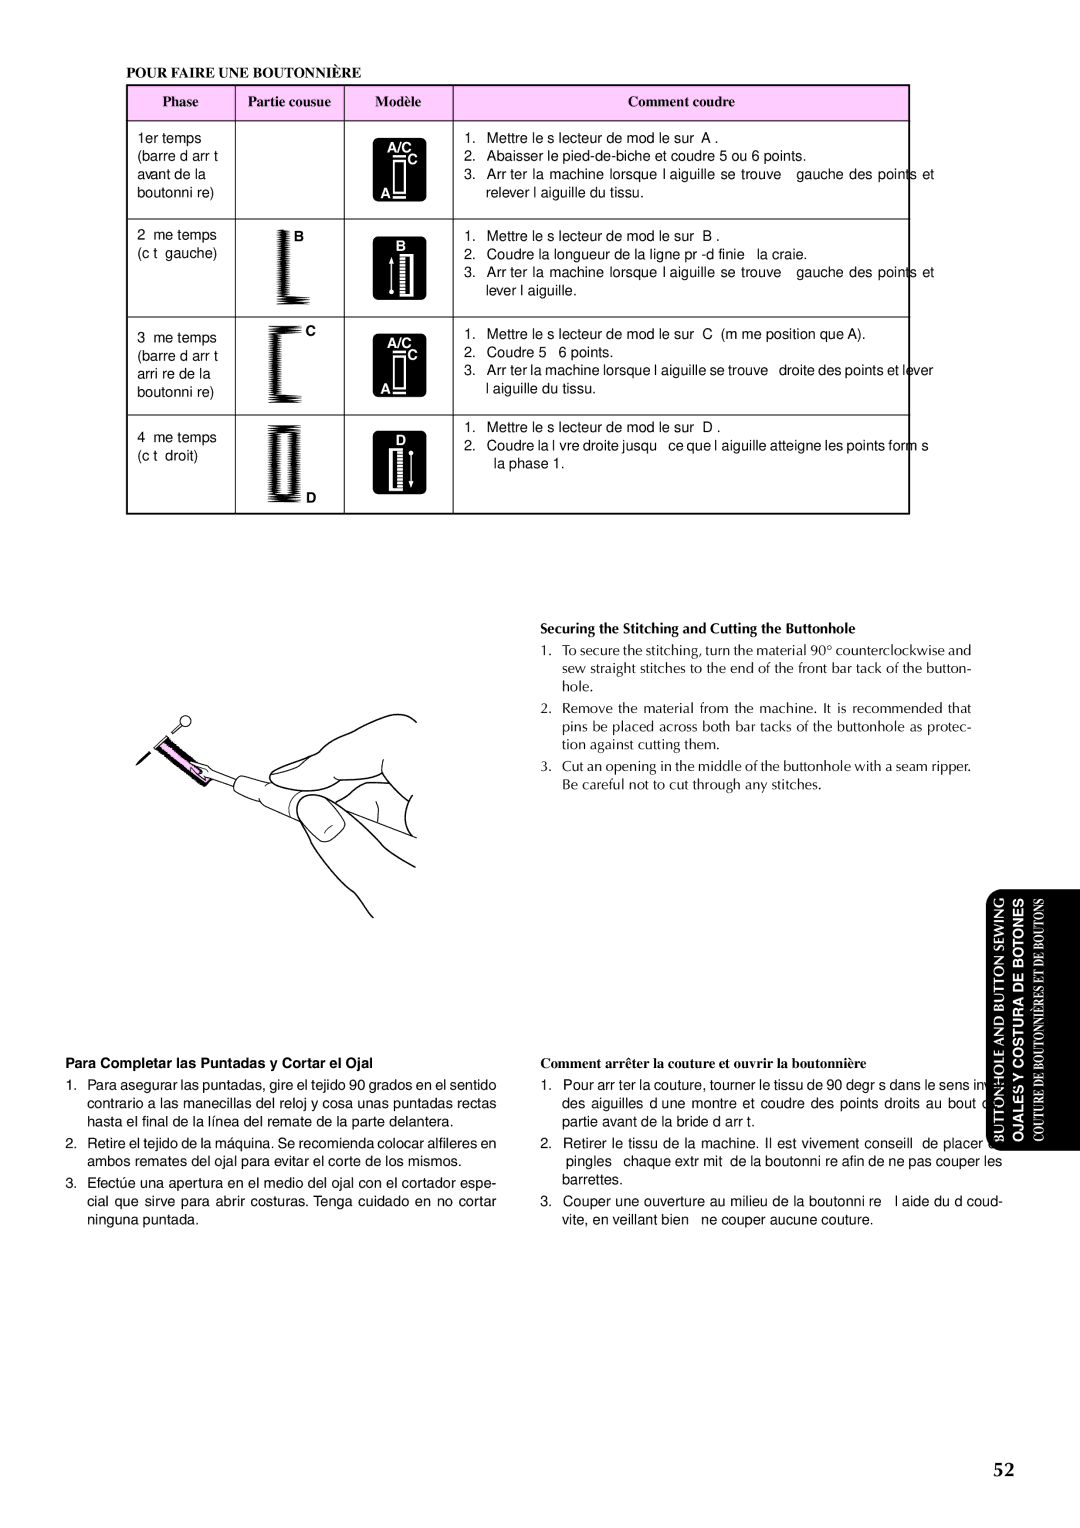
POUR FAIRE UNE BOUTONNIÈRE

Phase

Partie cousue

Modèle


Comment coudre


1er temps


A/C

1.

Mettre le sélecteur de modèle sur “A”.

(barre d’arrêt


2.

Abaisser le pied-de-biche et coudre 5 ou 6 points.


C


avant de la


3.

Arrêter la machine lorsque l’aiguille se trouve à gauche des points et

boutonnière)


A


relever l’aiguille du tissu.


2 ème temps

B


B

1.

Mettre le sélecteur de modèle sur “B”.

(côté gauche)


2.

Coudre la longueur de la ligne pré-définie à la craie.


3.

Arrêter la machine lorsque l’aiguille se trouve à gauche des points et


lever l’aiguille.


3 ème temps

C

A/C

1.

Mettre le sélecteur de modèle sur “C” (même position que A).


2.

Coudre 5 à 6 points.

(barre d’arrêt


C


arrière de la


A


3.

Arrêter la machine lorsque l’aiguille se trouve à droite des points et lever

boutonnière)


l’aiguille du tissu.


4 ème temps


D

1.

Mettre le sélecteur de modèle sur “D”.


2.

Coudre la lèvre droite jusqu’à ce que l’aiguille atteigne les points formés

(côté droit)


D


à la phase 1.


Securing the Stitching and Cutting the Buttonhole

1.To secure the stitching, turn the material 90° counterclockwise and sew straight stitches to the end of the front bar tack of the button- hole.

2.Remove the material from the machine. It is recommended that

pins be placed across both bar tacks of the buttonhole as protec- tion against cutting them.

3. Cut an opening in the middle of the buttonhole with a seam ripper. Be careful not to cut through any stitches.

Para Completar las Puntadas y Cortar el Ojal

1.Para asegurar las puntadas, gire el tejido 90 grados en el sentido contrario a las manecillas del reloj y cosa unas puntadas rectas hasta el final de la línea del remate de la parte delantera.

2.Retire el tejido de la máquina. Se recomienda colocar alfileres en ambos remates del ojal para evitar el corte de los mismos.

3.Efectúe una apertura en el medio del ojal con el cortador espe- cial que sirve para abrir costuras. Tenga cuidado en no cortar ninguna puntada.

Comment arrêter la couture et ouvrir la boutonnière

1.Pour arrêter la couture, tourner le tissu de 90 degrés dans le sens inverse des aiguilles d’une montre et coudre des points droits au bout de la partie avant de la bride d’arrêt.

2.Retirer le tissu de la machine. Il est vivement conseillé de placer des épingles à chaque extrémité de la boutonnière afin de ne pas couper les barrettes.

3.Couper une ouverture au milieu de la boutonnière à l’aide du découd- vite, en veillant bien à ne couper aucune couture.

BUTTONHOLE AND BUTTON SEWING

OJALES Y COSTURA DE BOTONES

COUTURE DE BOUTONNIÈRES ET DE BOUTONS

52

Page 61
Image 61
Brother XL5300, XL5200, XL5100 Phase Partie cousue Modèle Comment coudre, Securing the Stitching and Cutting the Buttonhole

XL5100, XL5300, XL5200 specifications

The Brother XL series sewing machines, including the XL5200, XL5300, and XL5100, are versatile and user-friendly models designed for both beginners and experienced sewers. These machines combine functionality with advanced features to cater to a wide range of sewing projects.

The Brother XL5200 is designed to simplify the sewing experience while offering versatility. It features 35 built-in stitches, including decorative, utility, and stretch stitches, providing plenty of options for various projects. The easy-to-read LCD screen allows users to select stitches effortlessly. One of its standout features is the automatic needle threader, eliminating the frustration of threading the needle manually. The machine also comes equipped with a drop-in top bobbin system that ensures smooth and consistent sewing.

The XL5300 builds upon the capabilities of the XL5200, providing additional features that enhance creativity. With 60 built-in stitches, including an impressive selection of decorative stitches and seven one-step auto-size buttonhole options, this model encourages experimentation. The XL5300 also includes a hard case for protection and portability, making it an excellent choice for sewers who attend classes or workshops. Its adjustable stitch width and length allow for customization of stitches, ensuring the outcome perfectly aligns with the user’s vision.

The Brother XL5100 is a great entry-level machine known for its ease of use. This model contains 50 built-in stitches, including essential utility stitches that are perfect for garment construction, quilting, and crafting. Like its counterparts, it features an automatic needle threader and a jam-resistant drop-in bobbin. The XL5100 also offers a convenient free arm that is ideal for sewing sleeves and cuffs. This model is particularly user-friendly, making it an excellent option for beginners looking to develop their sewing skills.

All three models come with various presser feet and accessories that expand their functionality, such as a zipper foot, buttonhole foot, and walking foot for quilting. They are designed with sturdy construction, ensuring durability and longevity for all sewing enthusiasts.

In summary, the Brother XL5200, XL5300, and XL5100 are excellent choices for those looking for reliable sewing machines that offer a blend of user-friendly features, versatility, and performance. Whether for simple alterations or complex projects, these models provide the tools necessary to help bring user creativity to life.