
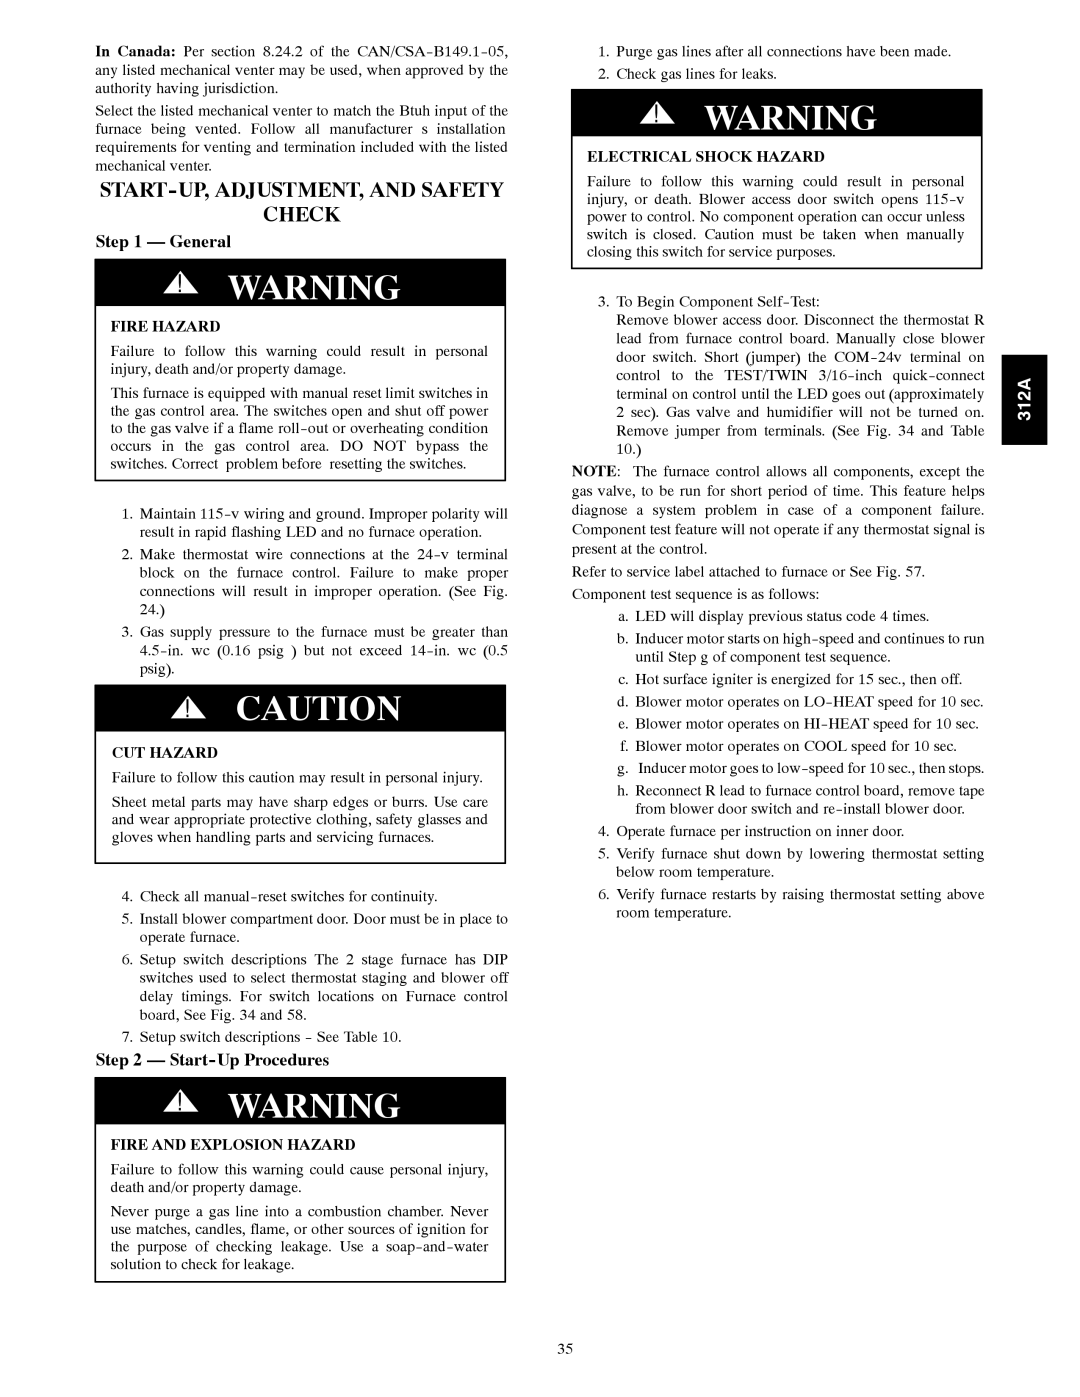
120 specifications
The Bryant 120 is a remarkable system designed for residential and commercial heating and cooling needs, showcasing an impressive blend of efficiency, reliability, and advanced technology. As a part of Bryant's extensive line of HVAC solutions, the Bryant 120 stands out with its features and performance, making it an ideal choice for those seeking comfort year-round.One of the main features of the Bryant 120 is its exceptional energy efficiency. It boasts a high Seasonal Energy Efficiency Ratio (SEER) rating, enabling homeowners to save on energy costs while enjoying consistent temperature control. This efficiency is aided by its variable-speed compressor, which allows the system to adjust its output based on current requirements, optimizing both energy consumption and comfort.
In terms of technology, the Bryant 120 incorporates advanced controls that enhance user experience and system performance. The system comes equipped with smart thermostats that allow homeowners to monitor and adjust their environment remotely. These thermostats not only provide convenience but also help in optimizing energy usage by learning the household's heating and cooling patterns.
Another characteristic of the Bryant 120 is its durable construction. The unit is built to withstand various weather conditions, featuring a robust cabinet and components designed for longevity. This durability ensures that homeowners can rely on the system for years without the need for frequent repairs or replacements.
Noise levels are also a critical consideration in HVAC systems, and the Bryant 120 addresses this with its quiet operation. The system is designed to minimize sound output, making it suitable for residential areas where noise can be a concern. This is particularly beneficial for nighttime use, providing a comfortable sleeping environment.
Additionally, the Bryant 120 supports eco-friendly refrigerants that comply with environmental standards, contributing to a reduction in greenhouse gas emissions. This commitment to sustainability reflects Bryant's dedication to creating products that are not only effective but also responsible.
Overall, the Bryant 120 encapsulates a harmonious balance of efficiency, advanced technology, durability, and quiet operation. Whether for a new installation or a replacement, the Bryant 120 presents an ideal solution to meet diverse heating and cooling requirements, enhancing comfort while prioritizing energy savings and environmental responsibility.