Instructions
Page
Thank you for purchasing a Canon product
Symbols
Contents
User-Controlled Shooting
Camera Care and Storage
Handling Cautions
LCD Displays
How Low Battery Levels Affect Camera Operation
Batteries
Lens Electrical Contacts
Quick Start Guide
Install the batteries Attach a lens
Load the film
Batteries as shown. p.18
On the lens, set the focus mode switch to AF. p.20
4Turn the Mode Dial to
8Unload the film
Mirror p.75 Contacts p.7
Nomenclature
Date Model only With an EX-series Speedlite
AEB
Nomenclature LCD Panel
Viewfinder Information
Creative
Nomenclature Mode Dial
Basic Zone
Creative Zone
AF Mode Dial
Eye Control Switch m Model only
Film Advance Mode Lever
Reference page numbers are in parentheses
Conventions Used in this Instructions
Attaching the Strap
Before You Start
Open the battery compartment
Installing the Batteries
Install the batteries
Closecover. the battery compartment
Checking the Battery Level
Turn the Mode Dial to a shooting mode
Battery Life
Mounting and Detaching a Lens
Mounting a Lens
Detaching the Lens
When it is pressed halfway
When it is pressed fully
How the Shutter Button Works
Loading Film
5Loading and Unloading Film
Move the 7 arrow to the D icon
Checking the Film Speed
Unloading Film
To rewind the film in midroll, follow the procedure below
6Midroll Rewind
Press the 6 button
2Turn the dioptric adjustment knob
Dioptric Adjustment
Remove the eyecup
Reattach the eyecup
Holding the Camera
Fully Automatic Shooting
Turn the Mode Dial to Y, U, I, O, P, or a
2Aim any of the AF points on the subject
YFull Auto Mode
Focus the subject
Press the shutter button halfway to focus
AF-Assist beam with the Built-in Flash
Take the picture
Compose the shot and press the shutter button fully
Portrait
Programmed Image Control Modes
Landscape
This is for wide scenic views, night scenes, etc
Night Portrait
Sports
To cancel red-eye reduction, set W on the LCD panel
Move the 7 arrow to the F icon on the LCD panel
2Turn the l dial to set E on the LCD panel
Set the film advance mode lever to p
QUsing the Self-timer
SThe K icon will be displayed on the LCD panel
2Take the picture
Remove the eyecup from the eyepiece
Using the Eyepiece Cover
Push up both sides at the bottom Eyecup
2Attach the eyepiece cover
Press the q button
Imprinting the Date or Time Date Model only
Replacing the Date Battery
AF Modes and Metering Modes
Selecting the AF Mode
AI Servo AF for Moving Subjects
One-Shot AF for Still Subjects
AI Focus AF for Automatic AF Mode Switching
Selecting the AF Mode
∗ Predictive AF
3Selecting an AF Point
Basic Procedure for AF Point Selection
Manual Selection
Automatic Selection
3Selecting an AF Point
Display all AF points in red
Set the Eye Control switch to e
Calibration Procedure
EEye Control Calibration m Model only
2Select a blinking CAL No
EEye Control Calibration m Model only
11Set the Eye Control switch to g
Intelligent Eye Control
Deleting Eye Control Calibration Settings
Select a non-blinking CAL No
Press the w button and 3 button simultaneously
Set the Eye Control switch to e 2Select the CAL No
GUsing Eye Control m Model only
Set the Eye Control switch to g 4Select a shooting mode
Turn the Mode Dial to select the desired shooting mode
Turning Off Eye Control
Eye Control Servo AF
2Select the desired AF point Focus the subject
Focusing Off-Center Subjects
8Manual Focusing
When Autofocus Fails Manual Focusing
Difficult Subjects for Autofocusing
SetMF.the lens focus mode switch to 2Focus the subject
ZMetering Modes
CCenter-weighted averaging metering
ZEvaluative metering
XPartial metering
User-Controlled Shooting
Turn the Mode Dial to S
Program AE
Check the display
4Take the picture
Difference Between S and Y
About Program Shift
Shutter-Priority AE
Turn the Mode Dial to R 2Select the desired shutter speed
Press the shutter button halfway to focus the subject
4Check the viewfinder display and take the picture
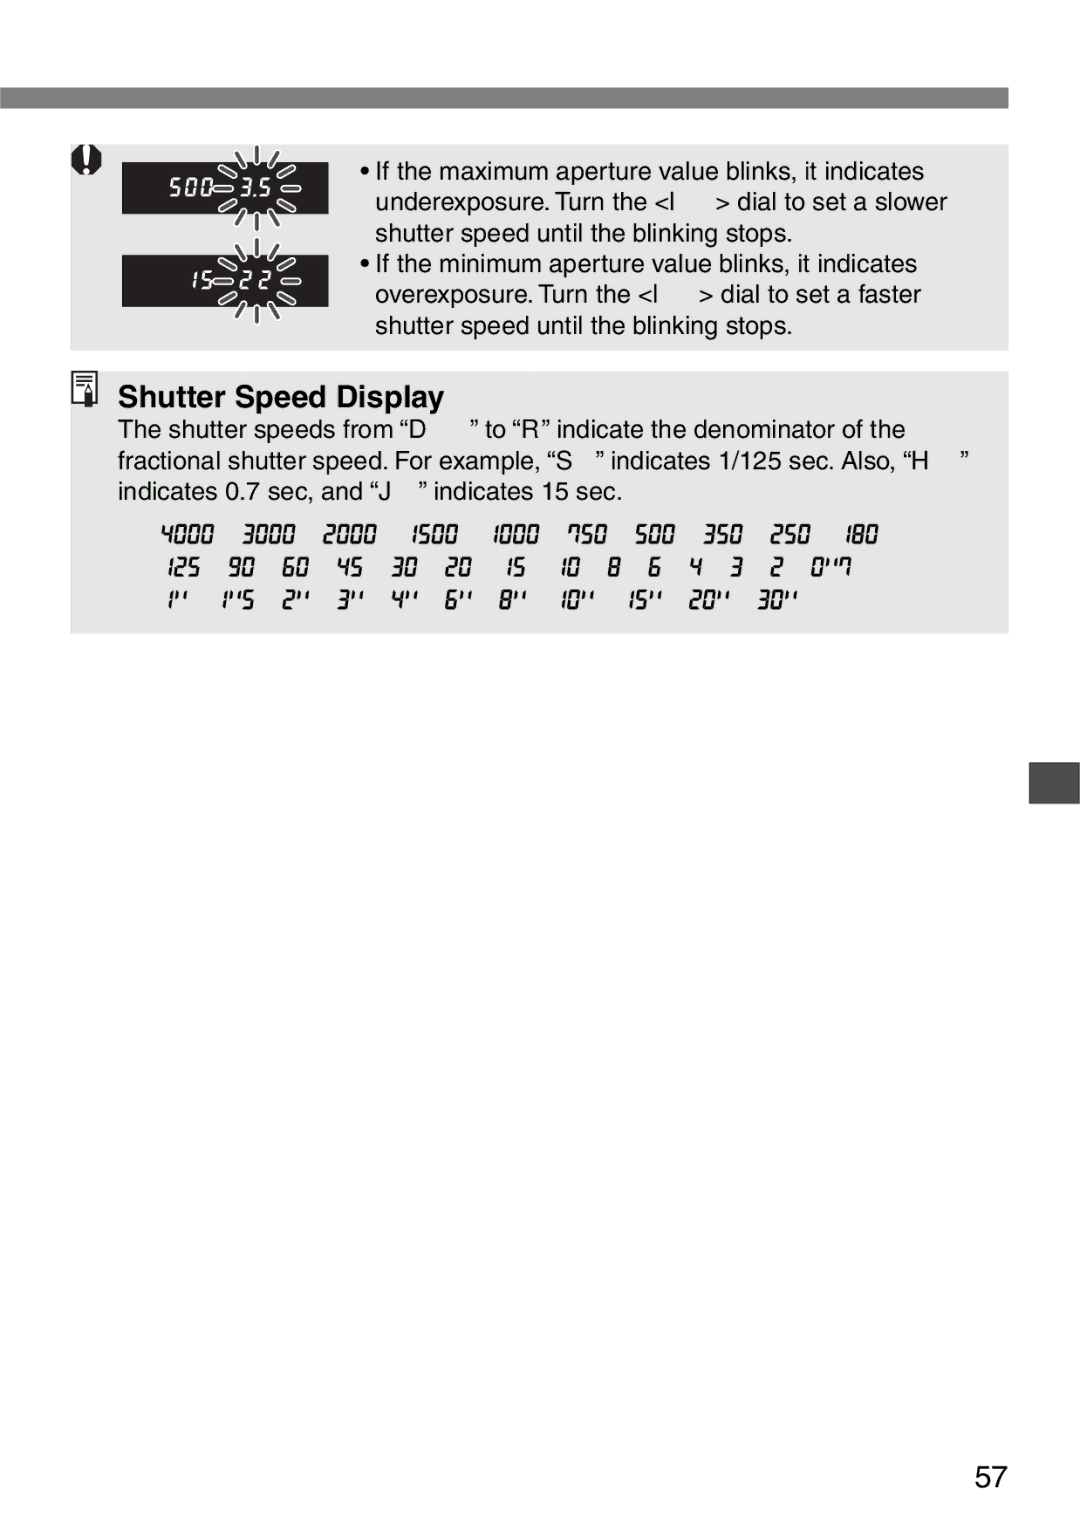
Shutter Speed Display
Turn the Mode Dial to E 2Select the desired aperture value
Aperture-Priority AE
SThe shutter speed is set automatically
Aperture Value Display
Depth-of-field Preview
Manual Exposure
Turn the Mode Dial to W 2Select the desired shutter speed
Select the desired aperture value
4Press the shutter button halfway to focus the subject
6Take the picture
Determine the exposure
2Turn the Eye Control switch to Select the AF point
Turn the Mode Dial to Q. sThe AF mode will be set
Depth-of-field AE
Depth-of-field AE with a Manually-Selected AF Point
4Focus the nearest subject
Focus farthest subject
6Compose the picture and press the shutter button halfway
Make sure the correct CAL No. has been set. p.48
Turn the Mode Dial to Q 2Set the Eye Control switch to g
Focus the nearest subject you want in focus
Picture
Press the shutter button halfway
Depth-of-field AE
Exposure Compensation
2Check the exposure setting
Press the shutter button halfway and check the display
Set the exposure compensation amount
LAuto Exposure Bracketing AEB
SThe picture will be taken in the current film advance mode
Moveicon. the 7 arrow to the L
Look at the LCD panel and press the 0 button
S R E Q modes
Canceling AEB
2Press the j button sThe j icon will light
JAE Lock
Bulb Exposures
Turn the Mode Dial to W 2Set the shutter speed to y
4Start the bulb exposure. sDuring the bulb exposure, y
Blinks on the LCD panel
4Multiple Exposures
Moveicon. the 7 arrow to
2Set the desired number of multiple exposures
Setting the ISO Film Speed
HSelecting the Film Advance Mode
2Set the desired film speed
Turn the l dial to set the film speed
Turn the l dial To enable the beeper to sound, set to E
2Set the setting to W
9Silencing the Beeper
BLCD Panel Illumination
Press the shutter button fully. sThe mirror will lock up
Mirror Lockup
SAfter 30 seconds, it will go back down automatically
2Pressagain. the shutter button fully
KWireless Remote Control
Using the Remote Switch
Turn the film advance mode lever to p
Flash Photography
A Basic Zone Mode
Using the Built-in Flash
A Creative Zone Mode
This mode gives the same flash result as the S mode
ISO
Flash Distance Range With EF28-105mm f/3.5-4.5
Using the Built-in Flash AFlash Exposure Compensation
Move the 7 arrow to the a icon on the LCD panel
2Set the flash exposure compensation amount
Using an EX-series Speedlite
Using an EOS-dedicated Speedlite
Using an EZ/E/EG/ML/TL-series Speedlite
About E-TTL II Autoflash
Using an EOS-dedicated Speedlite
Custom Functions C.Fn
Turn the Mode Dial to G. sThe V icon and Custom
GSetting a Custom Function
Set the Custom Function setting
2Select the Custom Function No
Enabled Disabled
Custom Function Settings
Makes focusing and AE lock separate operations
Increase the film rewind speed
Custom Function Settings
Disabled Normal operation Enabled
1st-curtain sync 2nd-curtain sync
Auto 125 sec. fixed
Off
Button + l u
Disabled Enabled
AF stop AF start
AE lock while metering
Exposure
Basic Photography Terms
Shutter speed
Aperture value
Basic Photography Terms
Depth of field
Feature Availability Table
AE Lock Effects
AF Mode and Film Advance Mode Combination
Program Line Description
Program Line
There was camera shake when the picture was taken
Picture looks blurred Lens focus mode switch is set to MF
R icon blinks on the LCD panel Battery level is very low
Misoperation has occurred
Major Specifications
Exposure control
Major Specifications
Film transport
Index
Shutter Button
CT1-1265-000 Canon INC