3
Before Scanning
Selecting the Network Scanner to be Used
Selecting the network scanner to be used with the ScanGear Tool enables scanning with Network ScanGear. No scanner is selected during Network ScanGear installation, so this operation is required before use.
![]() IMPORTANT
IMPORTANT
•The ScanGear Tool cannot be started at the same time as the Network ScanGear driver.
•Before selecting a network scanner, first you must switch it online. For details, see ‘Switching the Scanner Online and Offline,’ on
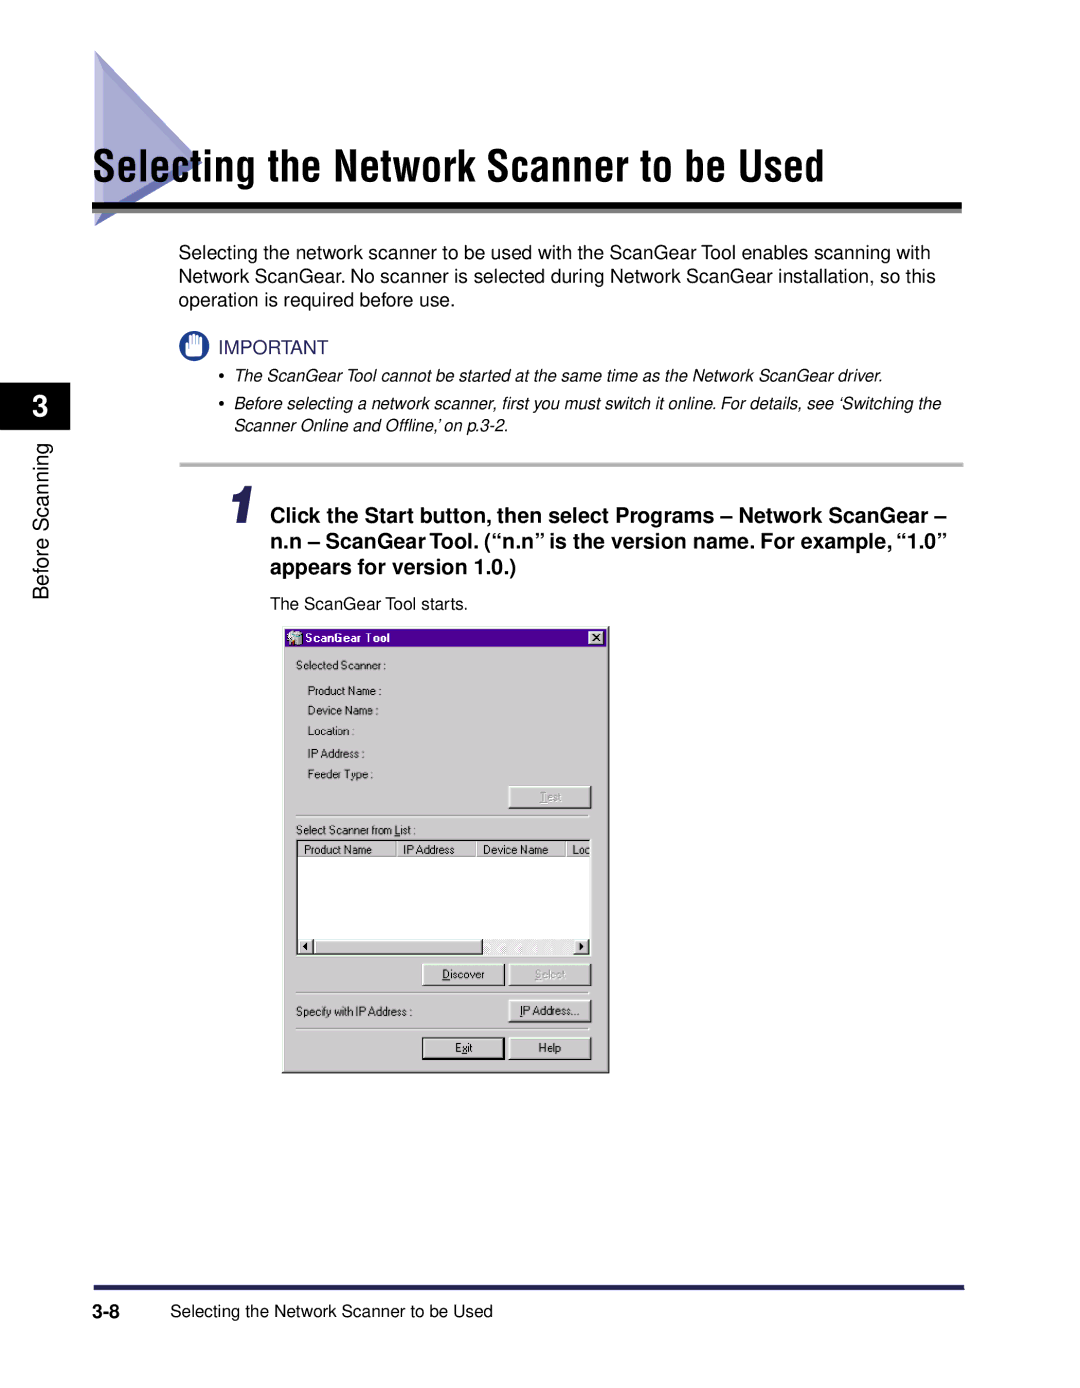
1Click the Start button, then select Programs – Network ScanGear – n.n – ScanGear Tool. (“n.n” is the version name. For example, “1.0” appears for version 1.0.)
The ScanGear Tool starts.