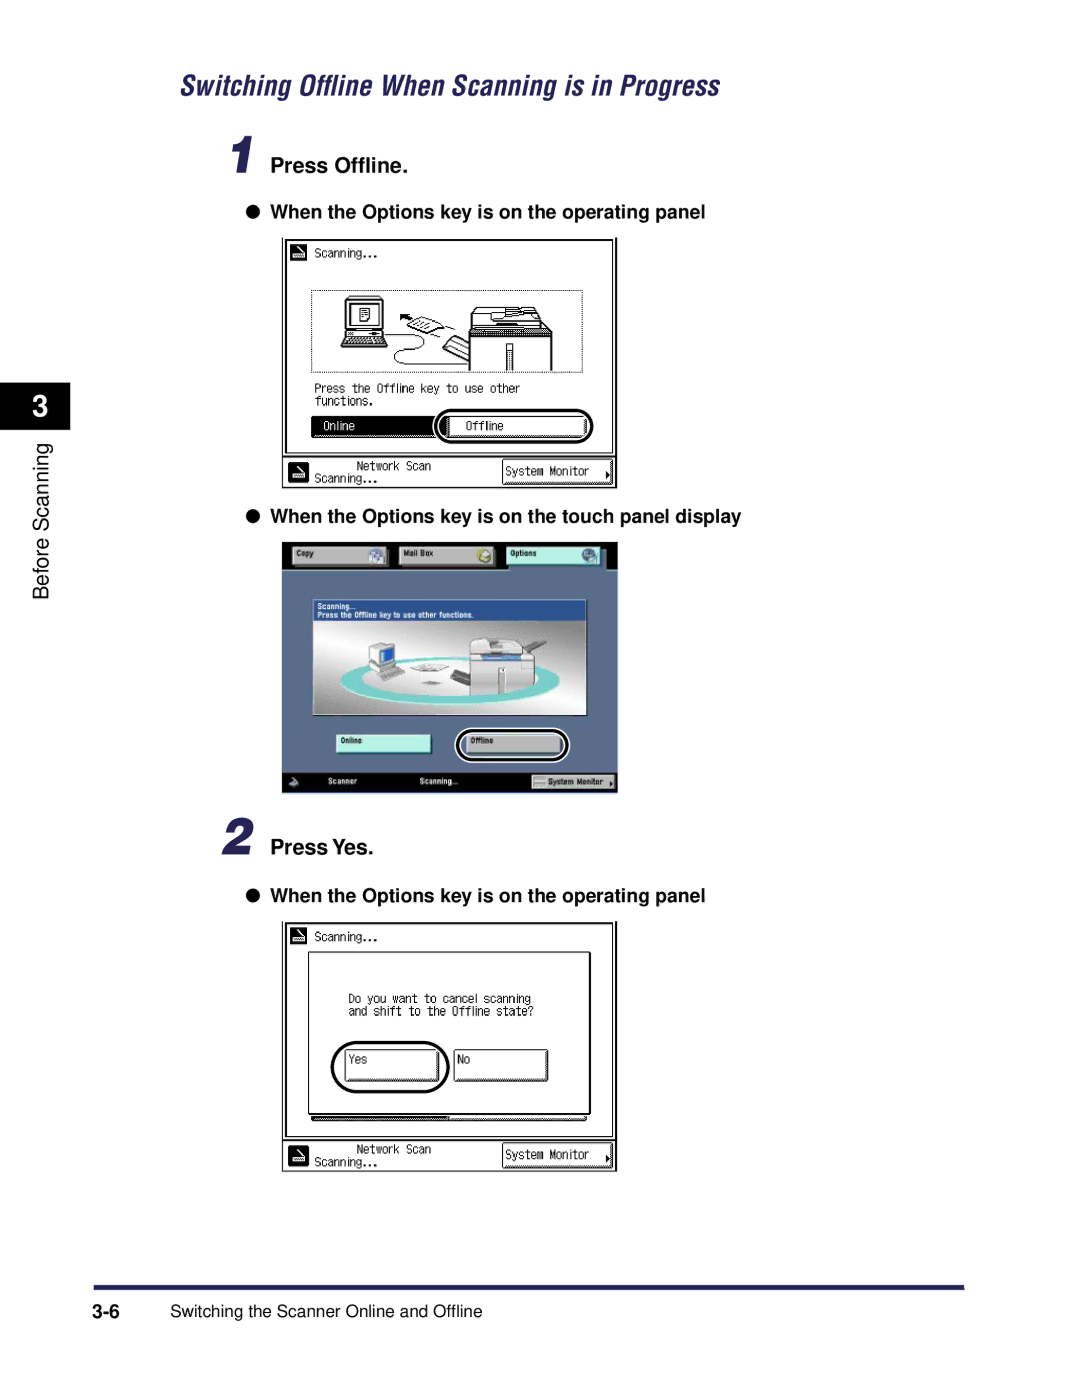
User’s Guide
Please read this guide before operating this equipment
Network ScanGear
Introduction
Organization of this User’s Guide
Installation
Chap
Installation Procedure
Table of Contents
Installation
How to Use This Manual
Index
Chapter4 Scanning
About Abbreviations
How to Use This Manual
Symbols Used in This Manual
About Trademarks
About Trademarks
Page
CHAPTER
Introduction1
Help Information
Features
Introduction to the Software
Readme File
Introduction
Operating Environment
Hardware
Introduction
Software
CHAPTER
Installation2
This chapter explains how to install Network ScanGear
Installation
Installation Procedure
where Network ScanGear is to be installed, then click the Next button
9 In the Choose Destination Location dialog box, specify the location
Installation
2-4 Installation Procedure
12 Click the Finish button
Installation
Installation
Uninstallation Procedure
1 Click the Start button, and select Programs - Network ScanGear
2 In the Confirm File Deletion dialog box, click the OK button
Page
CHAPTER
Before Scanning
When the Options key is on the touch panel display Press Options
Switching the Scanner Online and Offline
Switching the Scanner Online
When the Options key is on the operating panel
When the following display appears, the scanner is online
When the Options key is on the touch panel display
2 Press Online
When the Options key is on the operating panel
Switching Offline
Switching Offline When Scanning is not in Progress
1 Press Offline
Before Scanning
When the Options key is on the touch panel display
Switching Offline When Scanning is in Progress
2 Press Yes
When the Options key is on the operating panel
Before Scanning
When the Options key is on the touch panel display
Press No to cancel if you decide not to switch the scanner offline
3-8 Selecting the Network Scanner to be Used
Selecting the Network Scanner to be Used
Before Scanning
The ScanGear Tool starts
Before Scanning
2 Select the scanner to be used by either of the following methods
3 Click the Exit button
Before Scanning
1 Switch the scanner online
Starting Network ScanGear
2 Start the application
Move Image button
Network ScanGear Main Window
1 Toolbar
Crop button
Help button
2 Scanning buttons
Zoom button
Ruler button
Selecting Cropping Area
3 Preview Area
4 Tab sheets
5 Status bar
Page
CHAPTER
Scanning4
1 Start Network ScanGear from the application
2 In the Main sheet, select Platen for Original Placement
Scanning from the Platen Glass
Scanning
5 To preview the image, click the Preview button
6 Click the Scan button
1 Start Network ScanGear from the application
Scanning from the Feeder
Scanning
4 Load the originals in the feeder
6 If necessary specify the scanning area, then click the Scan button
1 In the Main sheet, click the Orientation button
Ensuring Scanned Originals are Correctly Oriented
To Automatically Recognize the Orientation of the Original
To Set the Feeding Direction of the Originals
1 In the Main sheet, select Different Sizes for Original Size
Scanning Different Sized Originals Together
Scanning
Specifing the Scanning Area
1 Click the Preview button to display the image in the Preview Area
2 Click the Crop button on the toolbar
Specifing the Scanning Area
Scanning
Setting
Summary of Important Features and Settings
Basic Settings
Settings for Scanning from the Feeder
Index
Page
3-12
Uninstall
Zoom button
Page
CANON EUROPA N.V
CANON INC
CANON U.S.A., INC
CANON CANADA INC