APPENDIX
OPERATING WIRELESS MOUSE
The Remote Control Unit is not only able to operate this projector but also usable as a wireless mouse for most Personal Computers. The POINT buttons and two CLICK buttons are used for wireless mouse operation.
This Wireless Mouse function is available only when PC mouse pointer is displayed on a projected screen. When the ON- SCREEN MENU or any message / dialog box is displayed on the screen instead of PC mouse pointer, this Wireless Mouse function cannot be used.
INSTALLATION
To use the Remote Control Unit as Wireless Mouse for a Personal Computer, installation of the mouse driver (not supplied) is required. Make sure that the mouse driver is properly installed in your computer and that the mouse port (or USB port) of your computer is activated.
1 | Connect the mouse port (or USB port) of your computer to | Note : When your computer has no mouse |
port, connect the Serial Port of your | ||
Control Port (or USB connector) of this projector with the Control | computer to the Control Port of the | |
| Cable (or USB cable). (Refer to page 11, 12 for connection.) | |
| projector with the Control Cable for the | |
|
| |
2 | Turn the projector on first, and then turn on your computer. | Serial Port (not supplied). |
| ||
When the computer is switched on first, Wireless Mouse may not |
|
work properly.
OPERATING WIRELESS MOUSE
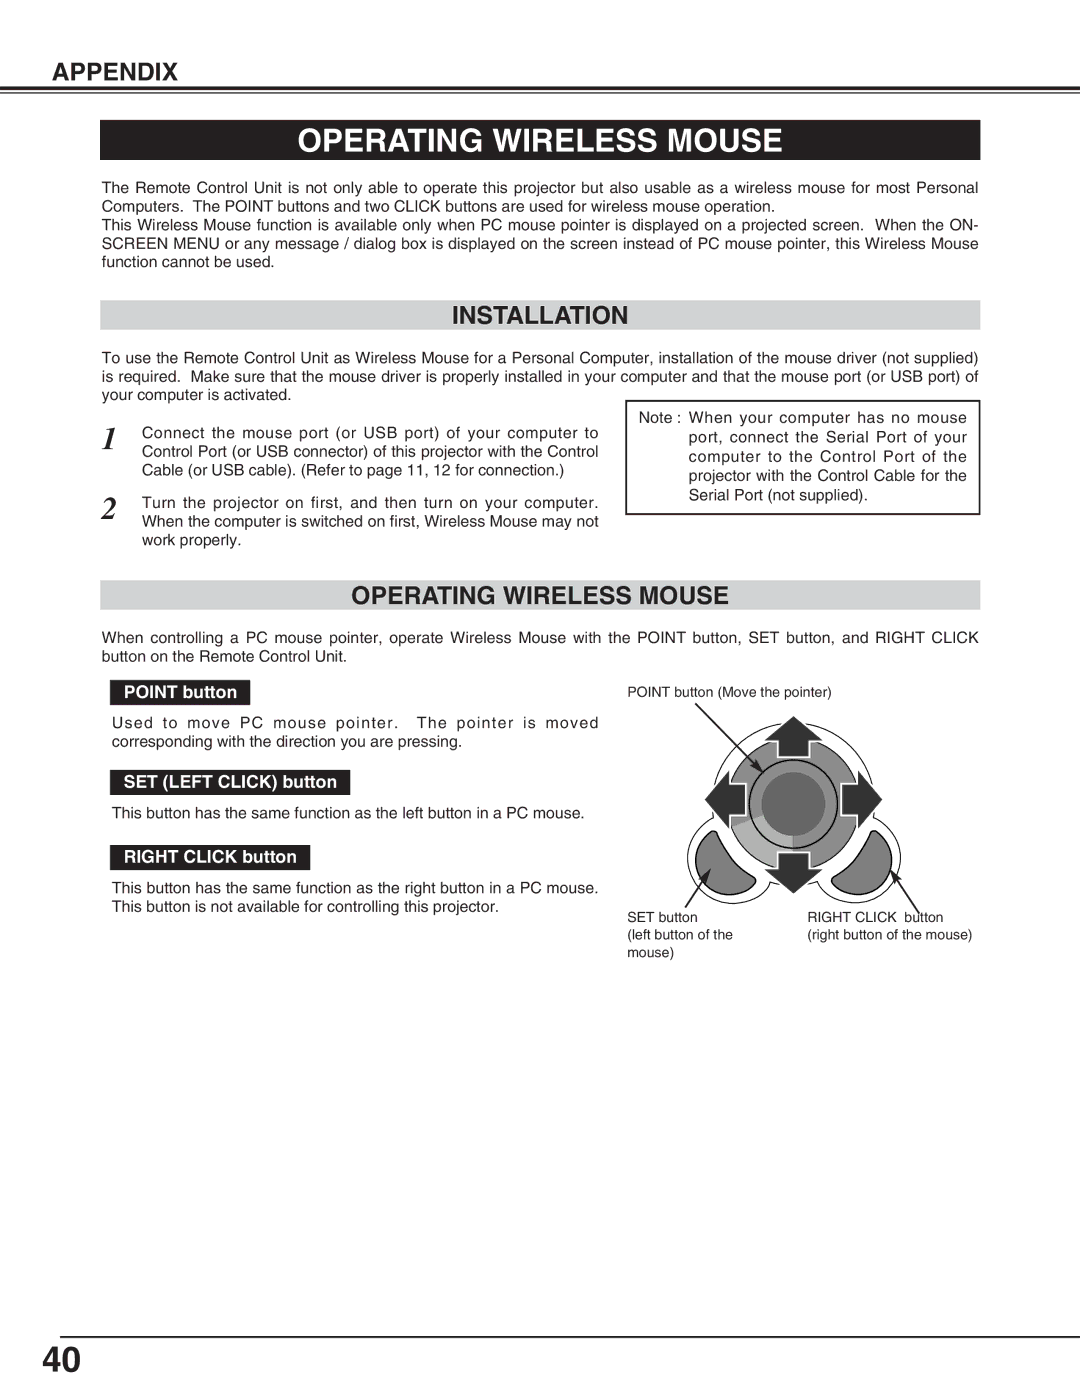
When controlling a PC mouse pointer, operate Wireless Mouse with the POINT button, SET button, and RIGHT CLICK button on the Remote Control Unit.
POINT button | POINT button (Move the pointer) |
Used to move PC mouse pointer. The pointer is moved corresponding with the direction you are pressing.
SET (LEFT CLICK) button
This button has the same function as the left button in a PC mouse.
RIGHT CLICK button
This button has the same function as the right button in a PC mouse.
This button is not available for controlling this projector.
SET button | RIGHT CLICK button |
(left button of the | (right button of the mouse) |
mouse) |
|
40
