Using the ND Filter
(lenses with built-in ND filter)
When recording in bright surroundings, the camcorder will set a small aperture value and the picture may appear blurred. When using a lens with a
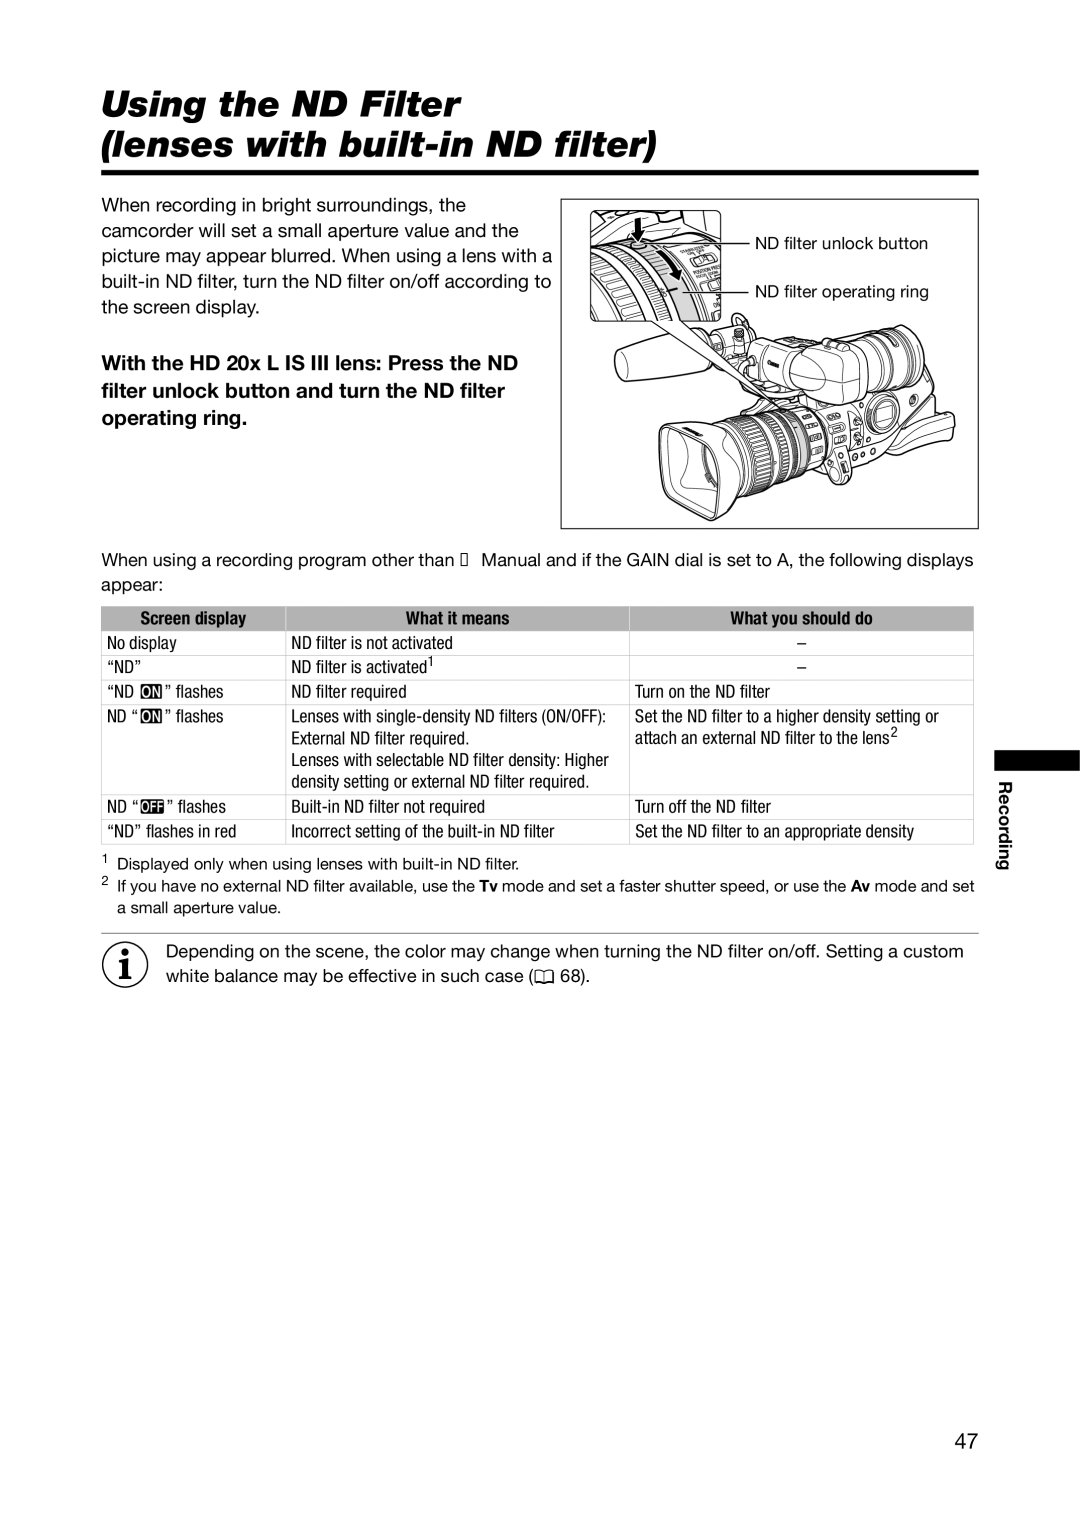
With the HD 20x L IS III lens: Press the ND filter unlock button and turn the ND filter operating ring.
ND filter unlock button |
ND filter operating ring |
When using a recording program other than M Manual and if the GAIN dial is set to A, the following displays appear:
Screen display | What it means | What you should do | |
No display | ND filter is not activated | – | |
“ND” |
| ND filter is activated1 | – |
“ND | ” flashes | ND filter required | Turn on the ND filter |
|
|
|
|
ND “ | ” flashes | Lenses with | Set the ND filter to a higher density setting or |
|
| External ND filter required. | attach an external ND filter to the lens2 |
|
| Lenses with selectable ND filter density: Higher |
|
|
| density setting or external ND filter required. |
|
|
|
|
|
ND “ | ” flashes | Turn off the ND filter | |
|
|
| |
“ND” flashes in red | Incorrect setting of the | Set the ND filter to an appropriate density | |
1Displayed only when using lenses with
2If you have no external ND filter available, use the Tv mode and set a faster shutter speed, or use the Av mode and set a small aperture value.
Depending on the scene, the color may change when turning the ND filter on/off. Setting a custom white balance may be effective in such case (![]() 68).
68).
Recording
47
