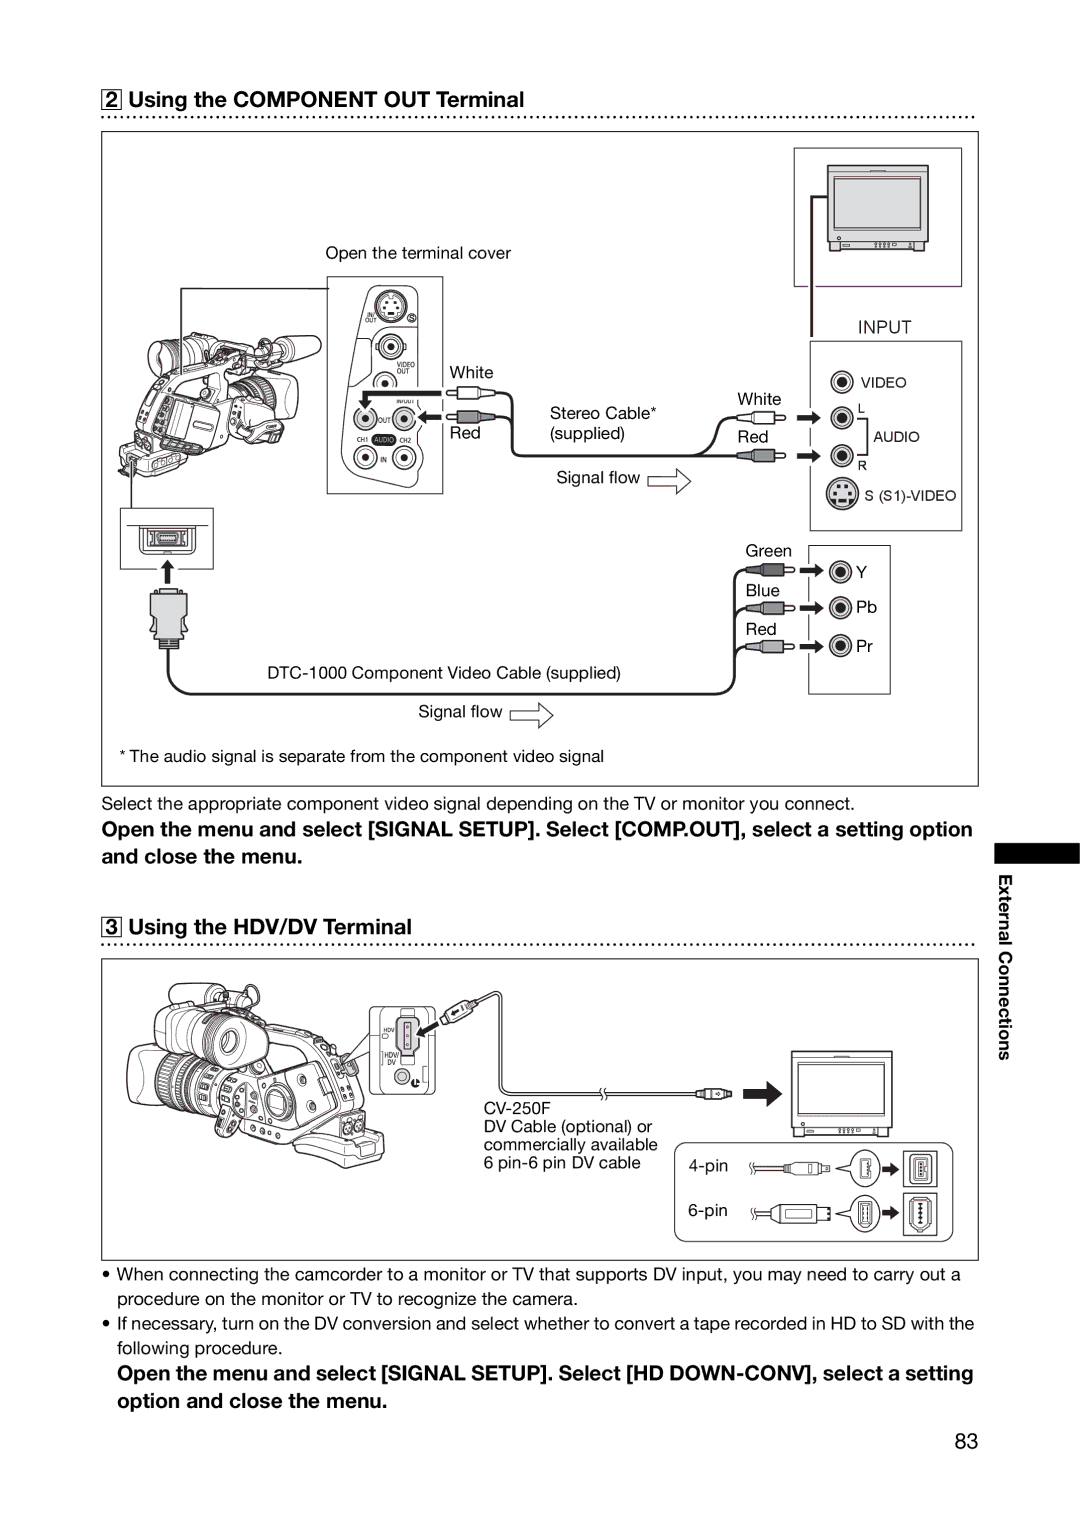
2 Using the COMPONENT OUT Terminal
Open the terminal cover |
|
|
|
|
|
| INPUT |
White |
|
| VIDEO |
|
| White | |
| Stereo Cable* | L | |
Red |
| ||
(supplied) | Red | AUDIO | |
| Signal flow |
| R |
|
| S | |
|
|
| |
|
| Green |
|
|
| Blue | Y |
|
| Pb | |
|
|
| |
|
| Red | Pr |
|
|
| |
|
| ||
Signal flow |
|
|
|
* The audio signal is separate from the component video signal |
|
| |
Select the appropriate component video signal depending on the TV or monitor you connect.
Open the menu and select [SIGNAL SETUP]. Select [COMP.OUT], select a setting option and close the menu.
3 Using the HDV/DV Terminal
| |
DV Cable (optional) or |
|
commercially available |
|
6 | |
|
External Connections
•When connecting the camcorder to a monitor or TV that supports DV input, you may need to carry out a procedure on the monitor or TV to recognize the camera.
•If necessary, turn on the DV conversion and select whether to convert a tape recorded in HD to SD with the following procedure.
Open the menu and select [SIGNAL SETUP]. Select [HD
83
