Getting Started
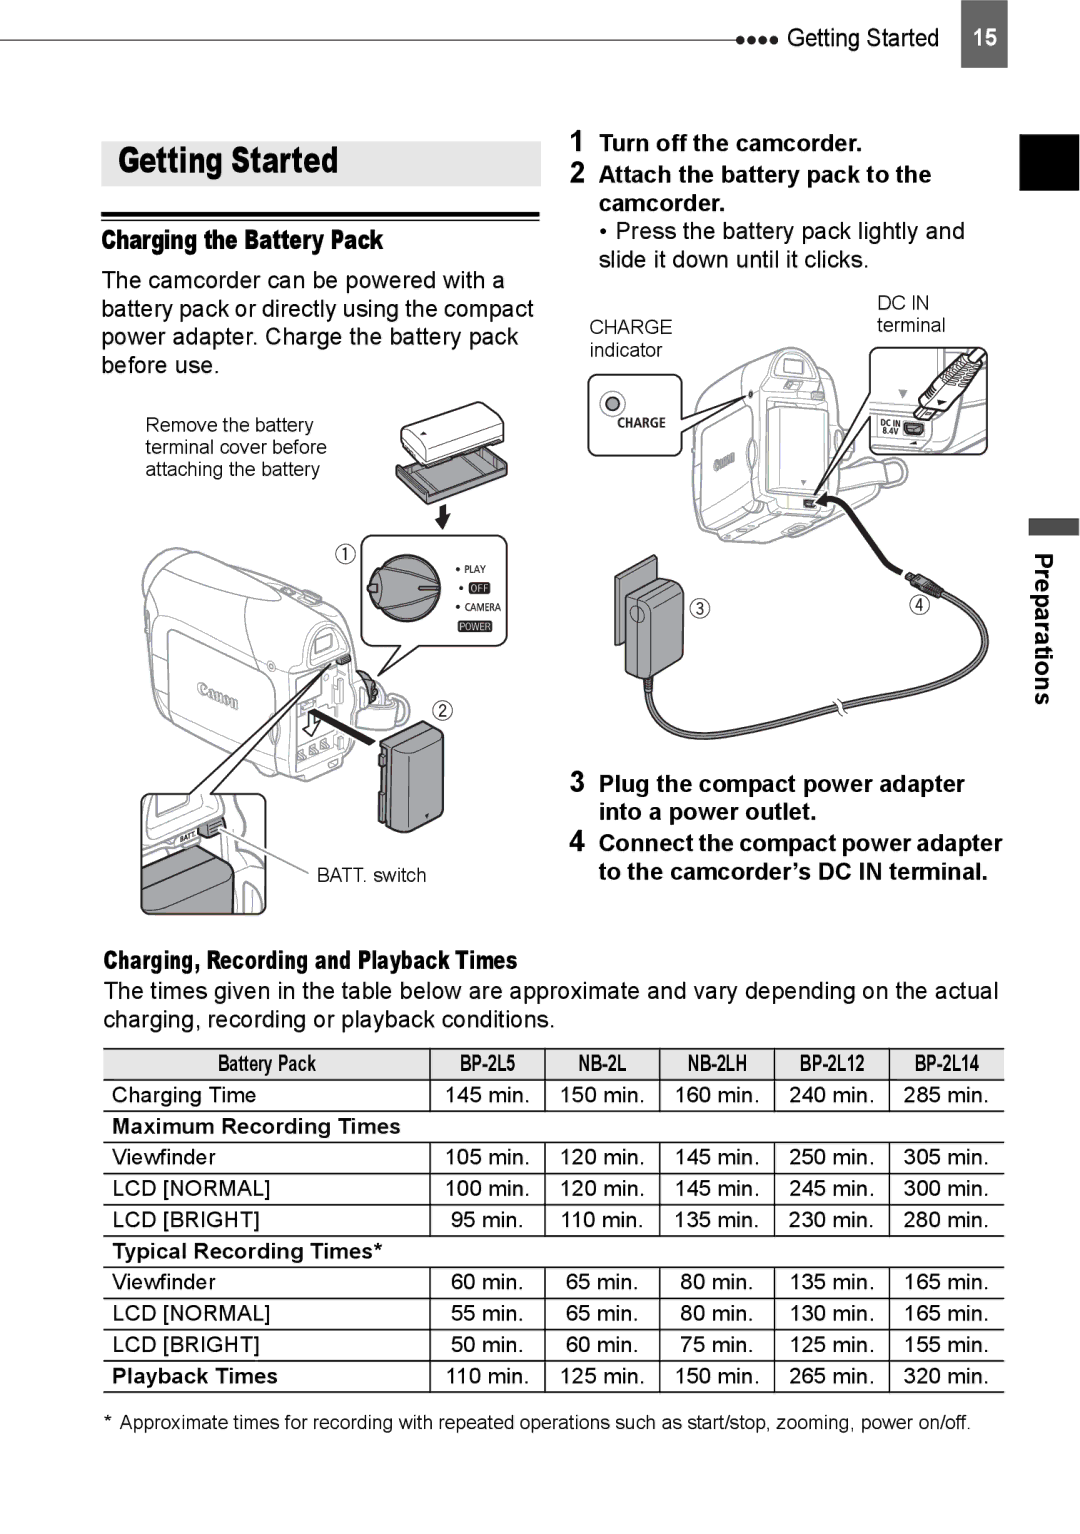
Charging the Battery Pack
The camcorder can be powered with a battery pack or directly using the compact power adapter. Charge the battery pack before use.
Remove the battery terminal cover before attaching the battery
![]()
![]()
![]()
![]() Getting Started 15
Getting Started 15
1Turn off the camcorder.
2Attach the battery pack to the camcorder.
• Press the battery pack lightly and slide it down until it clicks.
DC IN
CHARGEterminal indicator
Preparations
3Plug the compact power adapter
| into a power outlet. |
| 4 Connect the compact power adapter |
BATT. switch | to the camcorder’s DC IN terminal. |
Charging, Recording and Playback Times
The times given in the table below are approximate and vary depending on the actual charging, recording or playback conditions.
Battery Pack |
|
| |||
Charging Time | 145 min. | 150 min. | 160 min. | 240 min. | 285 min. |
Maximum Recording Times |
|
|
|
|
|
Viewfinder | 105 min. | 120 min. | 145 min. | 250 min. | 305 min. |
LCD [NORMAL] | 100 min. | 120 min. | 145 min. | 245 min. | 300 min. |
LCD [BRIGHT] | 95 min. | 110 min. | 135 min. | 230 min. | 280 min. |
Typical Recording Times* |
|
|
|
|
|
Viewfinder | 60 min. | 65 min. | 80 min. | 135 min. | 165 min. |
LCD [NORMAL] | 55 min. | 65 min. | 80 min. | 130 min. | 165 min. |
LCD [BRIGHT] | 50 min. | 60 min. | 75 min. | 125 min. | 155 min. |
Playback Times | 110 min. | 125 min. | 150 min. | 265 min. | 320 min. |
* Approximate times for recording with repeated operations such as start/stop, zooming, power on/off.