GAS VALVE ADJUSTMENT (48 Series Units Only) Ð The gas valve opens and closes in response to the thermostat or limit control. When power is supplied to valve terminal 3 (D1 on low heat), the pilot valve opens to the preset posi- tion. When power is supplied to terminal 2 (W1 on low heat), the main valve opens to its preset position.

The regulator factory manifold pressure setting 2.9 in. wg and is stamped on the valve body.

Manifold pressure is the pressure at the factory-supplied pressure tap on the manifold downstream of the gas valve. This is not the same as the pressure at the tap on the gas valve body. Always use the tap on the manifold to read mani- fold pressure.

To adjust regulator:

1.Set thermostat at setting for no call for heat.

2.Turn main gas valve to OFF position.

3.Install a suitable pressure measuring device.

4.Set main gas valve to ON position.

5.Set thermostat to call for high ®re (W2).

6.Remove screw cap or plastic cover covering the regula- tor adjustment screw.

7.Turn adjustment screw clockwise to increase pressure or counterclockwise to decrease pressure.

8.Once desired pressure is established, remove pressure- measuring device and replace screw cap.

MAIN BURNERS ADJUSTMENT (48 Series Units Only)

ÐMain burners are factory set and should require no ad- justment. However, if burner adjustment is necessary:

1.Perform Automatic Pilot Adjustment (page 49).

2.Turn gas valve to ON position. Allow unit to operate at least 15 minutes with heat section access panel closed.

3.Open heat section access panel.

4.Loosen primary air shutter and adjust to a minimum open- ing of 5¤8 inch.

5.Retighten primary air shutter and close access panel.

To check ignition of main burners and fan switch opera- tion, move thermostat dial above and below room tempera- ture several times, pausing at least one minute between cycles.

Main Burner Removal (48 Series Units Only)

NOTE: For high-heat units, the side posts must be removed before the burner assembly can be removed.

1.Shut off main gas valve.

2.Shut off power to unit.

3.Unplug PL9 (and PL10 on high-heat) and all sensor and ignitor wires.

4.Disconnect gas connection(s) from between gas valve(s) and ®eld-supplied piping. See Fig. 37 and 38.

5.Remove 2 screws securing burner assembly to unit.

6.Slide burner assembly from unit.

Switch Adjustment Ð All units with an economizer have an auxiliary switch located on the economizer damper motor. This switch is factory set to prevent the power ex- haust from operating when the economizer damper is less than 50% open. If other than the factory setting is desired, follow the steps below.

Do not turn motor shaft by hand or with a wrench. Dam- age to the gear train will result.

1.Remove top cover from motor to gain access to motor terminals and cam adjustments.

2.Disconnect controller from motor. Connect RED, WHITE, and BLUE terminals on the 135-ohm manual potentiom- eter to corresponding RED, WHITE, and BLUE termi- nals on the motor. Connect 24-vac power to Terminals 1 and 2. See Fig. 60.

3.Adjust the 135-ohm potentiometer so that the motor shaft turns to the position where auxiliary equipment is to be switched.

4.Adjust auxiliary cam by inserting a 1¤8-in. straight blade screwdriver into slot on cam and moving TOP of screw- driver to the right or left. See Fig. 61.

5.To close auxiliary switch RED and BLUE contacts as the motor travels open (energizing the power exhaust mo- tor), the switch differential can only be 10 degrees on both switches. To adjust either cam, perform the following steps:

a.If RED and BLUE contacts are open, rotate the cam counterclockwise until the contacts close.

b.If the RED and BLUE contacts are closed, rotate the cam clockwise until the contacts open.

Refrigerant Feed Components Ð Each refrigerant circuit (2 per unit) has all the necessary refrigerant controls.

Thermostatic Expansion Valve (TXV) Ð On size 034, each circuit has one. On size 044, each circuit has 2. The superheat is nonadjustable. On sizes 054-074, each cir- cuit has 2 TXVs on which superheat may be adjusted if ab- solutely necessary.

The TXV is set to maintain 10 to 13 F superheat leaving the evaporator coil. It controls the ¯ow of refrigerant to the evaporator coils.

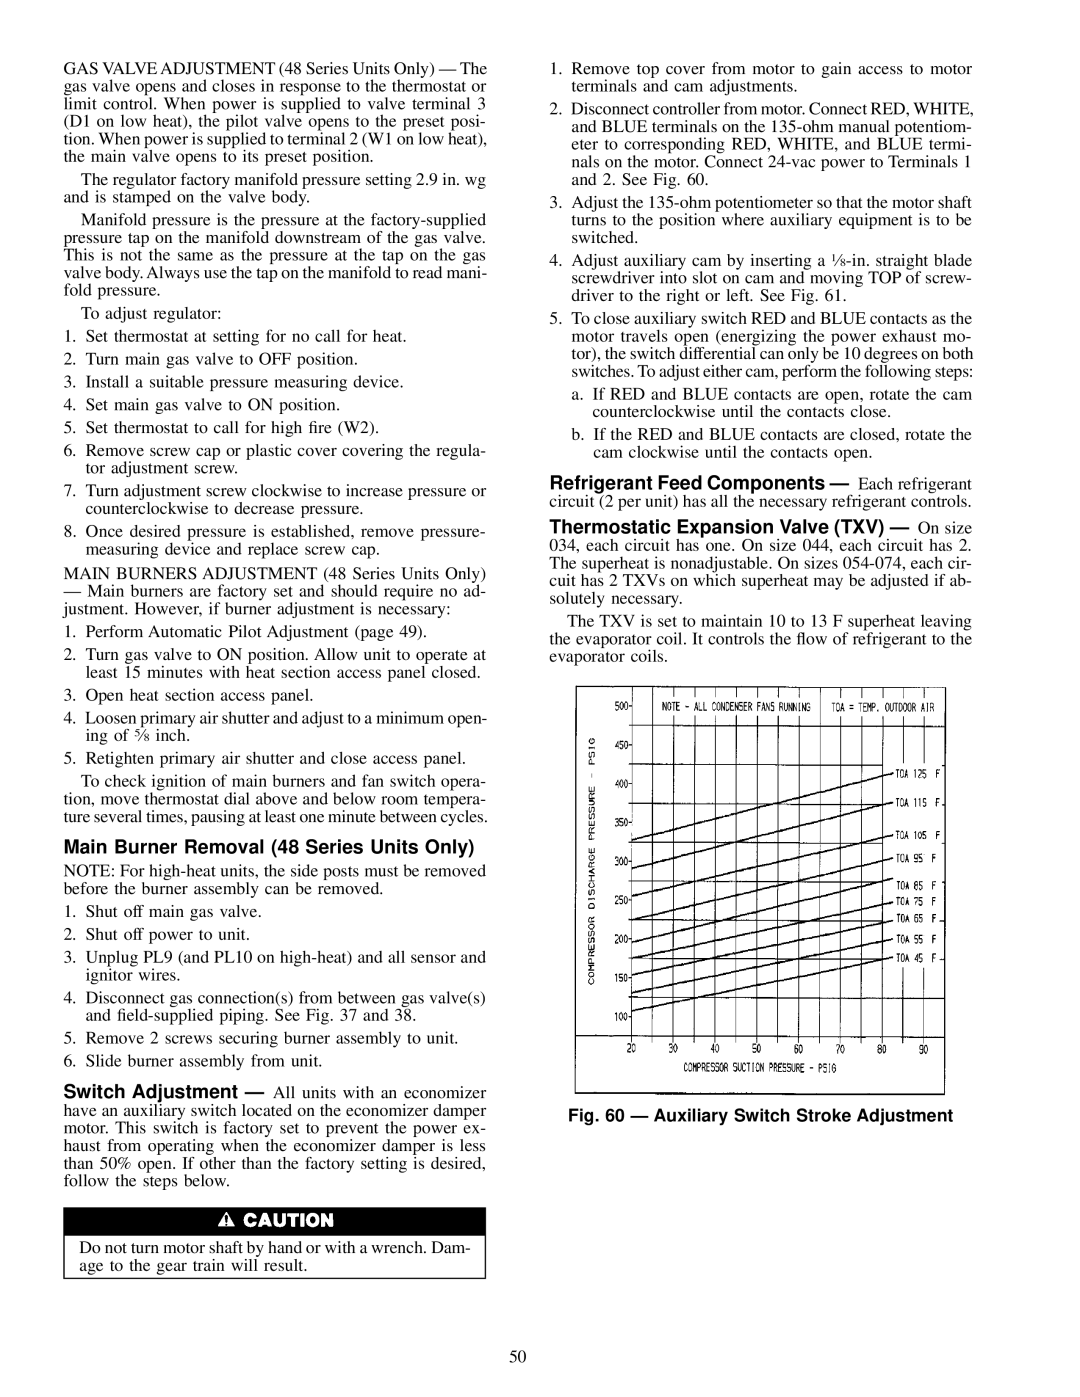
Fig. 60 Ð Auxiliary Switch Stroke Adjustment

50

Page 50
Image 50
Carrier NP034-074 specifications Main Burner Removal 48 Series Units Only, Auxiliary Switch Stroke Adjustment

NP034-074 specifications

The Carrier NP034-074 is an advanced rooftop unit designed for commercial heating, ventilation, and air conditioning (HVAC) applications. This unit is part of Carrier’s extensive range of rooftop units that are known for their energy efficiency, reliability, and innovative features. The NP034-074 series is particularly recognized for its robust performance in diverse environmental conditions, making it ideal for a variety of commercial building types.

One of the standout features of the NP034-074 is its high-efficiency compressor. Equipped with a scroll compressor, the unit offers enhanced performance and quieter operation compared to traditional reciprocating compressors. This design not only improves energy efficiency but also reduces operating costs over time. The unit is designed to meet or exceed the latest efficiency standards, ensuring that businesses can enjoy optimal indoor comfort while keeping energy consumption low.

The NP034-074 also integrates advanced control technologies that provide users with greater flexibility and ease of operation. The intuitive control system allows for precise temperature management and can be easily integrated with building automation systems. This enables users to monitor and adjust settings remotely, ensuring consistent and efficient climate control throughout the facility.

Another key characteristic of the NP034-074 is its robust construction. Built to withstand various weather conditions, the unit features a galvanized steel cabinet with a powder-coated finish for corrosion resistance. Its design also facilitates easy access for maintenance and service, which minimizes downtime and operational interruptions.

In terms of air distribution, the NP034-074 incorporates a powerful blower system that ensures even and effective airflow throughout the space. This design improves indoor air quality by enhancing ventilation while maintaining comfort levels. Additionally, the unit can be customized with options such as economizers and variable speed fans to optimize performance based on specific building needs.

The NP034-074 is a versatile and reliable choice for businesses looking to enhance their HVAC systems. With its combination of energy efficiency, advanced technology, and robust construction, this rooftop unit stands out as a top choice for commercial climate control solutions.