ADVANCED FEATURES | 19 |
New Photo Indicator (PicturePlan only)
The New Photo Indicator feature, when enabled, alerts you whenever you receive new photos.
1.Press the Menu button.
2.Choose Settings and then New Photo Indicator, pressing the Select button after each.
3.Choose ON or OFF and press the Select button. The default setting is ON.
4.Press the Select button when Save is highlighted to confirm your choice.
Slideshow Settings
The Slideshow Settings screen allows you to control how your CEIVA frame will display your photos.
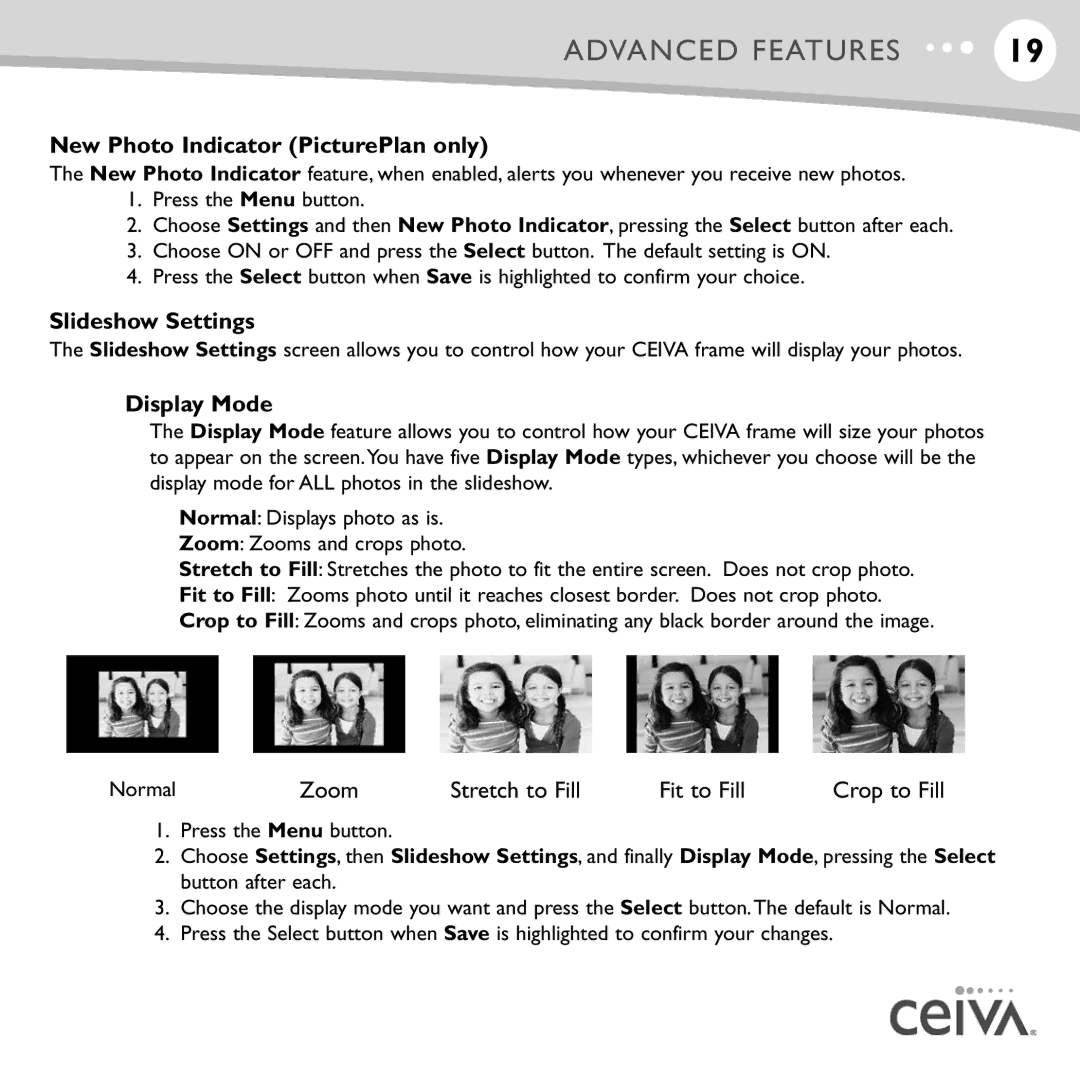
Display Mode
The Display Mode feature allows you to control how your CEIVA frame will size your photos to appear on the screen.You have five Display Mode types, whichever you choose will be the display mode for ALL photos in the slideshow.
Normal: Displays photo as is.
Zoom: Zooms and crops photo.
Stretch to Fill: Stretches the photo to fit the entire screen. Does not crop photo.
Fit to Fill: Zooms photo until it reaches closest border. Does not crop photo.
Crop to Fill: Zooms and crops photo, eliminating any black border around the image.
Normal | Zoom | Stretch to Fill | Fit to Fill | Crop to Fill |
1.Press the Menu button.
2.Choose Settings, then Slideshow Settings, and finally Display Mode, pressing the Select button after each.
3.Choose the display mode you want and press the Select button.The default is Normal.
4.Press the Select button when Save is highlighted to confirm your changes.